Tips and Tricks

Your YARN is the Problem โ€” Part One: Hand Knitting Yarn Prep

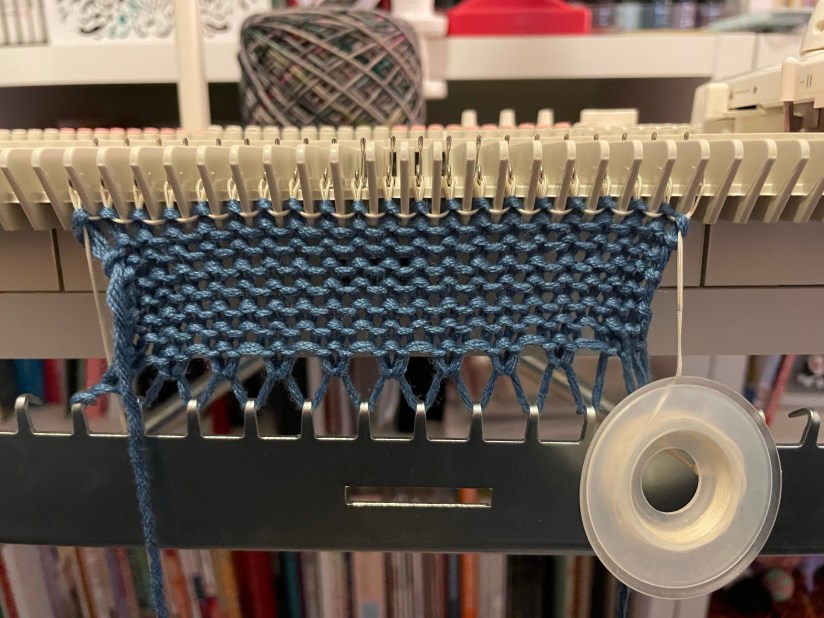
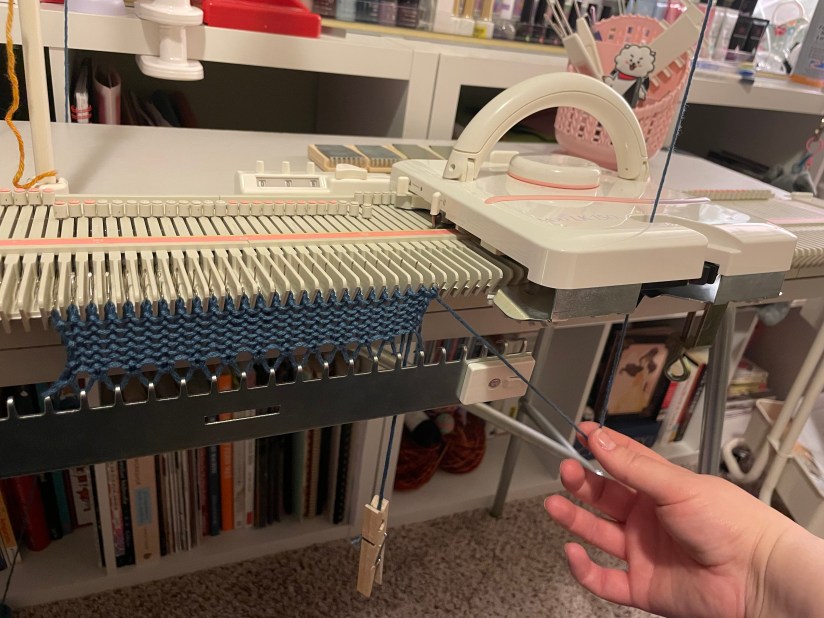
You might have encountered one of these problems before: the yarn stopped flowing through the tension unit and the tension wire bent all the way towards the carriage and needle bed, the carriage jammed, an entire row knitted at a much tighter tension than you wanted, the yarn broke. 

If you are experiencing problems when you machine knit with hand knitting yarn, your yarn preparation (or lack of) might be the problem. Here are some things to consider about different yarn put-ups and the ways they can affect your tension while knitting. 


Hank
Must be wound into ball or cake before use
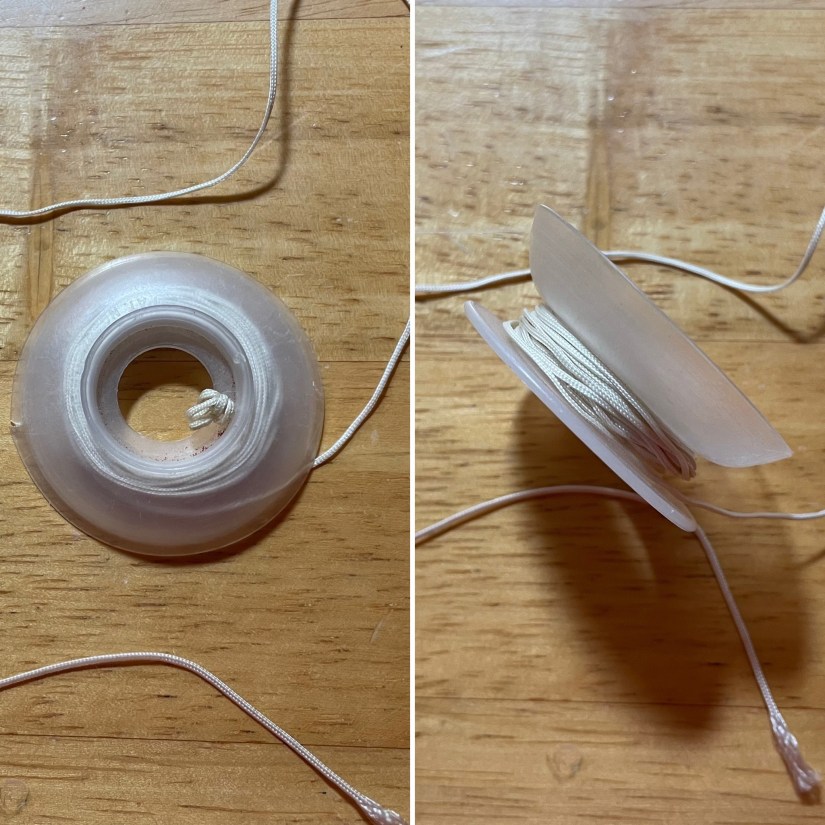
Donut
I absolutely hate the donut put-up, so I’m going to rant about it!

It does nothing other than look pretty on a shelf. Hand knitting will cause it to fall apart. Putting it in your bag after purchase will cause it to fall apart. Looking at the outer layer cross-eyed will start it on its slinking, unwinding, collapsing journey!

Unstable put-up
Uneven tension
Needs to be contained
Flops around

Yarn Ball
Can roll away
Needs to be contained in a basket or bucket
Yarn can get caught under the weight of large balls causing uneven tension

Skein
Center pull often results in “yarn barf” and/or collapsing skein
Needs to be contained
Outside pull means flopping/traveling/rolling skein and uneven tension as yarn enters machine
Outside pull means stopping after a row to pull out enough yarn to knit a row every time to avoid flopping
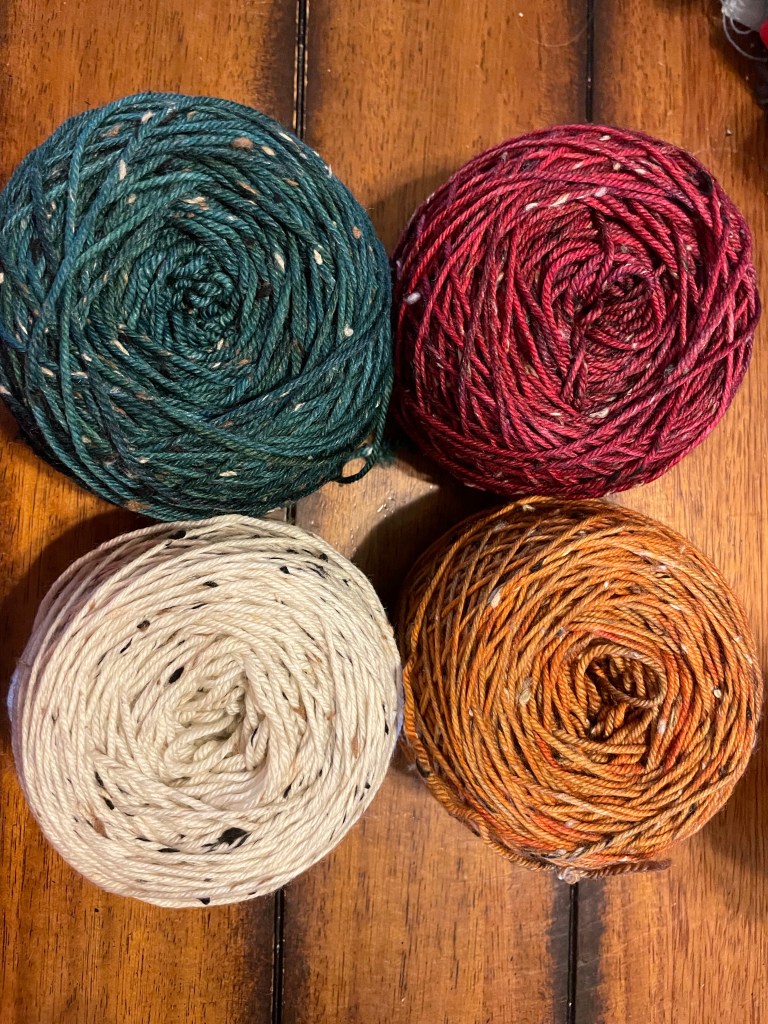
Cake
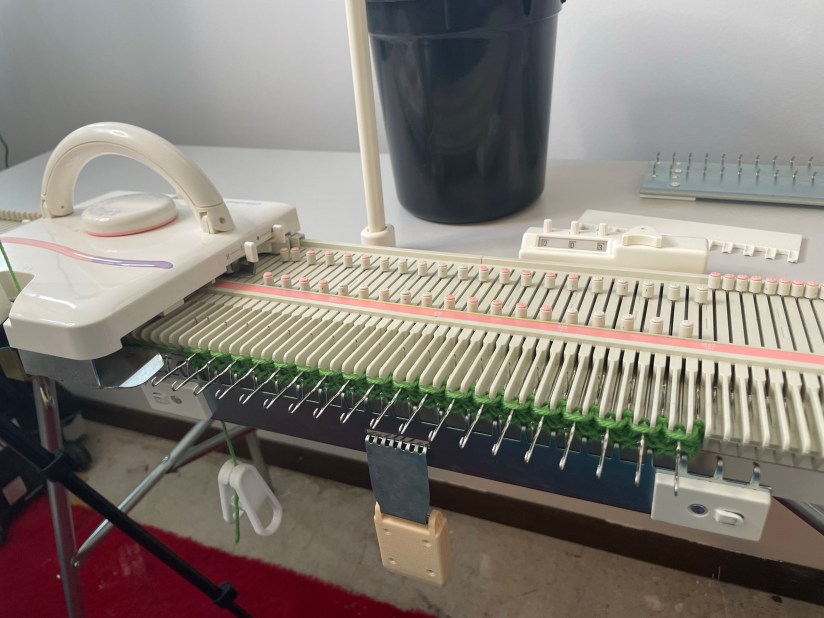
Manual-recommended put-up for Silver Reed LK150
Flat top and bottom
Should not roll
Most even tension of all put-ups mentioned so far
Require ball winder and swift

Cone
Best put-up for machine knitting
Even tension
Large yardage
Not a commonly used put-up for hand knitting yarn


You aren’t an awful knitter if you don’t knit from yarn cakes or cones! But they are the best put-ups that are least likely to cause issues.

I’ve knitted center pull from a skein before. Everything turned out fine, but I did have to stop and fix a few tension issues as I knitted.

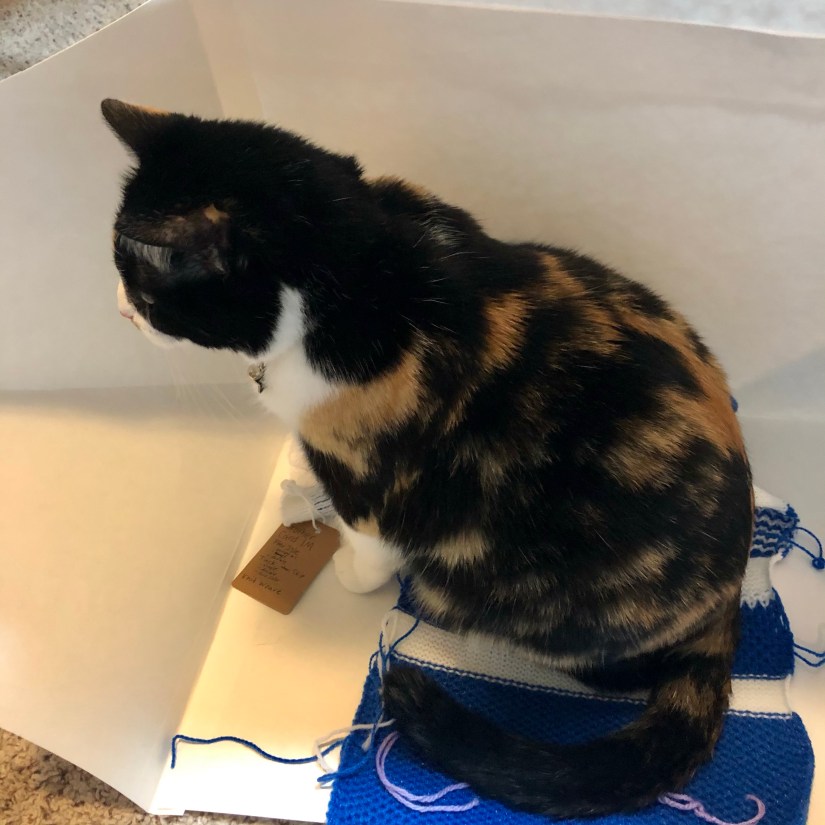
I knit from yarn balls all the time, especially for scrap yarn. Sometimes they jump out of their container when I’m knitting quickly and I have to chase them down. It happens.

Knitting from less than ideal put-ups just means I accept I might encounter problems and have to fix them.


A Note on Yarn Cakes

Ideally, yarn winders should wrap around the sides of the cake and not on top or bottom.

If your yarn winder wraps the yarn around the sides and over the top and bottom, the cake will flop and turn like a yarn ball and add additional tension as it does. This is not an ideal cake for machine knitting, but you can make it work by pulling yarn out periodically so it doesn’t have to flop and roll.

Flopping that happens to an “ideal” cake that isn’t wound over the top/bottom likely means there is not enough lead length of yarn from the cake to the tension unit to the carriage (such as the yarn sitting on the table instead of the floor behind the machine), so be sure to give your yarn ample space as it feeds into the tension unit.


Finding Cone Yarn

There are many places to find cone yarns online, but PLEASE visit your Local Yarn Shop first!

If they donโ€™t have any cones, just ask. Most shops are more than happy to custom order yarns. (Just remember some distributors have minimum orders and it might take a bit to meet that number!) And if you don’t have a yarn ball winder and swift, most LYS will wind the yarn you purchase there into cakes for you.

My Local Yarn Shop, Get Stitchinโ€™ in Tulsa, OK just became an Ashford dealer! I donโ€™t weave or spin much, but do you know what comes on cones? Weaving yarn!

(Disclosure: I teach classes, sell Silver Reed knitting machines, and sell my work at Get Stitchinโ€™, but Iโ€™m not paid to promote it. I mention it because I both sell and shop there.)

Carricoโ€™s Creative Corner in Bartlesville, OK, my mentor Pamela Carricoโ€™s shop, has a wonderful array of cone yarns as well as hand knitting yarns. Pamela sells cone yarn by the pound, which is a great option for knitters who donโ€™t want to commit to an entire cone and thousands of yards of one color. She also often has new old stock of discontinued yarns that were made especially for machine knitting.


In the end, the amount of preparation you do when machine knitting with hand knitting yarn is about what youโ€™re willing to put up with. You may be willing to deal with a ball rolling around or unwinding from the outside of a skein before knitting every row, but if you find yourself constantly encountering tension issues and uneven knitting, look to your yarn put-up and preparation first.

Thanks for coming along on my machine knitting journey! How do you prep your yarn? Are you strict about it, or do you knit from whatever you feel like using at the time? Let me know in the comments!

Knitting Machines, tutorial

Yarn Plating and the SilverReed LK150

Have you heard of plating? Not metal plating- yarn plating on the knitting machine!

Most knitting machines can plate with an attachment or interchangeable carriage piece, but plating is a built-in carriage capability on the Silver Reed LK150 6.5mm mid-gauge machine.

It’s described in the manual as two different yarns knitted together where

one yarn appears on the knit side while the second yarn appears on the purl side of the knitting

SilverReed LK150 Instruction Manual p22

The yarns are usually different weights and fibers with one giving additional support to the construction of the fabric and/or adding special visuals like the swatch below.

(If you really want to dive into the technicalities, check out section 6.8.3 Plating in Knitting Technology by David J. Spencer. I thought it was a fascinating read!)


rainbow rayon thread plated on the knit side over a wool dress yarn purl side

Adding Structure – My AHA! Moment

The swatch above uses a very thin, thread weight rainbow rayon yarn over a wool dress yarn of about fingering weight to create a fabric that couldn’t exist without utilizing plating. But how did I get there?

When I was a machine knitting beginner, my friend gifted me THREE CONES of thread weight rainbow rayon yarn. It’s lovely. I adore the colors.

But…

The yarn is so thin that I found it difficult to work with on a standard 4.5mm gauge knitting machine. It’s just too small, and I had no clue what I could make with it. Perhaps a light shawl, but I didn’t think that would work.

Plus… rayon isn’t known as “the poor man’s silk” for nothing. It has a smooth texture and a lovely drape. But that drape comes with drop sometimes. Rayon knits can stretch in length under their own weight, and that can create some fit issues like armholes dropping or skirts falling to an undesired length.

So rayon isn’t always a good choice for some projects unless you combine it with another fiber and use it in a blended yarn, but I already had yarn that was 100% rayon with no clue what to do with it…

That’s when my teacher and mentor Pamela Carrico of CMO Designer Knits introduced me to plating. She gave me the wool dress yarn and suggested plating my rainbow rayon yarn on top of it.

It’s. Perfect.

The wool yarn grants elasticity and memory to the fabric and gives it structure due to the way wool fiber clings to itself at the microscopic level with tiny scales. That wool yarn basically negated rayon’s inherent issues.

The wool is about fingering weight and was much more manageable than thread for me as a beginner. The fabric it created was still nice and lightweight, so that meant it was still wearable while being wool, which matters in Oklahoma.

A “what the heck” yarn turned into “this works perfectly” in an instant.

Visual Appeal

The wool yarn has a blush pinkish grey appearance that doesn’t photograph well and didn’t stand out much on its own. As someone attracted to color, I would have passed it up if Pamela hadn’t suggested it.

She knew that rayon needed structure, and she knew my particular rayon didn’t need more color.

Adding the rayon to the wool took it from slightly boring to amazing. The wool didn’t really need anything, but the rainbow colors helped it make a complete fabric.


You won’t always have yarn features or issues to work around like I did, but you might find yourself wanting something more from your yarn, and plating offers that, too.

Lurex metallic yarns are easy to find on sites like Etsy, but sparkle isn’t all you can add to your work. Bouclรฉ yarns add both visual interest and texture to your fabric. The possibilities are nearly endless.

So if you find yourself with a yarn that just doesn’t work on its own, try plating with it!


Plating Issues

Perfect plating places the yarn on the correct side every time, but for me on my standard gauge machine, that meant very careful carriage pushing and checking every row after it was knit. Even then, it didn’t always come out as planned.

rayon rainbow thread yarn on fingering wool dress yarn

If you look closely, you can see plenty of rows where the wool came through on the purl side and the rainbow rayon came through on the knit side. I wanted the rainbow on the purl side and the wool on the knit side for this swatch, but that just didn’t happen.


So where does the LK150 come in?

So far I’ve only discussed my experience with plating on a standard 4.5mm machine, but that’s not what the title said this post was about!

In my personal experience, I have not had the issues with yarns visiting the incorrect side of the fabric when I use the LK150 for plating. Instead of using an interchangeable part, the plating feature is built into the carriage, and I believe this is what makes it a more “stable” plating option.

For the smaller “top” yarn, I’ve used the thread rayon yarn, lace weight yarns, and even sock weight yarns on top of fingering and DK weight yarns. I even attempted plating two fingering weight yarns, which worked, but it wasn’t quite as nice of a fabric as the other combinations.

While preparing this post, I tried running the carriage across the needle bed very quickly, and I still did not experience yarns hitting the incorrect side of the work. This may not be universal and my machine’s younger age (about 3-4 years) might matter. I’m not complaining!

Plating takes yarns that might not be suitable on their own for your machine and makes working with them possible.


How to Plate on the LK150

Thread one yarn into slot 1, thread a second yarn into slot 2 and knit the night away!

That’s all it takes, but you should also make sure the yarns are not close to each other where they might twist or static cling to each other as they feed through the tension unit and carriage. Twisting two yarns together can make an interesting fabric, but that is not what we want in plating.

I can never remember which slot places yarn on the knit side and the purl side, so the first row of my swatches is often opposite of what I intended.

I’ve written it all out here so you won’t have the same problem! I’ll refer to the smaller yarn as the plating yarn.

slots 1 and 2 from the top
slots 1 and 2 from the front, angled upward

If you want your plating yarn to show on the purl side, thread it into slot 2 of the carriage.

If you want the plating yarn to show on the knit side, thread it into slot 1 of the carriage.


Once your carriage is set, swatch for tension and knit as usual!

I really do mean โ€œknit as usual.โ€ You can short row, cable, increase, decrease, and transfer stitches as you normally would while yarn plating.

You will want to be careful about where each yarn sits on the needle with any laddering and latching up to form purls for ribbing or texture stitches. The yarns need to stay on their respective sides of the knit fabric.

The same goes for stitch transferring and fixing dropped stitches. Make sure you catch both loops of yarn and re-hang them in the right orientation.

What do you think? Have you tried plating yarn before? Do you think you’ll try it now on the Silver Reed LK150? Let me know in the comments!

As always, thank you for reading and coming along on my machine knitting journey!

Patterns

The Doodle Beanie โ€” Free Machine Knitting Pattern

I was playing around on my Silver Reed LK150 a while back and came up with this simple beanie that begs to be customized. This hat has a folded brim and a cinched crown that would look great with an added pompom.

Itโ€™s just a rectangle, but itโ€™s the perfect template to doodle around with and try out new things as you develop your machine knitting arsenal of techniques. I hope you enjoy it and put your own spin on it!


Materials

50-150g of Worsted Weight Yarn (Samples use Cascade 220 Superwash Wool at T7)
Silver Reed LK 150 6.5mm knitting machine

Sizing

Baby- 60 stitches, 30L-30R
Child/Teen- 80 stitches, 40L-40R
Adult- 90 stitches, 45L-45R
Adult L- 100 stitches, 50L-50R

Gauge

4 st per in at T7 in Cascade 220 Superwash


The Doodle Beanie concept will work with any machine gauge and suitable yarn. Knowing your stitches per inch from swatching yarn is immensely beneficial, so I encourage you to swatch beforehand if you have no clue what yarns knit best at what tensions on your machine. 


Pattern Instructions 

Set Tension to 7.
E-wrap CO 60 (80, 90, 100) stitches.

Brim:
Knit 20 (30, 40, 40) rows.
Hang hem by picking up the e-wrap and hanging it on the needle above it. 
Knit 1 row at T9. 

Revert back to T7.
Reset to RC000

Body:
This is the place to experiment with stitch patterns, stripes, etc
Knit 20 (30, 40, 40) rows.

Crown: 
Transfer stitches to EON.

Tension down to T6. Knit 1 row.
T5. Knit 1 row. 
T4. Knit 1 row.
T3. Knit 1 row.


Finishing:
Do not remove stitches from needles. 
Leaving a tail long enough to seam the beanie, cut yarn. 
Thread needle and sew through the live stitches from the opposite side of the tail before removing the beanie from the machine. 
Cinch the top of the beanie together. 
Pull tightly but be careful not to break your yarn. 

Mattress stitch the sides of the beanie together. Weave in ends. Attach a pompom if you like. 


Modification Tips and Ideas

For a rolled brim, halve the number of rows in the brim step and do not hang the stitches.  

If you are not comfortable using your transfer tools or are in need of a very quick knit, tensioning down alone will work, but you will need to cinch the top together above the remaining live stitches like the pictures below to close the crown. The density of stitches at the crown is why we decrease to EON.


If you want a bit of a slouchy beanie, you can add 5 rows and skip tightening tension in the crown altogether. It will be easier to cinch the top if you decrease to EON.

Try knitting two strands of smaller yarns together or using variegated yarn to spice up the simplest version of this hat. 


Abbreviations

COCast On
BOBind Off
WPWorking Position
CORCarriage on Right
COLCarriage on Left
EONEvery Other Needle
RC ###Row Count ###, i.e. Row Count 023
T#Tension and size number (Tension 1, Tension 2…)

What will you doodle?


Did you knit a Doodle Hat? Please consider sharing your projects on ravelry so I can see what you made. I love seeing project pictures!

If youโ€™d like to help support the site, please consider buying me a Ko-Fi.

As always, thank you for joining me on my machine knitting journey! Let me know what you think below in the comments. Iโ€™m also happy to hear from you via my contact form or on Instagram.

Knitting Machines, Patterns

Free Step-by-Step Wristwarmer Pattern

Happy New Year, everyone!

You might recognize this stitch from my Using The Needle Beetle with Bonus Baby Blanket Recipe post.

I received a few requests for a step-by-step tutorial (a few of which were tied up in spam filters, so my apologies to those of you who havenโ€™t received a reply yet) so here it is!

This is a nice introduction to tuck/textured stitches for beginners since needle selection and carriage changes are isolated to the first and fourth row of this four-row repeat.

Check the notes after the pattern if youโ€™re interested in modifications! The abbreviation key also follows the pattern.

Solid vs Multicolor in this textured tuck stitch

Materials

Silver Reed LK 150 6.5mm Mid-Gauge Knitting Machine & Accessories
1 ball Cascade 220 Superwash (or any in the 220 family)
-or-
100g worsted weight yarn

Pattern Instructions

Set carriage to Tension 6 or number needed to achieve desired fabric

Initial Setup:
1) E-wrap CO 32 stitches from left to right (16L to 16R). COR
2) Knit 1 row. COL
3) Hang cast on comb and weights. COL
4) Knit 1 row. COR. Reset RC to 000.

Pattern Repeat:
Pattern row setup:
RC 000. COR.
Set Carriage to HOLD.
Place EON in hold beginning with the second needle (16R in WP, 15R in HOLD, etc). Last needle on the left (16L) should NOT be in HOLD. You should have two stitches in WP at the left edge.

Knit 3 rows.

RC 003. COL.

Set Carriage to KNIT.
Knit 1 row.

RC 004. COR

All needles are now in WP ready for selection for the next repeat.

Repeat from pattern row setup 18 times until RC 072.

Finishing:
Knit 1 row. RC 0073.

Perform the Backstitch Bind Off. This can be found in the LK 150 manual on page 38.

Choose whether you wish to use the purl side (the side that faces you during knitting and the side pictured at the top of the post) or the knit side (looks like a wonky stockinette stitch, pictured just above) as the public/outward facing side of your wristwarmers.

Wrap the rectangle around your hand to determine how much room to leave for your thumb and sew up with a tapestry needle using your stitch of choice.

Repeat for second wristwarmer.


Step-by-Step in Pictures

Setup:
RC 000. E-wrap CO from left to right.
Knit 1 row.
Hang cast on comb and weights, being careful not to catch working yarn in the cast on comb.

If you have trouble catching stitches, try pulling the e-wrap forward into the small dip in the needles. Do not pass the latches. (Click to enlarge pictures)


Reset to RC 000. Place EON in HOLD with Carriage set to HOLD before knitting. COR.
Knit across.

RC 001. One row knitted. COL
EON in HOLD should have a strand of yarn over it.

Knit across.

RC 002. Second row knitted. COR.

EON in HOLD now has two strands of yarn over it.

Knit across.

RC 003. Third row knitted. COL.

*RC 003. Set carriage to KNIT. COL.*

Knit across.

RC 004. Fourth row knitted. COR. Needles are in WP ready to be selected for pattern repeat.

Front view of setup rows plus one pattern repeat


Pattern Notes and Modification Tips

This pattern repeat will work with any machine and appropriately-sized yarn.

Stitch count must be a multiple of 2 + 2. The +2 stitches are seaming allowance.

If you change CO and BO types, make sure to use something stretchy. Tuck is a very horizontally stretchy stitch, and hands are active!

Remember to consider the finished projectโ€™s purpose when considering changes to a pattern!

Please consider making a tension swatch before you knit.
If you feel like walking on the wild side, note that tuck stitch patterns tend to be shorter and wider than stockinette, so plan on doubling your stockinette row count to reach your desired length.

Weights are very important when knitting tucked stitches. Weight helps the strands over needles in HOLD knit off properly. If you are having issues where stitches arenโ€™t knitting off, try adding weight.


Abbreviations

COCast On
BOBind Off
WPWorking Position
CORCarriage on Right
COLCarriage on Left
EONEvery Other Needle
RC ###Row Count ###, i.e. Row Count 023

Did you make wristwarmers using this step-by-step pattern tutorial? Please consider sharing your projects on ravelry so I can see what you made! I love seeing project pictures!

If youโ€™d like to help support the site, please consider buying me a Ko-Fi.

As always, thank you for joining me on my machine knitting journey! Let me know what you think in the comments! Iโ€™m also happy to hear from you via my contact form or on Instagram. I believe Iโ€™ve fixed the comment/contact spam filter issue, so please donโ€™t let that stop you!

Uncategorized

Stuck without a Ravel Cord? Try this!

Ravel cord is a strong and slippery-smooth braided nylon that machine knitters use to connect scrap yarn pieces knitted from the cast-on up with the main yarn of the garment in a way that can be easily removed.

After the hem has been hung and the main yarn stitches have been secured, you simply pull on the ravel cord and away the scrap yarn falls to reveal a beautiful hung hem or finished graft.

Coming from a hand-knitter who adores the look of a provisional cast on grafted to live stitches to create a seamless look but is too lazy to actually do it a decent amount of the time, the scrap yarn and ravel cord combo is a dream come true.


“Scrap’n’Ravel” is one of my favorite ways to cast on to the machine, so I use my ravel cord a lot.

To “Scrap’n’Ravel” on, I like to use the Automatic Cast On from my knitting machine manual. (That’s simply because it’s faster, so you can cast on whatever way you like. Scrap yarn is a great opportunity to practice new techniques, after all!)

After I’ve knitted at least 6 rows, it’s time to reach for the ravel cord before the real fun of the project starts.

But recently, that’s where I’ve been running into problems…

“problems” aka the Yarn Inspektor

We adopted a cat back towards the end of 2020. She is a lovely, talkative calico, and she loves yarn.

She loves sitting on yarn. She loves staring at yarn. She loves sprawling across yarn. She loves flossing with yarn. (That one I haven’t tried yet.)

But she also loves stealing my yarn!

I stopped her from chomping the cones, and I stopped her from sprinkling the skeins with wee, but I can’t seem to stop her from batting the bobbins.

These kumihimo bobbins, sometimes sold as Bryson EZ Bobs, are just too tempting for her! They’re primo cat toy size, after all, AND they have a “tail!”

kumihimo bobbins with ravel cord in closed and open positions

I have a stash of these things. Or, I suppose, had a stash. Now the Yarn Inspektor has a stash somewhere.


If things were going as they should, I’d knit a row using ravel cord. It would look like this…

… and I’d be ready to knit with my main yarn!

But since the Yarn Inspektor has decided my ravel cord is her ravel cord, sometimes I’ve had to make do.

Thanks to this trick I learned from my mentor, Pamela Carrico of CMO Designer Knits, I don’t have to spend hours searching for my bobbins of ravel cord.

I can use the scrap yarn I was knitting with as ravel cord!

(Is your mind blown like mine was?!)


This trick works best with smooth, strong yarns. A crispy acrylic or toothy wool is not a good idea. Removing the scrap-yarn-as-ravel-cord strip is not as smooth as working with ravel cord. I wouldn’t recommend this trick over using ravel cord.

But it will save you if “problems” meow your way.

When you’re ready to knit what would normally be your single row of ravel cord, use your fingers to grab onto the scrap yarn just under the carriage where the yarn is loaded into the feeder and pull a bit down, like so:

Without moving your hand, knit one row across. You’re left with a loop of scrap yarn at the edge of your work like this:

Now you’re ready to cut your scrap yarn and move on to the main event, just like you would be if you had knitted the row with ravel cord!

When it’s time to remove your scrap-cord, tug on the top half of the loop you made. It takes a bit more force than pulling ravel cord does.

As you can see in this clip, it is a bit of a tug, but it does the job! Just make sure to tug the top half.


What do you think? Is this a trick you think you’ll try in your knitting? Do you have any tips or tricks of your own to share?

Leave me a message in the comments below!


Thank you for joining me on my machine knitting journey!

Uncategorized

What Does Brother Punch Card 1M Look Like?

Punch cards for knitting machines are magical, but have you ever had trouble visualizing the patterns they make?

Those holes and spaces don’t translate to much inside my head for anything but fair isle patterns. Even though I know what tuck and skip stitches are, I just can’t see them.

Brother Punch Card 1M

That’s where a reference scarf comes in! Like the security scarf discussed in this post about gauge swatching, having a reference scarf with all of a punch card’s options featured can really come in handy, especially for design purposes.

If you don’t want to make your own reference scarf, I’ve got you covered. This post includes pictures from the knit and purl sides of all compatible functions of Card 1M except Plating Tuck Stitch; that is, all functions you can do by pressing buttons or toggling switches without changing any parts of the carriage.

The knit side is not always the right/public side of the work with these stitches, so I will be using “knit side” to reference the side of the work that always faces away from you while you knit it on the machine. “Purl side” references the side of the work that always faces toward you as you knit.


Function compatibility guide for Series M – scan from Brother KH-890 manual

The Brother M series of punch cards came with the KH-890 and KH-891 models. You can find the M series here from Machine Knitting Etc and punch them on a blank card if you do not want to look for them premade on eBay or another site.

I knitted these swatches from blue and white mystery acrylic yarns similar to Millor Piropo at Tension 10 on my Brother KH-890 machine.


Tuck Stitch

knit side
purl side
purl side of elongated pattern between stockinette stitch

Two Color Tuck Stitch

knit side
purl side

Skip Stitch

knit side
purl side
purl side between regular stockinette stitch

Fair Isle

knit side
purl side
knit side, elongated pattern
purl side, elongated pattern
knit side, card frozen on odd row
purl side, card frozen on odd row

Knit Weaving

knit side
purl side

I hope you found these pictures helpful in visualizing what Brother Card 1M can do. I will be upgrading my photography setup in the near future, but for now, please enjoy a bonus photo of my cat about to destroy my DIY light box. At least she’s beautiful!

The Destroyer

Do you have any tips or tricks for visualizing punch card patterns? What do you use for design references? What other things would you like to see on the blog? Let me know in the comments below!

Uncategorized

Finding Machine Knitting Patterns on Ravelry

From colorwork trends to brioche fads, you can find nearly everything knitting, crochet, or yarn-related on ravelry.com. I’ve been a user for years now, and I can spend hours looking through patterns, projects, and yarn pages.

Ravelry has over 600K hand knitting patterns and is quickly closing in on 400K crochet patterns, but there are only 3,775 machine knitting patterns listed in their database.

screenshot from March 16, 2021

That doesn’t mean you can’t find things to knit on your machine, though! Ravelry’s search feature has a wonderful amount of refinement options.

If you haven’t used their expanded search features before, I recommend reading Ravelry’s own tip articles on refining searches and saved searches.


Here’s how I use Ravelry when I’m looking for patterns to knit using my machines. The process is pretty straightforward, and you’re really only limited by how many modifications or adjustments you’re willing to make so a pattern will work.

This is where you can get really picky about what you what to knit and what you’re willing to do for modifications. Do you want to work with multiple colors? Scroll down the left side and select the number of colors you want to use from the “Colors used (typical)” box. Do you only have a certain amount of yardage in that special skein? Limit your search to a yardage/meterage range.


Craft Type

First of all, try refining by “Machine Knitting” as your craft type! Ravelry is nearing 4,000 machine knitting patterns in their database, after all. The term includes Addi circular knitting machines as well as Circular Sock Machines (CSM), but many patterns will indicate compatible machines in their titles.

If you sort by “New to Ravelry,” you’ll find there are designers like Lauren Riker who regularly upload new patterns. I find that new designs by Machine Knitting Monthly are only sporadically included in the database, though.

If you didn’t find something that spoke to you in the “machine knitting” tag, don’t worry. There are a lot more options out there.


Do the Math with a Schematic

If you know how to use proportions and your pattern has a schematic, you can fill in stitches and rows per inch using the pattern garment’s measurements to fit whatever machine gauge you’d like to use.

Ravelry has the searchable pattern attribute “has schematic” (just start typing it in the search bar and it will pop up), but not all designers will check the box so the database knows this.

I’ll do a more detailed post on knitting math in the future, so stick around if this is something you’re interested in learning more about!


Search Refinement: Yarn Weight

When you’re considering a new project without making anything specific in mind, think about what machine you want to work with and compatible yarn sizes.

If I’m working with my 4.5mm standard gauge machine, I generally select yarn sizes of sport weight and lighter. If it’s my 6.5mm mid-gauge, I select fingering through worsted weights. If it’s my bulky machine, I switch to excluding yarn sizes with the drop-down menu at the bottom of a search refinement box. and remove super bulky from search result possibilities.

Remember to consider the size of the garment you want to make and how many stitches/needles you’ll need. Standard gauge beds have 200 needles. Mid-gauge beds have 150, and Bulky beds have 120. If your pattern needs 300 stitches, you probably need to do some math and play with stitch gauge to make things work.


Search Refinement: “Worked-Flat”

I like to start out my potential machine knitting project browsing sessions with “craft: Knitting, has photo: yes, and attributes: worked-flat” as the minimum search refinements.

If something is worked flat already, you generally don’t have to worry as much about dividing pattern or colorwork repeats.

Some patterns are worked in-the-round and then separated at the arms to be worked flat, but they’ll show up in this search refinement. You can generally divide the total stitch count in half and then work front and back separately and be just fine. I like to add one stitch to each side of the separated halves as a selvedge stitch for later mattress stitching.

Once you’ve found a set of search refinements that fits what you’re looking for, be sure to save your search! Ravelry lets you save multiple searches, so you can select search terms according to your mood and come back to them whenever you want.


First Translations

If you’re worried about converting patterns to your machine or you’re just not sure about your skill levels, first try a knitting project that requires fewer modifications to make it to the machine.

A lot of DK weight patterns are at easily achievable gauges for the SilverReed LK-150 and have stitch counts that fit within your 150 needle limit. If you’re new to translating hand-knitting patterns to machine knitting, this can be a great place to start because you will be able to knit some patterns nearly exactly as written.

The Mojave Collection as seen on ravelry.com

I have knitted most of the patterns from the Mojave Knits Collection by Meghan Kelly on my LK-150 without modifications. I’ve also used some of them on my Brother KH-890 standard gauge at upper tensions. Most of the patterns feature a large amount of stockinette stitch with smaller areas/panels of eyelets that can be easily created with a transfer tool.


Hybrid Knitting

If you also hand knit, consider knitting garter stitch borders or complicated lace repeats by hand and then hanging your work on the machine when you come to a more machine-friendly part.

Don’t limit yourself to one craft just because you think you have to! Machine knitting does some things better than hand-knitting, and hand-knitting does some things better than machine knitting.

For the Alanis Sweater by Elizabeth Smith below, I finished the last few short-rows in the yoke shaping by hand because I didn’t want to worry about wraps and the garter bar. The sweater is knitted in-the-round by hand, but it was easy to separate the sides and add selvedge stitches.

Stay Flexible

When you’re looking at your pattern, keep an open mind. You can always replace hand knit borders with a machine knit variant. Mock rib is simple on the machine and is often included in your machine’s manual. You can ladder down purl stitches and latch them up with the latch tool as knit stitches for true ribbing, or you can use a ribber attachment if your machine has one.

If a lace pattern has purls in it, you can re-form them with the latch hook or simply leave them as-is for your own variation without the purl bump on the right side of the garment. If you don’t want to hand-transfer a lace pattern, consider replacing the lace area with a lace carriage punch card pattern.

If you can crochet, don’t rule out a crochet edging, either!

When you translate and modify a pattern to fit your machines, you really can create something one of a kind.

Because you’re modifying a pattern, remember there’s a chance it might not look exactly like the designer’s original piece. You are completely changing the craft they designed it for, after all. I personally don’t mind differences that might arise when changing crafts because they just add to the originality of the garment.

That being said, sometimes your attempts to modify a pattern won’t work. Whether it’s because of a gauge calculation error, a stitch miscount, or you need to keep working on your machine knitting skills, you might not succeed on your first or second try. Maybe that stitch wasn’t meant to be done by machine.

You might finish a garment and then be hit with something in hindsight that would have worked for your project much better than the choice you made, and that’s OK.

Don’t be afraid to rip out something that doesn’t work! You are allowed to rip it out and start over. If you’re like me and you need permission to undo something you spent a lot of time on, even though it didn’t work, here’s your sign. You can rip it out. It is OK. Learn from it, take a deep breath, and move on. You’re still on the right path and leveling up your skills.


How do you find patterns to knit on your machine? What search refinements do you like to use on ravelry? Do you use another site to find patterns, or do you stick to books and magazines?

Let me know in the comments!