Accessories, Knitting Machines

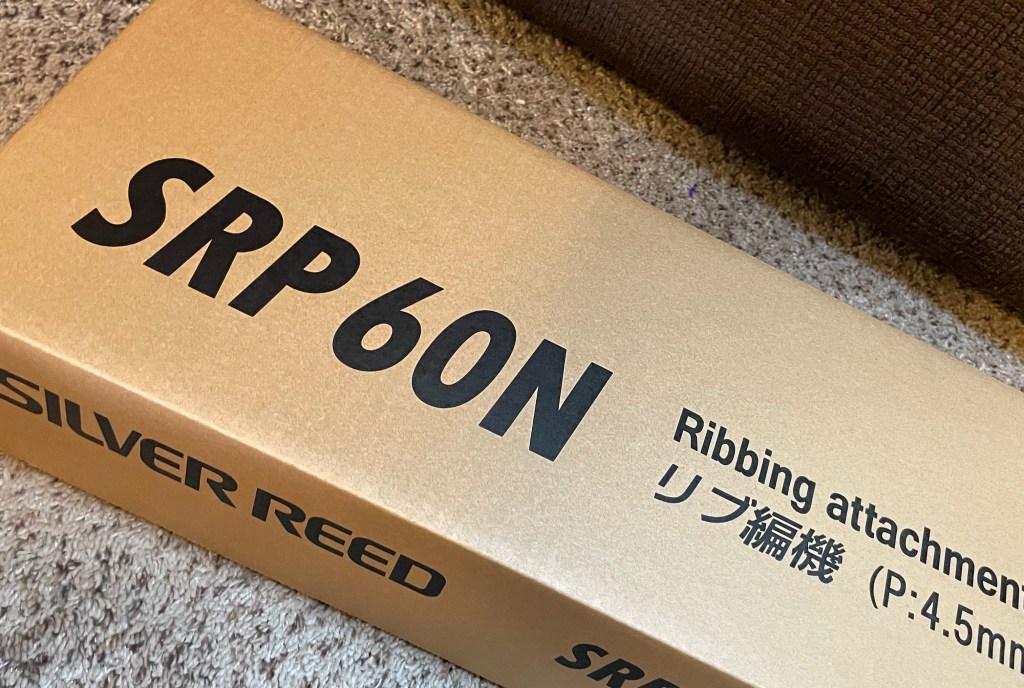
Silver Reed SRP 60N Ribber Attachment Unboxing and Assembly

Last time, we unboxed and assembled the Silver Reed SK 840 standard gauge 4.5mm knitting machine. Now itโ€™s time to learn what comes standard with the Silver Reed SRP60N 4.5mm ribbing attachment, often referred to as a ribber bed or simply a ribber.

Let’s see just how adding a second needle bed expands your machine knitting repertoire!


Compatibility

The Silver Reed SK 840 standard 4.5mm gauge knitting machine is the only current model the SRP60N bed fits. The SRP60N will not knit on its own and must be used with a main bed.

This attachment also fits older, discontinued models SK 210, SK 500, SK 580, SK 700, and SK 740. These could be labeled with Singer, Studio, Knitmaster, or Empisal brands, which were also produced by Silver Reed. This bed works with both punchcard and electronic machines.


Unboxing

Just like the main bed, the SRP60N ribbing attachment is securely packed in a shipping box and another box contains the actual ribber bed unit. The attachment and its accessories weigh in at around 30 pounds.


“helping” with accessories

The accessories come in a long, specially molded styrofoam block that slides in over the needle bed.

The styrofoam holds ribber-specific cast-on combs, a needle pusher, punch cards, a handle, a plating guide, and weights.

Instead of claw weights, the weights are cylindrical with a hook at the top. The smaller weigh about half a pound, and the larger weigh about a pound.

Mind your feet with these weights! It does NOT feel good if one falls on your bare feet!
(Learn from me and wear shoes when you machine knit.)


Be careful with this part of the unit!

The ends of the needle bed are held up with the help of two more molded styrofoam pieces and a flat spacer. These keep the back of the ribber bed safe during shipping and storage.

Each back side of the bed hosts a joiner point where the ribber slides into the main bed. These can be easily bent and damaged if the ribber bed rests on them, so the bed is packed needle-side down.

The ribber is not built into its own carrying case like the main bed and needs to be stored in a way that does not damage the attachment plates on the back, so I strongly recommend keeping the box and foam it came in.

If you uninstall the ribber from the main bed for transport or storage, put it back in the box with its special foam pieces, even if it’s temporary. Otherwise, gently place it needle side down in an out of the way place, or needle side up on a chair and allow the attachment points to hang down without touching anything.


auxiliary pieces to the main bed

Important note: the SRP60N comes with two “auxiliary pieces” that screw into the main bed on each side front that are required to attach to the main bed. The ribber will not fit properly unless you install these, so don’t lose them!


What does adding a ribber let you do?

Ribbed Stitches

As you’ve probably guessed by its name, the SRP60N ribber bed allows you to knit rib stitch patterns without manually reforming the stitches with a latch hook tool. If you knit ribbed edgings often, this attachment will save you a lot of time.

The main bed (the SK 840, sold separately) creates knit stitches while the ribber bed (the SRP60N) creates purls. You can use needles from each bed in combination to create simple rib stitch patterns like 1×1 or 2×2 ribbing, but that’s just the beginning.

Using punch cards or design software like Design A Knit 9, you can create special stitch combinations for endless fabric design opportunities. New combinations include tuck stitch ribbing and fisherman’s rib (think brioche, hand knitters! That’s actually a type of tuck stitch), as well as lace, cables with defining purl stitch patterns, and a special type of colorwork called double bed jacquard.

Circular Knitting

One bed means everything is made flat, but two beds means a tube!

Because the SRP60N has 200 needles just like the main bed, circular knitting with up to 400 stitches is possible simply by adding a ribber.

One round of knitting will take two passes of the carriageโ€”one pass for the main bed and one pass for the ribber bed.

I love being able to knit in the round on my flatbed machines. Socks are my current circular knitted favorite, but youโ€™re not limited to small items like you are with circular sock knitting machines that generally have around 70 stitches. Remember, you have 400 needles now!


Assembly

“Read the manual!” sounds like a cop-out on an unboxing and assembly post, but the manual should always be your first stop, especially if you are installing the ribber on a different model than the SK 840 I’m using.

There are diagrams, instructions, part names, and troubleshooting sections.

If you lose your manual, you can download a PDF copy at Machine Knitting Etc.

Table or Stand

Whatever you use to set up your machine needs to be able to withstand some torque. I prefer using a metal tilt/A-frame stand when I work with two machine beds since I don’t have a sturdy table that fits the clamps.


The first step in installing your ribber is to take down the main bed.

Take the tension unit out and set it aside.

The ribber needs to sit at a specific angle on the table/stand for the beds to knit properly, so taller, angled clamps are included with the attachment.

left: ready to install
right: installed

Remove the main bed’s original clamps and install the clamps that came with the ribber. Make sure the clamp slides to the smaller side of the hole and securely tighten it. Reattach the main bed to your table/stand.

Screw the auxiliary pieces (pictured earlier in the unboxing and seen in use below right) into the main bed and then insert the ribber attachment points into the slot of the auxiliary pieces. Secure the ribber to the table/stand with the main bed’s clamps.

left: angled clamp securing main bed
right: original main bed clamp securing ribber bed

Stand users: Your stand may have come with a part that sits around and under the tall clamps (as seen above on the left). This piece did not come with the ribber. I personally haven’t noticed a difference in stability between using it and leaving it out, so don’t worry too much if your stand doesn’t have one.


In addition to four clamps, the needle beds are further stabilized with ribber join supports. You simply flip the pieces up so they touch the main bed.


top: aligned
bottom: offset

The centers of the main bed and ribber bed are each marked with a zero. The alignment of the beds is adjustable depending on which type of knitting you want to do, but when you’re setting things up, you generally want the zeroes to align and then adjust from there according to the manual.

The ribber can be lowered so you can knit using only the main bed without uninstalling the ribber, but it must be fully raised to perform its functions.


The ribber has its own carriage that slides across the needle bed and has a special attachment for the main carriage called the ribber arm. You must use the ribber arm in the main carriage for ribber functions.

To install the ribber arm, remove the main carriage sinker plate by unscrewing the knobs and sliding it out. Put it away in the main bed’s lid. Slide the ribber arm in place where the sinker plate was, and tighten the knobs.

Do not over-tighten. You could strip the knobs. Hand tight is enough to securely hold the ribber plate.

The ribber carriage slides on to the tube-like railing at the bottom of the ribber needle bed. It leans toward you when you install it, but it must be flush with the ribber bed to use. Simply push it toward the needle bed to achieve this.

The main carriage and ribber carriage work in tandem and must be attached to properly function. The ribber carriage will click into place under the main carriage as you slide it along the bed. The two carriages can now move as a unit to knit.

The final step is replacing the tension unit. The tension rod has a bend at the bottom that bends away for use with the main bed alone but needs to bend towards you when the ribber is attached. This puts the rest of the tension unit pieces backwards, so you need to flip them around on the rod.

And there you have it! The Silver Reed SK 840 with the SRP 60N attachment, all set up and waiting for yarn!


If youโ€™re interested in purchasing current Silver Reed knitting machines or accessories, please contact me. I sell Silver Reed knitting machines through Get Stitchinโ€™ in Tulsa, Oklahoma. Weโ€™re happy to custom order current Silver Reed machines and parts for you, and we keep the Silver Reed LK 150 plastic hobby machine in stock. Please be aware that we are experiencing some delays in delivery due to supply chain issues like everyone else, but we will keep you informed each step of the way.

And stay tuned! More accessory unboxings and demos are coming to help you learn what each machine can do and what add-ons you might want or need for your favorite stitches.


Thanks for reading! I hope you enjoyed this look at everything that comes standard with the Silver Reed SRP60N ribbing attachment that fits the SK 840 standard gauge metal bed knitting machine.

Did I miss anything? What would you like to see next? Let me know in the comments below!

Knitting Machines

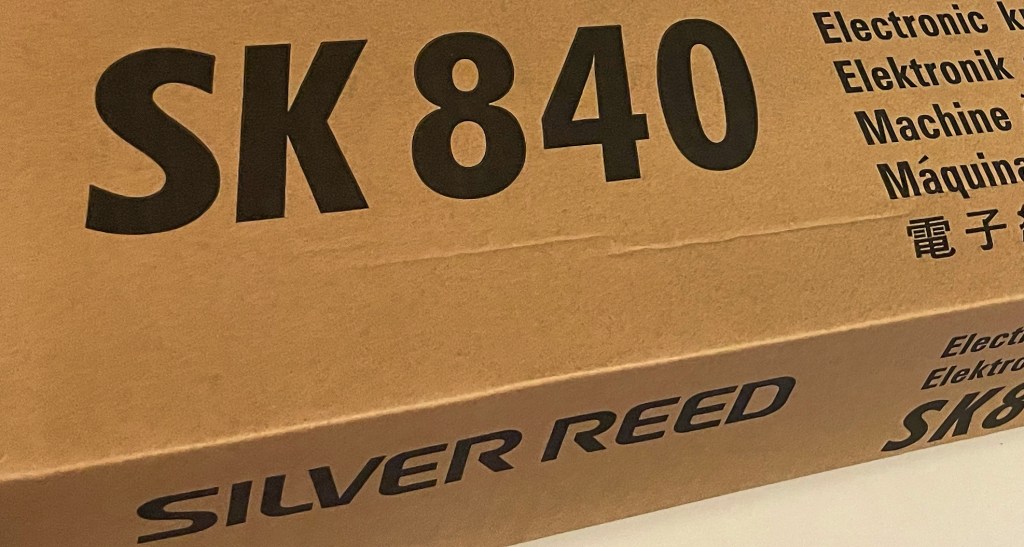
Silver Reed SK 840 Knitting Machine Unboxing and Assembly

If you’re wondering what comes with the Silver Reed SK 840 standard gauge electronic knitting machine right out of the box, this is the post for you!


Unboxing

Unboxing this machine feels a bit like a Christmas box-in-a-box prank at first, but with good reason. The SK 840 is manufactured in China and has to make its way to you safely, after all. The machine ships in a long box that contains the actual box that contains the machine in its built-in case.

The interior box is clearly labeled, and at this point, I accidentally ripped one of the sides off in my excitement to get it open. Be a little bit more careful than I was when you’re removing the shipping box. It’s a tight squeeze, so you may need someone else to pull the other end while you ease it out.

This metal bed machine weighs in at around 35 pounds. In its closed case, it’s 44 inches long, about 8 inches deep, and just under 4 inches tall. The long size and weight make it a bit unwieldy to carry.

Once you open the interior box, you’ll be greeted with two manuals and the machine in its closed case. The extra padding on the ends keeps the machine from moving around too much during shipping.

Both manuals contain basic how to instructions, but the green Operation Manual provides more extensive guidance for using the machine with various (separately purchased) accessories.

sneaky Pete not included

The SK 840 and its accessories are neatly packed inside its case. Paper strips protect the needle bed and gate pegs from scratches while foam keeps the carriage tension dial in place. The carriage itself is locked to the needle bed with a carriage lock, and the tension dial on the carriage is held in place with a rubber band to prevent the buttons and levers from moving.

The padding in the lid is attached, which is oddly one of the things I was most excited to find out. Sometimes putting the sinker plate and tension mast back in a case for storage is confusing, so I’m very glad the foam is there as a guide. Some machines case lids have plastic pieces with drawings on them to indicate where each piece goes, but those are often lost or damaged over the years.


The tools come in their own box as opposed to the storage drawer some machines (especially punch card machines) have built in to the plastic portion of the needle bed.

It’s nice to see that there are three hot pink nylon ravel cords included. (I think their color may vary.) My cat is constantly making off with my ravel cord bobbins, and I end up needing to use scrap yarn as ravel cord most of the time. (See this post if you’re interested in learning how to use scrap yarn as ravel cord in a pinch.)

The manuals detail which accessories you’ll need for different functions, so be sure to read it. Remember, the manual is your best friend!


Everything you see above is what comes standard with the Silver Reed SK 840. To connect to Design A Knit software, you do need to purchase a separate cable or use a separate pattern control unit.


Assembly

To use your machine, you’ll need to place it on a table or machine stand and secure it with the included clamps. Your tabletop should be relatively shallow and straight-edged. The clamps don’t work well on a beveled edge.

I’ve set up the SK 840 on a metal stand I bought from my mentor.

Ready for more pics?

The carriage lock keeps the carriage from sliding about in transit. You should always use it when you pack your machine away for storage or travel.

I recommend keeping the carriage lock in your accessories box when it’s not in use so you don’t lose it.

After removing the carriage lock, you can attach the sinker plate to the carriage. The plate has guides to help you install it securely. Be careful not to over-tighten and strip the knobs.

The yarn tension guide attaches to the back side of the tension rod. There are high and low placement options on the rod with metal nubs that help keep the tension guide secure.

The tension springs are attached to the back of the auto tension unit but are folded back for storage. They will snap into place when you fold them forward.

The smaller end of the tension rod fits into the bottom of the auto tension unit and is different enough in size that you can’t install it incorrectly or upside down. I’ve done that in the past with a couple of Brother machines and wondered why the yarn clip holders didn’t work very well. I like that this unit saves you from that silly mistake.

You can assemble the entire tension unit (rod, guide, springs, and auto tension piece) before placing the rod into the machine, or you can place the rod in the machine first and add the other pieces from there. I don’t think order matters too much as long as you remember which direction the tension unit pieces should face.


Here it is set up and waiting for yarn. Looks pretty great, doesn’t it?


If you’re interested in purchasing a Silver Reed SK 840 knitting machine, feel free to contact me. I sell Silver Reed knitting machines through Get Stitchin’ in Tulsa, Oklahoma. We’re happy to custom order current Silver Reed machines and parts for you, and we keep the Silver Reed LK 150 plastic hobby machine in stock. Please be aware that we are experiencing some delays in delivery due to supply chain issues like everyone else, but we will keep you informed each step of the way.

Still thinking about it? Don’t worry! Accessory unboxings and demos are coming to help you learn what this machine can do and what add-ons you might want or need for your favorite machine functions.


Thanks for reading! I hope you enjoyed this look at everything that comes standard with the Silver Reed SK 840 standard gauge metal bed knitting machine. Also, apologies for the late post! It’s 2022 and it looks like I still can’t count days and weeks correctly. Whoops! I’m sure glad those needle beds are numbered….

News

What a year!

Merry Christmas, Happy Holidays, and Happy New Year, everyone!

I hope you’re spending the end of the year how you want, where you want, with whomever you want.

From launching ELY Knits as a site to attending my first in person market in years, a lot of things have happened this year. I didn’t accomplish everything that I wanted to, but I was able to do some unexpected things like team up with a local store to become a machine dealer and team up with some local fiber artists to make some exciting projects for 2022.

I’m looking forward to next year. If you’d like to see specific techniques or yarns, as always, drop your suggestions in the comments below or send me a note through the contact page.

Thank you for taking time out of your busy schedule to join me on this machine knitting journey.

Good luck on your last minute knitting, and may you always win at yarn chicken.

hand knitting, Knitting Machines

Knitting with Hand and Wrist Pain: My Journey to Machine Knitting

This post includes my own experiences with pain and hand and machine knitting and should not be considered medical advice. If you have a concern about knitting-related pain, you should seek help from a medical professional.

More Common Than You Think

Over the years I spent working in a yarn shop, I heard a lot of things about customers knitting less or even stopping their hand-based yarn hobbies altogether because of hand pain.

Quite a few of our shop patrons experienced occasional or chronic hand pain, and their responses to it varied as much as their yarn projects.

Some customers swore off small yarns and began knitting with bulky yarns on large needles. Others blamed the bulk of large projects and decided to only work on small, lightweight pieces.

Some knitters swore by compression gloves to remedy their pain. Others relied on copper bracelets and rings to help with blood flow to their fingers. Some made lotions and balms with different oils to soothe and relax tired hands. One customer even suggested certain yoga poses to help release arm and hand tension.

Whether itโ€™s arthritis, carpal tunnel, or tendinitis, knitting is a repetitive motion, so it does carry a bit of a risk of injury or aggravation with too much of it.

But what do you do when the pain gets to be too much and you canโ€™t knit more than a row or two without stopping to rest or reaching for some medical pain relief?

If youโ€™ve ever seen a knitting machine, you may think it could be the answer to keep you knitting.

Pushing a carriage across a needle bed to make a blanket or turning a crank to make a sock seems like such a simple motion compared to the steps you complete to make a stitch in hand knitting.

Knitting that quickly and simply must be super easy, right?


Life with Hand Pain

Iโ€™ve had issues with the joints in my hands and arms since I was a child. They gave me trouble with things from learning piano to writing class notes.

I learned to hand knit in college, but I didnโ€™t ever knit long enough in one sitting to notice anything past the usual pain, swelling, and weakness flaring up, and it did that anyway with normal daily activity.

A doctor first noticed a bit of minor arthritis in one finger in my mid-20s, but she wasnโ€™t able to pin down a reason for the rest of the weakness, inflammation, or swelling of my hands and arms.

She told me I should just stop knitting.

That advice came right as I was launching an Etsy shop and beginning to attend craft shows. It was a day ruiner, thatโ€™s for sure.

I loved knitting, and I wasn’t about to give it up, so I decided to follow the advice of my fellow knitters and tried stretches and compression gloves along with frequent breaks to alleviate my hand pain. If my hands were swollen and weak that day, I wore my braces and read knitting magazines or browsed ravelry instead.

I tried taking over the counter medicines and went back to the doctor again, but she still said there wasn’t anything wrong with me other than that small spot of arthritis. At this point, I was barely able to hold a pen or a fork, let alone knit.

I randomly saw a machine knitting video on Youtube. I don’t think I knew knitting machines existed before 2017, to be honest, but I finally started considering one a solution that could keep me knitting.


Hand Involvement in Machine Knitting

If you think machine knitting is only pushing a carriage across a needle bed, you’d be incorrect.

True, that is the most basic action in machine knitting, but you use your hands a lot.

If you have a manual machine like the SilverReed LK-150 or Brother KX 350 (click here to read a post about cleaning and testing this machine), you do everything besides knitting the stitches themselves by hand.

Needle selection is by hand. Transferring stitches for increases, decreases, lace, or cables is done by hand with specialized tools. Any decent cast on with a finished edge is done by hand wrapping or using the latch tool. Bind offs? By hand. Seaming? Unless you buy a linking machine, you’re doing it by hand.

And that’s the thing. It is quite easy to remove the majority of the hand manipulated element of machine knitting, but it isn’t cheap. You have to buy specific machines or accessories to lessen your manual involvement.

You can hand select and do things manually on all machines, but punchcard and electronic machines have settings that enable a lot less handwork. Those extra functions come with extra cost. They are more expensive, sometimes double the cost of the manual machines mentioned above, and some require buying even more accessories to accomplish what would otherwise be manual tasks.

Lace and intarsia specialty carriages can be over $100 each. Buying a second bed to knit ribbing can run about $500. Whether you buy used or new, you’re still looking at a range from a few hundred dollars to a couple thousand invested in removing the manual element from your knitting.


Adapting to Painful Hand Knitting with Machine Knitting

I still hand knit. It is what started me down the fiber road, after all. But I cannot knit as much as I used to. I’m down to about a tenth of what I once could do. Moving my hands in certain ways seems to flare things up more than others, so I’ve written off entire stitch patterns if they hurt.

It definitely feels awkward as an instructor to say I physically can’t do that knitting stitch other than showing how it’s done once or twice, but awkward is a better feeling than pain. I tell my students as long as they’re forming the stitches correctly, there’s not really a “wrong” way to knit. But if it hurts, that’s knitting the wrong way.

Some days I wake up and my hands feel fine. Others I can barely hold the spoon to eat my morning oatmeal. Checking how my hands are functioning is a part of my morning routine now.

I modified how I hand knit so that most of the motion comes from my better hand, my left. My right hand is basically a needle stabilizer. I can knit this way with braces on my hands, so I still get a little bit of hand knitting accomplished on painful days.

Moreso than trying to knit wearing my braces, I look for ways to blend hand my hand and machine knitting together. I figure out what parts I can hang on a machine so I can save my hands. Does the pattern call for 12″ of stockinette stitch? That’s going on the machine. Is there a complicated lace repeat on a hem? I’ll do that by hand with plenty of breaks on a good day or I’ll try to find a similar punchcard lace pattern on the machine.

I can operate almost every function of a punchcard machine on all but the worst pain days. I can push a machine carriage and change lever- and button-based settings; I can use transfer tools, the latch tool, and thread the machine’s tension unit. I’m not going to choose something with a lot of hand manipulation like cables or hand transferred lace on a bad pain day, but that’s easy enough to stay away from.


Return to Teaching

I had to pause teaching classes and working at the yarn shop when the pandemic started, and after the shop closed earlier this year, I was unsure if I’d teach hand knitting again.

I’m currently working with Get Stitchin’ in Tulsa, OK to offer classes and SilverReed machine sales through the shop. It’s a dream come true for me to be teaching again and connecting with the fiber community once more, but working around my hands sometimes feels iffy.

When you check the Classes page on Get Stitchin’s site, you’ll see hand knitting classes. With me. I’m not stopping, but I am adjusting.

I have to give myself much more time to compete a project. What would previously have taken me less than a month might now take three. Trying to have a sample done in time for in-store class advertising has been a little rough on my hands. Instead of the larger projects I once wanted to do with multiple-part classes, I’ve chosen smaller things that teach and reinforce skills and concepts but do it in a more compact project.


Worth It

Investing my time and money into knitting machines has enabled me to continue on my fiber journey. I didn’t have to give up my creative passion, and that alone makes machine knitting priceless to me. In addition, I’ve been able to speed up my design process because knitting a piece on the machine takes so much less time than doing it by hand. Making mistakes and ripping them out is not necessarily an uncommon occurrence for me when I’m working on the machine, but making those mistakes has given me more confidence in my ability to create and fix designs.

Knitting machines can’t always produce the exact same fabrics that hand knitting can, but there are analogs and even more stitch options to produce all kinds of wonderful fabrics that would be nearly impossible, or at the very least extremely impractical, to do with hand knitting.

I did manage to get some answers regarding my hands this year with a new doctor, but other than steroid shots, there’s not much that has been able to help. There are a couple surgical options in my future, but one always has to weigh risks and benefits with them. How long will I have to stop knitting to recover, and is it a permanent solution? I’m cautiously optimistic that I may finally be able to eat, write, and hand knit pain free someday.


Have you experienced yarncraft-related hand pain? What did you do to combat it? Did you turn to machine knitting to stay creative? Are you considering a knitting machine to give you more flexibility in your knitting? Let me know in the comments below, and, as always,

Thank you for coming on this knitting journey with me.

Knitting Machines

Cleaning a Brother KX 350 – Start to Finish

There aren’t really many entry level or hobby options for knitting machines in production these days. Your options are the SilverReed LK 150 6.5mm mid-gauge or … nothing. That’s it. The LK 150 is the only hobby plastic machine still in production.

The LK 150 is a great machine, and I love mine, but the $440.00 MSRP is a lot of money for something you might not be certain about.

BUT if you look to the used or vintage market, you might be surprised with what you can find.

The Brother KX 350 is another mid-gauge plastic bed hobby knitting machine. Many are still floating around in good condition. All they need is a little love, and they’ll be knitting for you for years.

The KX 350 was made in Japan and has 130 needles where the SilverReed LK 150 has 150 and is produced in China. The KX 350’s needles are 7mm apart where the LK 150’s are 6.5mm. The KX 350 cannot “officially” plate yarn, but there is a trick to make it work, where the LK 150 has a yarn plating function built into the carriage. Both machines are manual where the user selects all needles, and both machines can use most hand knitting yarns.


a LOT of knitting machines and my little helper, Pete

I recently purchased a lot of Brother and Studio machines from an estate sale. Luckily for me, their former owner was a knitting machine dealer and used and maintained her machines well. They’ve been sitting for a couple years, but the buildup on the machines is much less than what I’ve found on other vintage machines that sat for over a decade before I cleaned them.

Other than the accessories and pieces being stored by type (tension units with tension units, cast on combs with cast on combs), the recent machine lot is in good shape.

This makes the restoration process for the majority of these machines more of a simple cleaning rather than replacing and repairing parts like my on-hold Brother KH 260 restoration with a broken patterning unit. That one has to wait until I can procure parts, which is one of the downfalls of working with out of production machines versus current models.


The Cleaning Process


Inventory the Machine

Before I started cleaning, I downloaded the KX 350โ€™s manual from Machine Knitting Etc. I checked parts and accessories against the manual so I could order any missing items as soon as possible.

The accessories for my newly-acquired machines are scattered throughout machine cases and random boxes, but this KX 350 was only missing a 1×2 transfer tool. That’s not too bad, and it could still pop up somewhere.


Cleaning Supplies

  • LPS 1
  • LPS Food Grade H1
  • Dawn dish soap
  • Lukewarm water
  • Toothbrush
  • Clean paintbrush
  • Old towels
  • Blue paper towels
  • Mineral Spirits
  • Glass jar with lid
  • Sponge with Brillo pad side
  • Washi tape

Cleaning the Needle Bed

I started by removing the needles from the needle bed and storing them in my glass jar.

I attempted to pull the old sponge strip out of the machine in one piece, but it had other ideas.

quite dead sponge strip bits

The old sponge strip had no memory or spring left to it, and the places where the needles rested were clearly visible.

nicely dusted but still a bit dirty needle-free KX 350 needle bed

Once the needles were out of the way, I used my clean paint brush to brush away as much dust and dirt as possible. I was surprised at just how much cleaner the machine was with just a little bit of dusting.

I used a paintbrush because the bristles were long enough to reach into the needle slots where the toothbrush couldn’t. As long as your brush doesn’t shed bristles, you should be fine. You don’t want to have to fish out bristles in addition to the rest of your cleaning.


I filled a bowl with tepid water and a little bit of Dawn dish soap. I used a lightly wetted toothbrush to scrub away the dirt and grime.

Emphasis on the lightly.

The bottom of the needle bet still hosts metal parts, so I was careful not to over-wet the toothbrush and slop water everywhere. I worked in small areas and wiped things dry as I went. I did scrub the metal sections, but I was very careful to thoroughly dry them.

I could have removed the metal support sections and cleaned them separately, but they were not dirty enough to warrant it in my opinion. There was no rust to remove.

bottom view of the KX 350’s needle bed with metal support parts and spring-loaded clamp holder

If you are cleaning a KX 350 and decide to remove the metal support pieces, I recommend taking pictures of each support piece and its screws individually before and after removal and keeping them in labeled bags to ensure you donโ€™t lose screws and parts. You’re always better off safe than sorry when working with vintage machines since parts have iffy availability.


For any remaining grime in the needle slots, I sprayed a tiny bit of LPS 1 and scrubbed it with the toothbrush. According to Ask Jack at The Answer Lady, LPS 1 is safe on plastic bed machines as well as metal machines, but I think it’s best to attempt soap and water first.

needle bed before / after

After I finished the needle bed, I took my toothbrush and soapy water to the carriage and wiped the metal carriage plates and accessories with an LPS 1 wipe. (I ordered my LPS 1 wipes from EMI Supply.)

I placed a strip of washi tape on each accessory and put a matching strip on the needle bed. I have quite a few machines, especially mid-gauge and bulky, with accessories that all look about the same at a glance, so I make sure to give each machine its own washi tape code.


Replacing the Sponge Strip

You should always replace the sponge strip in a new-to-you machine unless the seller explicitly states they have installed a new sponge strip and you have checked that it is new. Trust but verify!

The sponge strip/sponge bar is vital to your machine knitting fabric properly.

All that said, replacing the sponge strip in a plastic hobby machine is for. the. birds. This vital process is tedious at best. Give me a metal machineโ€™s sponge bar any day!

The KX 350 has the added insult of these bars across the sponge strip channel.

Don’t worry, I cleaned the grimy bits out of the sponge strip channel!

I used a transfer tool to help scrunch and inch the sponge strip through the channel and under the bars, but any narrow, blunt-tipped object would probably work. I tried to pull the strip with tweezers initially, but it tore the end of the strip and began to tear at the part under the channel bar. I don’t recommend pulling the sponge strip through.

Sponge strips are longer than the needle bed, so I simply snipped off the ugly end, but it would have been fine to leave it as the ends are not actively supporting any needles during knitting.

freshly inserted sponge strip

Needle Cleaning

Upon closer inspection, quite a few needles from this machine had rust on them. A few latches were rusted in the open position, but the majority of rust was in small patches along the length of the needle between latch and butt and would not affect their functionality in knitting. It seems like these needles had some sort of metal plating on them that had just worn off.

While I worked on cleaning the needle bed, I let the needles soak in some mineral spirits in a sealed glass jar.

bits started to come off the needles as soon as I filled the jar

After I finished the needle bed and carriage, I sat outside on my porch and wiped down each needle with blue towel and checked the latch function. It was another task on the tedious end of machine cleaning, but itโ€™s worth it to do it all at once rather than pulling supplies out again mid-test knitting.

I used the toothbrush and a sponge Brillo pad to remove rusty spots, but I think steel wool might have worked better in hindsight.

A couple needles had rough formerly-rusted parts on the actual hook of the latch that could catch on yarn, so I soaked them again overnight and scrubbed them as best as I could before returning them to the needle bed.

I sprayed the needle bed slots with H1 Food Grade lubricant and made sure to wipe off any excess from the top of the bed before reinstalling the needles. I gave the carriage a spray of H1 as well to prepare it for knitting.


Brother KX 350, cleaned and assembled, mid test knit

Test Knitting

With the bed freshly cleaned and assembled, I started test knitting. I used leftover Piropo, a vintage acrylic Millor yarn.

When testing a machine, I believe you should knit using every single function the machine has available. If your machine has a punch card, you should test the punch card functions. If you have a lace carriage, you should test the lace carriage.

For the KX 350, testing means knitting stitches that use the part and hold levers on the side of the carriage for tuck and skip stitches along with some fair isle colorwork. Testing at different tensions is important, too.


Final Thoughts

I bought this lot of machines intending to clean, refurbish, and resell most of them, but working with this KX 350 has me really tempted to keep it. This sturdy little manual machine has a lot of knitting left in it.

Cleaning was a series of simple, sometimes tedious tasks that ultimately added up to about a day or long afternoon of work if you don’t count the downtime of soaking needles.

Since I’m pretty sure the missing transfer tool is floating around my machine shelf, the only part replacement I needed to complete was changing the sponge strip. And replacing a sponge strip/bar is a part of regular knitting machine maintenance, so I feel like that barely counts.

I hope reading through my cleaning process helped you whether you are looking to revive a used machine or simply storing up tips for the future.

If youโ€™re interested in what working on a metal bed machine looks like, check out this post on a Brother KH 260 restoration in process.

Keep an eye here on the site in the future for the Store tab featuring cleaned, refurbished, and TESTED vintage machines in addition to patterns, finished garments, and machine accessories.

Thanks for coming along this knitting journey with me!

yarn review

Yarn Review: Lion Brand Touch of Yak

I bought this yarn in 2020 to review, and, well, 2020 (and now most of 2021) happened. Now it’s on clearance, but if this yarn seems like it’s for you, you might find a good deal on

Lion Brand Touch of Yak

Touch of Yak in Water Lily

All opinions are honest and my own. I am not affiliated with any company or individual mentioned or linked unless otherwise noted. I purchased this yarn myself and did not receive compensation for this review.


About

Fiber Content90-% Acrylic / 10 % Yak
Yardage/Meterage219 / 200
Ounces / Grams3.5 / 100
Yarn Weight4 / Medium / Worsted
Made inChina
AvailabilityLocal Yarn Store, Online
Put upSkein

This yarn is on clearance for $6.99 at the time of this post, so if it’s something you’re interested in, grab it while you can. The clearance price brings the price per yard down from $0.06 per yard to $0.03 per yard.

Originally retailing for 13.99, Touch of Yak is part of Lion Brand’s “Touch of Luxe” collection. The listing mentions “Yak fiber is as soft and warm as cashmere, with wonderful drape,” but with 90% of this yarn being acrylic, any drape you achieve will be from steam blocking or “killing” the acrylic.

Colors are soft, muted, and generally neutral. Now that it’s on clearance, three colorways remain.


Care Guide

Hand WashYes
Machine WashYes
Flat DryYes
Machine DryNo

I machine washed and dried this yarn with no problems. To be honest, I couldn’t tell any difference made by the minimal presence of yak fibers compared to any other decent machine washable and dry-able acrylic.


Knitting Machine Compatibility

4.5mm Standard GaugeNo
6.5mm Mid-GaugeYes
8mm / 9mm Bulky GaugeYes

This is a worsted weight yarn. I wouldn’t put it through any standard gauge machine, but it worked fine on other gauges.


Touch of Yak in Waterlily in a warm light
Pattern: Mirror Cable Mitts on ravelry

Performance

This yarn knitted up fine. It wasn’t anything special, but it wasn’t terrible to work with. When I transferred stitches to form cables, the yarn was annoyingly splitty, but plain knitting was fine. The stitch definition was fine for cables and the finished project looked nice.

There’s really nothing to point out if you treat this like any decent acrylic. The yak is nowhere to be found, especially if you’ve worked with 100% yak fiber before. If you haven’t, you might be able to convince yourself this yarn is softer than another mid-range acrylic, but really, it’s not anything special. There is a slight halo of potential yak fiber if you squint. Maybe?


Blocking

This yarn is 90% acrylic, so block it as such. Too much heat will “kill” the acrylic and freeze it in place. “Killing” acrylic is literally melting the plastic it is made of. You’ll achieve a great drape with this but lose any other properties acrylic might offer.

Careful steam blocking is my blocking method of choice for all yarns, even acrylics, but you should make sure you do not leave your steamer in one location for too long.


Touch of Yak in Water Lily wound into a cake

Final Thoughts

This yarn is fine. That’s it. It’s fine. The “touch” of yak is barely noticeable. It feels like almost any other mid-range acrylic. It’s soft, it works, it’s machine washable, and even though it says not to, it really is machine dry-able. The color range is limited, and the yarn is now on clearance. If you like a slightly softer than normal acrylic and you snatch it up, this could be a good yarn for you provided you aren’t picky about colors. Just don’t expect anything that actually touched a yak when you purchase this.

I give Lion Brand LB Collection Touch of Yak a 2 out of 5 score.


Have you used Lion Brand Touch of Yak before in your machine knitting? What about in your hand knitting? What kind of projects did you use it for, and what did you think of its performance?

Are there other properties you think I should include in my yarn reviews? What yarn should I review next? Let me know in the comments!


Uncategorized

Free Machine Knitting Pattern: Sarah in Lace

Hello all, and here’s to another happy day of knitting!

Did you see last month’s free hand-knitting pattern, the Sarah in Lace cowl? I am so grateful for all of the wonderful feedback I’ve received about this piece.

Thank you all for your support!

This month, it’s the machine knitting version’s turn!

Sarah in LaceMachine Knitting Version

Ideal for hand dyed or natural yarns with slight color gradient, this cowl will let the yarn speak for itself. Cables on each side create a scalloped, slightly rolling edge without allowing the normal roll of stockinette stitch.

The simple lace repeat is suitable for beginners familiar with the latch tool and transfer tools.

The length and width are easy to modifyโ€“just add lace repeats to achieve your desired size, but note that adding repeats will require more yarn.

Gauge is not vital to this project, but you do not want a tight fabric.


This is the machine knitting version of this pattern.

Visit this post if you’re looking for the hand-knitting version.


Written and Charted Instructions

The lace chart and simplified instructions are on one page (page 5) to be printer-friendly for more experienced knitters, and detailed written instructions for newer knitters follow.

In the written instructions section, I take you step-by-step through the first lace row and the first cable row. The other lace and cable rows build off of those techniques, but are not explained in detail, needle number by needle number.


Decrease Choices

Like its hand-knitting sister, this PDF pattern contains modification tips to help you really make this piece your own.

There are different choices of decreases with instructions for each.

On the left, you’ll see the original decrease intended for the pattern. The detailed row instructions in this pattern assume you are using this decrease.

The yellow sample pictured on the right shows two other decrease options-one on the left of the sample and one on the right. Instructions are provided for this decrease in the pattern notes but not the detailed row instructions like the original decrease.


Pattern Repeat Tip

Mark it up!

Use a set of wet erase markers like Expoโ€™s Vis-ร -Vis markers (non affiliate link) to denote cabled stitches, purl stitches, or central stitches of the lace pattern repeat on the bed of your knitting machine. This can help you remember where to start each lace repeat, which stitches to ladder down to latch up as purl, and which direction cable crosses should go.

In this picture, I’ve used an “X” across two needles to denote the center of the lace pattern repeat’s “V” shape. A bullet marks the needle that I need to ladder down and latch up purl stitches on, and diagonal arrows and “CC” for “cable cross” remind me which direction the four-stitch cable over those needles needs to go.

Wet erase markers work great for any project with pattern repeats and are easy to remove once you’ve finished. Have you given them a try yet?


You can find this pattern in my Ravelry Store as a Free Ravelry Download.

This pattern is available to non-Ravelers, too, so donโ€™t worry about signing up unless you want to. download now


As always, please contact me if you find anything missing or notice an error in my patterns. I will correct them ASAP.


Thanks for coming on this machine knitting journey with me! If you like what you see and want to help me bring more machine knitting content, please consider supporting me on Ko-fi.

Uncategorized

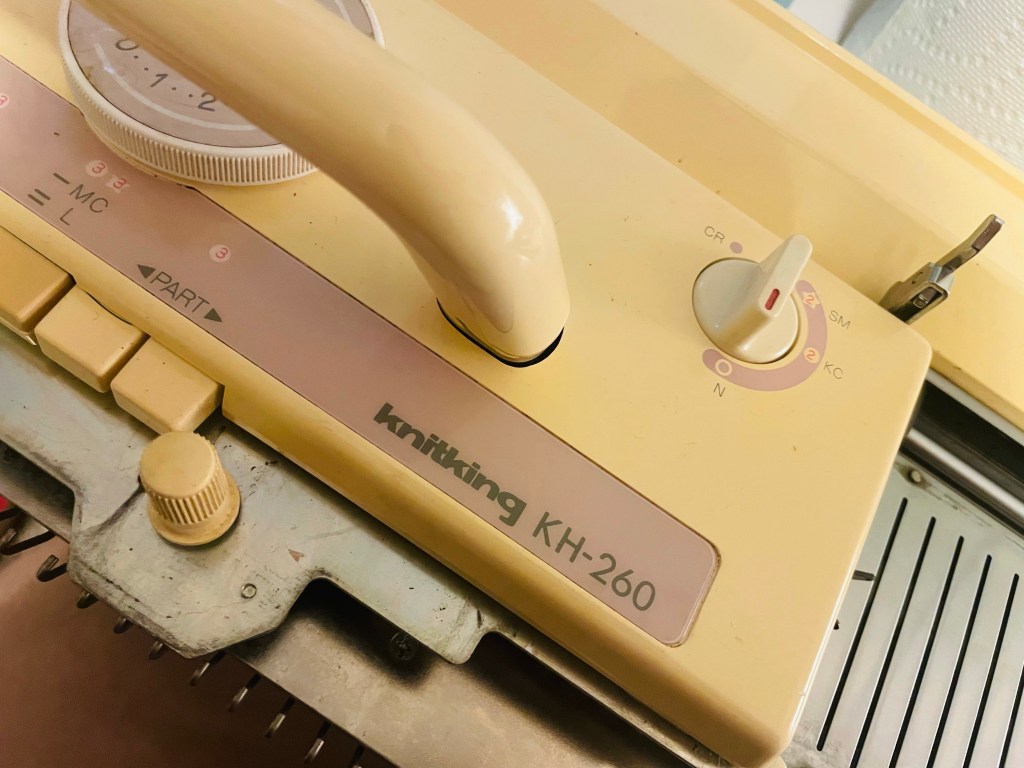
Knitting Machine Restoration: Part One

Meet one of my newest machines, the Brother/KnitKing KH-260. It’s a 9mm bulky gauge metal bed machine with punchcard capabilities that can do fair isle, punch lace, tuck, slip stitches, and more. With the right attachments, you can knit intarsia colorwork and ribbing.

This machine was definitely on my WANT list, and my mentor saved it for me when it came to her after its owner passed away.

I don’t know much of this machine’s history other than it was said to be well used and loved. I don’t know how long it sat in storage or where its missing bits are, but I’m happy to have it in my growing (although don’t tell that part to my family) machine collection.

This series isn’t really a tutorial, more of a progress log, but I’ll include links to resources I’ve used along with descriptions of my process and things I’ve learned along the way. Things might be a bit jumbled since this is my first true restoration and I don’t know some of what I’ll need to know yet, but I hope you enjoy it, and I hope you learn something fun and interesting along the way.

Welcome to my first restoration project!


Before I began cataloguing what I had, I went to MachineKnittingEtc.com to find PDFs of the instruction manual, the parts list, and the service manual for this model. (The site is an amazing resource, so be sure to take some time to browse it. It isn’t just instruction manuals, as you can see in this brief overview post.)

This lovely machine doesn’t look much different than what she did out of the box other than her yellowed color. ABS plastic normally yellows due to time, UV exposure, and bromine in the plastic’s composition. That’s just cosmetic, and it’s to be expected for a machine around 30 years old. There are ways to bleach the plastic, but it will re-yellow with time, and the plastic bleaching process could potentially weaken it. There’s nothing wrong with yellowing.

This baby is missing a few parts, though. The rod of the tension mast is missing along with the take-up spring (the antennae-like part) of the mast. The yarn-holder part of the tension mast seems to be part of a color changer with four yarn hole options and not the two-holed part that came standard with the machine. The needle bed number-marking sheet is present but not attached, and most of the accessories are missing.

Fortunately, those parts are generally inexpensive and fairly easy to find and replace on eBay or Etsy. For the accessories, I can just borrow them from my other bulky machine, the Brother KH-230.


With parts catalogued and manuals in hand, it was time for a clean.

This poor girl was dusty. I used LPS-1 wipes to remove most of the dust and grime from the needle bed and used a can of the same chemical to spray down the carriage after carefully removing the plastic casing. I used tweezers to remove what dust bunnies I could and waited for the LPS-1 to reveal more.

You can definitely use the LPS-1 from the spray can with a non-lint cloth to wipe dust and grime away, but I bought a few wipes to try them out and to reach the free shipping threshold. (We Millennials do love our free shipping, after all.) I bought mine from EMI Supply (non-affiliate link).

If there’s one thing I’ve learned so far about knitting machine cleaning, there is always more dust or grease somewhere. Once you spray a machine down with LPS-1, the buildup just starts seeping out of every crevice.

The carriage tuck button was stuck due to gunk and grime, so I used a few drops of Marvel Mystery Oil to help that get moving. That stuff works miracles.

I learned how to clean knitting machine carriages from this Answer Lady Ask Jack video. I recommend watching all of their videos if you have an interest in machine knitting maintenance and repair!

After replacing the sponge bar with a new one and borrowing the tension mast and accessories from my Brother KH-230, I set up the KH-260 for plain knitting.

Things were going well until I attempted patterning with a punch card.

As you can see from my Instagram clip, there’s something pretty wrong with my punchcard unit!

One pass of the carriage resulted in way too many row advances of the punchcard.

And the needle selection? That was a mess, too. Some needles in the center of the 24 stitch pattern never selected.

Let me back up a bit.

Since plain knitting was fine, I went straight to patterning with tuck stitch with plans to go to skipstitch afterwards because I saw on someone’s Instagram post (I’ll update with a link if I can find it again!) that tuck and/or skip stitches really show what a machine can do and point out any faults in its performance.

I removed the test knitting from the needle bed and took the sinker plate off of the carriage so I could see the movement of the needles clearly. (You can do this to find the center of a pattern or where the repeat starts when your machine is working normally if you want to be precise about pattern placement.)

After that, I took off the card stop lever knob and panel covering the card reader unit on the right side of the machine.

I used a small screwdriver that came with a nail polish display rack kit, so I’m not sure what size it was other than perfect for knitting machine maintenance. I will figure out the screwdriver size and update later with details.

As seen in the picture below, the card reader has cracks in the rotary cam (the ivory colored barrel-shaped part). These cracks are likely due to expansion and shrinkage from being stored in a hot attic or garage. There are also cracks along the opposite side.

The plastic direction indicator piece that shows which direction the carriage goes was broken and had disappeared into the void of the machine. The timing belt guide plate to the right of the rotary cam is very loose (as you’ll see in the second video embedded above with my Instagram post). I’m not sure if it’s supposed to be that loose, but I did end up removing it and replacing it as one of the screws holding it was barely in its designated hole.

I used long tweezers from my nail art kit to help me position the screws. Definitely add a pair of these to your machine knitting kit when you can. They’ve been incredibly handy in fishing for dropped parts or reaching into tight spaces.


According to the maintenance manual and Ask Jack videos, the timing belt seems to be timed correctly, so that is a bit of a relief, but I’m not quite sure what to do next. The looseness of the timing belt guide plate seems to be a problem. Placing my hand on it so that it can stop the turning of the punch card clutch gear seems to solve the issue of the card reader turning too many times, but only in one direction.

The carriage also makes a loud CLUNK as it passes across the needle bed when it is in patterning mode. That’s not right, either.


At this point, I don’t know enough about knitting machine maintenance to fix the patterning issue, so I’m actively reading through parts and service manuals, Ask Jack articles, and old forum posts to learn more.

My standard gauge Brother KH-890 machine also has a punchcard unit, so I plan to remove the panel and watch how that machine works in hopes they are similar enough for me to find a clue on how the KH-260 should behave. The loose timing belt guide plate might not actually be an issue.

While I’m figuring out what to do about the punchcard unit, I’ve removed all of the needles from the needle bed for a quick wipe down with LPS-1, and I’ll use needle-nose pliers to straighten any that are bent. I’ll also straighten a couple crooked gate pegs at the end of the needle beds.

I keep all of the needles, screws, and miscellaneous pieces in the same glass jar so nothing will be lost. Now all I have to do is keep my cat away from the jar and we’ll be in a good place regarding loose pieces!


Progress So Far

ProblemActionCompleted
Missing Accessories/Tension Mast PartsBuy on eBay or Etsy
Dirty CarriageLPS-1 and Marvel Mystery Oil cleaningCheck mark, Wingdings font, character code 252 decimal.
Dirty Needle BedLPS-1 Wipe DownCheck mark, Wingdings font, character code 252 decimal.
Dead Sponge BarInstall replacementCheck mark, Wingdings font, character code 252 decimal.
Missing Punchcard Indicator PieceBuy Replacement/InstallCheck mark, Wingdings font, character code 252 decimal./ X
Cracked Rotary CamDetermine if it works as is or needs to be replaced
Loose Timing Belt Guide PlateDetermine if it’s a problem- Watch KH-890
Needles Not Patterning CorrectlyInspect Card Feeding Unit and Needle Selecting Units, then ???
Punchcard Reader Turning too muchInspect Card Feeding Unit and Needle Selecting Units, then ???
Carriage CLUNKNo. Idea. Blame the Punchcard Unit?
Crooked NeedlesRemove and straighten with pliers
Crooked Gate PegsStraighten with pliers

I have a lot left to learn, but there are still things I can do at my current skill level. In between internet sleuthing sessions, I’ll be straightening needles and hunting dust bunnies.

And despite that list of problems, this machine still works. I can still do those fancy skip and tuck stitches, but I’ll have to do the needle selection myself. Being a bit of a lazy knitter, that is less than ideal, but I can still use this wonderful machine.


Thanks for coming on this knitting machine repair journey with me! I’m so excited to learn more about knitting machines through restoration. If you have any tips, tricks, or experience to share, be sure to leave a comment below or email me through the contact page!

Uncategorized

Resource Roundup #2: Machine Knitting Etc

There are so many wonderful machine knitting resources floating around on the internet, but theyโ€™re not always easy to find. Theย Resource Roundupย series goes through the links on theย Helpful Links and Resourcesย page in more detail to help you discover new places to learn more about machine knitting.


What is Machine Knitting Etc?

Machine Knitting Etc is the best place to find FREE knitting machine manuals and other PDF resources. If your machine didn’t come with a manual or yours is damaged, you’ll likely be able to find a copy here, even if it isn’t one of the more well-known brands like Brother or Passap.

For the DIY knitting machine mechanic, you can often find parts and service manuals.

If you’re looking for a punchcard pattern, you’ll find copies of standard punchcard sets, such as the “M” series that came with the Brother KH-890, along with sets from other brands and models.

And that’s still not all! You can find various stitch dictionaries, tip and technique articles, and …

Vintage magazines!

Some of the color choices may seem questionable now, but the vintage magazines Machine Knitting Etc host on their site are wonderful sources of patterns and inspiration.

Those 80s and 90s magazines sure boast some familiar looks to what some stores are hanging on their racks now. Classic shapes are classic for a reason, after all!

Many patterns offer schematics so you don’t need to worry about anything being written for a long-discontinued yarn. Simply fit your yarn’s gauge to the pattern, and you’re ready to go after a little math.


I could drone on and on about this wonderful site, but I hope you’ll take some time for yourself to explore it. These manuals and magazines are snippets of machine knitting history, and you never know where your next project might come from!

Please consider adding Machine Knitting Etc. to your ad-blocking software’s white-list so we can support this valuable resource to our craft!


Do you have a resource to share? Comment below or send it to me via the contact me page!

Uncategorized

The Basket of Shame

It started out with good intentions as “the finishing basket” when I was working on inventory before a craft show.

I’d knit a few washcloths then finish out the day with a cowl or shawl. I’d put them in the finishing basket and weave in the ends later as I watched the news. Then they’d go off to the wash and eventually be blocked and inventoried away.

It was a good system.

Then that cute little cardigan needed some buttons, but USPS was delayed, so it went to the basket.

Then I didn’t feel like finishing the fringe on a self-fringing shawl, so it went into the basket.

Then something interrupted me as I was weaving in ends, so that project went into the basket. Just for a little bit.

Then the craft show was cancelled and other shows followed suit.

The finishing basket was moved to the completely easy-to-see-and-not-forget corner of the yarn closet, and there weren’t any shows coming up anyway….

It was fine, right?

Here I am, a year later, with an overflowing finishing basket. The Basket of Shame.

Oops?

Is it too late for “oops?”


the Basket of Shame Overfloweth

I want to call myself as a professional knitter.

And professionals finish their work, right?

So what am I doing with this pile of stuff?

I’m honestly more than a little embarrassed about it.

How did I let it get this bad? I was home all the time for over a year. There was time to get this done!

That’s not to say that I didn’t finish some things, because I did. But that basket pile still grew….


If you’re like me and some of your works-in-progress have transformed into UFO’s (un-finished objects), I’m here to tell you that it’s OK. It happens. You’re not alone here.

It’s OK to put things down for good reasons, silly reasons, or even no reason at all.

But.

It is important to pick them back up again.

Try not to be too hard on yourself. The UFOs were put away. It happened. Can’t change it.

Now, what I can do, what you can do, is pick up one of those UFOs and work on it.

Little by little, it’ll get done.


If you have some WIPs-turned-UFOs, why don’t you join me in finishing things up? Accountability helps, you know. ๐Ÿ™‚


UFO sighting! Nearly finished curly-fringed shawl and Kelso tank top

I’ll go first.

Here’s my UFO list and what each one needs to join my list of finished works.

  • Teal Gradient Shawl – 25% left of curly fringe, final block
  • Flame Gradient Shawl – initial block, straight fringe, final block
  • Turquoise Socks – mattress stitch ribbing of 2nd sock, weave in ends
  • Green Baby Surprise Sweater – edging, ends, buttons, final
  • Grey Baby Surprise Sweater – ends, buttons, final block
  • Grey Tank Top – armhole ribbing, side seams, ends, final block
  • Black and Pink Scarflette – ends, final block
  • Yellow and Orange Ear-flap hat – felting
  • Coral skirt – elastic waistband
  • Clapotis Scarf – blocking
  • Washcloth 1 – ends
  • Washcloth 2 – ends
  • Orange Mittens – seaming, ends of second mitten
  • Lavender Mittens – seaming, ends, actually make the second mitten
  • Faux ‘Fair Isle’ Socks – make second sock, seaming, ends
  • Fingerless Mitts – second thumb gusset, ends

Whoa. Sixteen projects with varying degrees of completion. A couple of them go more than a year back. Yikes. Others are SO close to the finish line it’s silly to think I stopped where I did.

On top of that, I found four completed projects in that basket! I don’t remember even making them!

I’m not proud that these projects ended up this way, but this is do-able. The Basket of Shame kept growing because I felt overwhelmed and anxious, and I just froze and tried to ignore it.

But that’s OK! Because I’m here now doing and improving, and I’m not going to stop. Now that basket can go back to just being a basket.

nearly finished UFO – Baby Surprise cardigan, machine knit version


What UFOs are floating around your house? Why don’t you join me in taking care of them?

Thanks for reading. See you next time!