Blog

Book Review

Creative Machine Knitting by Alison Dupernex

Here in the USA, recent Machine Knitting books seem few and far between. That’s not the case across the pond, and I’ve been able to find quite a few wonderful skill and pattern books published within the past five years from the UK.

Here’s my review of Creative Machine Knitting: A Voyage of Discovery into Colour, Shape and Stitches by Alison Dupernex.


Creative Machine Knitting is simply a treasure trove for machine knitters overflowing with inspiration and design know-how. Expand your creative vocabulary, knit with an open mind and be prepared to have a go, make changes and look to improvise—push yourself out of your comfort zone.

[T]he book features over 100 patterns, all of which can be adapted and form the basis of new designs.

Jacket Blurb

The Details

Published: 2022Publisher: The Crowood Press
Format: HardbackPages: 256
MSRP: £35.00~$44.00 as of this post

Chapters

An Introduction to Design SourcesWaistcoats
Sustainable Options for Knitwear DesignersChildren’s Knitwear
Design BasicsAccessories
Classic Jackets and CardigansInteriors
Painting with YarnCable Directory
Designing with Panels and BordersStitch Pattern Directory
Shawl Collar Cardigans
Diagonal Knitting

What I’m Looking For

If it’s a machine knitting book in print today, you can bet I’m going to get my hands on it. If it’s a good book, I’m recommending it to my friends. If it’s a great book, I’m recommending it to my students, too.

But what am I looking for? What makes a book good or great?

Schematics
Pictures, illustrations, and diagrams are vital to any skill book. Knitting books, hand or machine, must have pattern schematics to be “good.” Schematics are the first thing I look for in a book.
I like to play around with yarns and rarely, if ever, use the recommended yarn for a pattern. Schematics make it easy to change yarns and still have the correct finished garment.  

Perspective
I look for eye-catching designs and unique pattern elements, twists on familiar classics, and sections sharing the writer’s design thoughts and philosophy along with thoughtful commentary on the crafting community.

How To’s
If a book is geared towards building new skills, I look for step-by-step tutorials with plenty of photos, but I don’t think every book needs to spend chapters dedicated to starting from scratch. I appreciate books for those of us who have made it past the beginner stage and don’t need our hands held.


Overview

Creative Machine Knitting is aimed at the experienced machine knitter who wants to explore knitwear design. Dupernex begins with a section on culture, books and patterns, and key considerations on originality. She emphasizes adapting elements you like and using your own skills to create designs rather than copying someone else’s work. She encourages you to experiment with your style, research the market, and make production choices based on feasibility, but what I appreciated most was the chapter called Sustainable Options for Knitwear Designers. That section includes fiber analysis, types of sustainability, and commentary on the Slow Fashion movement.
Dupernex includes a brief history of classic cardigans before diving in to her patterns. Building onto those classics, she includes punchcards and color instructions for customization and explains her design process and inspiration. There is a wealth of punchcard information in this book that mainly focuses on using fair isle techniques.


Thoughts

Schematics? Check!
Each pattern features schematics, but most patterns are one size.
I don’t know Ms. Dupernex’s measurements, but I’m 5’8″ with a 48″ bust, and some of the measurements don’t hit me in the same places they did her. Since many of these patterns are knit sideways, adding length could pose a problem. Tall and plus size ladies like myself will need to do the math to knit these patterns and be willing to rework a few things if needed.

Perspective? Lovely, but overwhelming…
I appreciate that Dupernex took the time and space in this book to focus on what the industry can be moving forward and choices designers can make to help it become sustainable and more focused on small, local businesses and creators. As knitters, we aren’t pumping out cheap tees with fun slogans that wither in the wash after a few wears. We should strive to create quality when we knit, and I think responsible material choices are included in that.

As for her designs themselves, I have very mixed feelings on Dupernex’s work. I love her use of classic shapes, but I prefer texture over colorwork any day. Dupernex relies on colorwork for the majority of patterns in this book, and I cannot see myself making the same color choices she has.

Stripes, stripes, and more stripes in every color under the sun often lead to the eye being drawn to random places on the body–places the wearer might or might not wish to emphasize. The busyness of the colors is often overwhelming to me, and I find myself drawn to her color blocked, earth toned patterns over the majority that use color-changing fair isle stripes.

Because of the focus on color, the cable directory feels a little out of place, but I love that Dupernex made sure to include texture in her book. We definitely do not agree on color usage, but I think seeing this (what feels to me) extreme color usage will help me grow as a knitter and designer.

How To’s
Dupernex gives precise color instructions down to the row on how to recreate her color madness, but since she included sections on blending yarn and choosing inspiration, you don’t have to feel tied to the pattern or her color choices.

Overall

Rating: 4 out of 5.

Should you buy Creative Machine Knitting? For me, it’s a resounding “YES” despite my color and stripe issues. The chapters on sustainability and design considerations from someone who has long been in the machine knitting industry are worth it. The tips on finding inspiration plus the fair isle colorwork experience, as wild as I found it, will help you solidify your own design perspectives. It may be too much for brand new beginners, but the step-by-step color instructions could help the more confident beginner knit their own technicolor dreamcoat.


Where to Buy

I bought my copy during a sale from Blackwell’s UK along with other machine knitting books that haven’t had their US release yet.

I’m a bit of a hypocrite here because I didn’t wait for US release to shop local, but I hope you’ll consider asking your local yarn shop or bookstore to order the book for you.

If you don’t have a local shop that can order the book, please consider using my Amazon Affiliate link to order. It doesn’t cost you any extra, and I may receive a small commission that will help me continue bringing you free content.

Thank you for joining me on my machine knitting journey. Do you have Creative Machine Knitting by Alison Dupernex? What do you think? If you don’t, do you plan on buying it? Let me know in the comments below.

Tips and Tricks

Finding Cone Yarn

Knitting machines can use a range of yarn from all kinds of put-ups like we saw in my last post, but the easiest and best put-up for machine knitting is cone yarn. Cones don’t need extra preparation before use, have more yardage in general, and often feature unique textures or colors that you might not find in hand knitting yarns.

If cone yarn is so great, why is it harder to find? 

In the USA, machine knitting isn’t as common as it once was. While the hobby is growing again, it’s kind of seen as a niche within a much more popular one or even as “cheating” at hand knitting. Yarns made and wound on cones specifically for machine knitting aren’t really a thing here anymore. 

On the retail side, cones are larger and more difficult to display compared to other put-ups. Most shops don’t have the shelf space to dedicate to a few 1-2lb cones that would otherwise be filled with 10-15 skeins or hanks. Many hand knitting or crochet projects don’t need the thousands of yards that can come on a cone. Additionally, shipping cones generally costs more for the number of products you get than other, smaller put-ups. 

The downsides of retail shouldn’t keep you from using cone yarn in your machine knitting.

Let me butter you up a bit, reader. If you’re a machine knitter, you already work harder to find your materials, parts, and resources than other yarncrafters have to because of that niche! A little work to find cone yarn is nothing to you, right?


Finding Cones Locally

I’m a big believer in shopping at local small businesses whenever possible.

So please, 

Check Your Local Yarn Shop

Maybe they have cone yarn and you missed it! It’s easy to get distracted among the beautiful colors and textures in a yarn haven. Trust me, I understand. 

If your local yarn shop doesn’t stock cone yarn, ask them about it!

Most shops are happy to accept special orders.
**Please keep in mind that many distributors have a minimum dollar amount to place an order for new accounts, so it may take your LYS time to reach that amount depending on their size. Pay up front and work with your local shop so you both benefit! Convert your yarn friends so more of you need cones! (No downsides to that one, right?)

Get Stitchin’, the shop where I teach lessons, recently became an Ashford dealer. Now they have 0.5lb Ashford cotton yarn cones alongside their Ashford spinning wheels and looms! Those gorgeous yarns work wonderfully on 4.5mm standard knitting machines. The owner is happy to order other yarns in, too. I just have to ask!

Oh, speaking of looms,

Ask the Weavers!

Ask your weaving friends or your region’s weaving guild where they source their coned yarns. Many of them will use hand yarns, but those who work with finer yarns will often use cones. (If you don’t have any weaving friends yet, try to make some! Weavers are fun!)

Chat with the Regulars

I live in rural Oklahoma. Most people probably think of Native Americans and buffalo when they think of the state. They definitely don’t think of yarn.

That doesn’t mean hand or machine knitting doesn’t exist here, it just means I had to look a little harder than someone in a big coastal city or European town might’ve had to. 

As some of you know, I used to work at a yarn shop in the suburbs that focused on hand knitting and crochet. When my hands started to deteriorate (I talked about it in this post), I had to start looking for other yarn craft options.

I saw Addi circular machines online, but I had never heard of a flat bed knitting machine. I mentioned my machine research once at the old yarn shop with the other regulars, and wouldn’t you know, one told me about the Fiber Christmas In July festival, a wonderful local fiber festival, and a vendor there who specializes in machine knitting!

Who knows how long it would’ve taken me to figure things out if I hadn’t stuck around and chatted with the yarn shop regulars?!

My teacher and mentor Pamela Carrico is the fiber artist specializing in machine knitting that customer told me about. Her shop has both hand knitting yarns and machine knitting cone yarns! She has new old stock vintage yarns as well as quality acrylic 2/24 yarns that she sells by the pound, which is really helpful if you want to do a colorwork project but you don’t want to pay for pounds of yarn colors you may only use once. 

Asking around helped me find an instructor and materials in one place!


Things worked out wonderfully for me, but what if you don’t have a local yarn shop or yarn community? Making your own is always an option, as is joining an online one.

If you don’t have a local yarn shop, please consider finding a small business online and supporting it before you turn to a big box store. You’re more likely to find someone who can really help you find what you need at a small specialty shop, too!

Call (Yes, Call) Other Yarn Shops 

I have the Millenial Aversion to Phone Calls. If you’re not a close friend or family, I much prefer text or email, so I understand there can be some discomfort in this tip.

But remember, many machine knitting shops have been in business for decades, meaning they have operated without texts and emails for a long time, so a phone call is going to be your best option, especially as they take care of things in store. Don’t forget to leave a message if you need to. Save the shop’s contact information so you know they aren’t spam when they call you back. (Yes, you’ll have to answer the phone, too!) 

At the bottom of this post, you’ll find a list of shops that I know stock machine knitting cone yarn in the USA. If you know of more, let me know in the comments!

Some of these shops don’t have cone yarn listed on their websites but can tell you what they have when you call and ask. Many have “dead stock,” or discontinued cone yarns that are still perfect for knitting. They just aren’t made anymore.


Online Marketplace Listings

If you weren’t able to find anything with info from your LYS or yarn friends, try using Google, Craigslist, and Facebook searches for “<your location> cone yarn” or “<your location> machine knitting.” Don’t forget to check Facebook Groups that may meet locally or regionally, either! 

Cone yarn is often listed in large lots from estate or garage sales. Since it takes up so much room, many people are happy to meet you somewhere and give you the yarn for an extremely low price or even free. I’ve found yarn like this several times. It’s worth checking regularly.

Set a search alert using machine knitting and cone yarn terms so you’ll know when something near you pops up. When you pick up your yarn, ask the seller about their source or where they learned about machine knitting and cone yarn. 


If your local search doesn’t pan out, try some of these smaller businesses online:

Cone Yarn Stockists

Carrico’s Creative Cornerhttps://www.cmodesignerknits.com/Cone Yarn by the Lb, old stock, and more!
Knitcrafthttps://knitcraft.com/SilverReed Importer
The Knit Knack Shophttps://knitknackshop.com/ Tamm Yarns
Peter Patchis Yarnshttp://peterpatchisyarns.com/Email list of Specials
The Yarn Depothttps://yarndepot.orderpromos.com/LARGE cones
Rocking Horse Farmhttps://www.rockinghorsefarmknitshop.com/Machine Knitting Camp
Get Stitchin’https://getstitchin.com/ Ashford Dealer
Ashford Yarnshttps://www.ashford.co.nz/Find local dealer!
WEBS Yarn Storehttps://www.yarn.com/Valley Cone Yarns
YARN ITALYhttps://www.etsy.com/shop/YARNITALYGreat Variety
Silk City Fibershttps://www.silkcityfibers.com/“Wholesale” price
Paradise Fibershttps://paradisefibers.com/collections/coned-yarnFree Shipping after $150 Lower 48
The Wooleryhttps://woolery.com/Weaving Yarns

Have you tried machine knitting with cone yarn yet? Were you able to source it locally? What are you planning to make? Let me know below in the comments!

Disclosures:

I teach hand and machine knitting classes at Get Stitchin’ in Tulsa, OK. I’m not paid to promote the shop, but things that benefit the shop often benefit me as people may purchase my work from the shop or sign up for one of my classes! 

Carrico’s Creative Corner is my mentor’s shop. I’m not paid to promote her shop, but I happily mention it to support her and her work.  

Shops listed are provided for informational and educational purposes and are not affiliated with me.

Thanks for joining me on my machine knitting journey! I hope you learned something useful today. 

logo created by the lovely Mimolette Monster

Tips and Tricks

Your YARN is the Problem — Part One: Hand Knitting Yarn Prep

You might have encountered one of these problems before: the yarn stopped flowing through the tension unit and the tension wire bent all the way towards the carriage and needle bed, the carriage jammed, an entire row knitted at a much tighter tension than you wanted, the yarn broke. 

If you are experiencing problems when you machine knit with hand knitting yarn, your yarn preparation (or lack of) might be the problem. Here are some things to consider about different yarn put-ups and the ways they can affect your tension while knitting. 


Hank
Must be wound into ball or cake before use

Donut
I absolutely hate the donut put-up, so I’m going to rant about it!

It does nothing other than look pretty on a shelf. Hand knitting will cause it to fall apart. Putting it in your bag after purchase will cause it to fall apart. Looking at the outer layer cross-eyed will start it on its slinking, unwinding, collapsing journey!

Unstable put-up
Uneven tension
Needs to be contained
Flops around

Yarn Ball
Can roll away
Needs to be contained in a basket or bucket
Yarn can get caught under the weight of large balls causing uneven tension

Skein
Center pull often results in “yarn barf” and/or collapsing skein
Needs to be contained
Outside pull means flopping/traveling/rolling skein and uneven tension as yarn enters machine
Outside pull means stopping after a row to pull out enough yarn to knit a row every time to avoid flopping

Cake
Manual-recommended put-up for Silver Reed LK150
Flat top and bottom
Should not roll
Most even tension of all put-ups mentioned so far
Require ball winder and swift

Cone
Best put-up for machine knitting
Even tension
Large yardage
Not a commonly used put-up for hand knitting yarn


You aren’t an awful knitter if you don’t knit from yarn cakes or cones! But they are the best put-ups that are least likely to cause issues.

I’ve knitted center pull from a skein before. Everything turned out fine, but I did have to stop and fix a few tension issues as I knitted.

I knit from yarn balls all the time, especially for scrap yarn. Sometimes they jump out of their container when I’m knitting quickly and I have to chase them down. It happens.

Knitting from less than ideal put-ups just means I accept I might encounter problems and have to fix them.


A Note on Yarn Cakes

Ideally, yarn winders should wrap around the sides of the cake and not on top or bottom.

If your yarn winder wraps the yarn around the sides and over the top and bottom, the cake will flop and turn like a yarn ball and add additional tension as it does. This is not an ideal cake for machine knitting, but you can make it work by pulling yarn out periodically so it doesn’t have to flop and roll.

Flopping that happens to an “ideal” cake that isn’t wound over the top/bottom likely means there is not enough lead length of yarn from the cake to the tension unit to the carriage (such as the yarn sitting on the table instead of the floor behind the machine), so be sure to give your yarn ample space as it feeds into the tension unit.


Finding Cone Yarn

There are many places to find cone yarns online, but PLEASE visit your Local Yarn Shop first!

If they don’t have any cones, just ask. Most shops are more than happy to custom order yarns. (Just remember some distributors have minimum orders and it might take a bit to meet that number!) And if you don’t have a yarn ball winder and swift, most LYS will wind the yarn you purchase there into cakes for you.

My Local Yarn Shop, Get Stitchin’ in Tulsa, OK just became an Ashford dealer! I don’t weave or spin much, but do you know what comes on cones? Weaving yarn!

(Disclosure: I teach classes, sell Silver Reed knitting machines, and sell my work at Get Stitchin’, but I’m not paid to promote it. I mention it because I both sell and shop there.)

Carrico’s Creative Corner in Bartlesville, OK, my mentor Pamela Carrico’s shop, has a wonderful array of cone yarns as well as hand knitting yarns. Pamela sells cone yarn by the pound, which is a great option for knitters who don’t want to commit to an entire cone and thousands of yards of one color. She also often has new old stock of discontinued yarns that were made especially for machine knitting.


In the end, the amount of preparation you do when machine knitting with hand knitting yarn is about what you’re willing to put up with. You may be willing to deal with a ball rolling around or unwinding from the outside of a skein before knitting every row, but if you find yourself constantly encountering tension issues and uneven knitting, look to your yarn put-up and preparation first.

Thanks for coming along on my machine knitting journey! How do you prep your yarn? Are you strict about it, or do you knit from whatever you feel like using at the time? Let me know in the comments!

Knitting Machines, tutorial

Yarn Plating and the SilverReed LK150

Have you heard of plating? Not metal plating- yarn plating on the knitting machine!

Most knitting machines can plate with an attachment or interchangeable carriage piece, but plating is a built-in carriage capability on the Silver Reed LK150 6.5mm mid-gauge machine.

It’s described in the manual as two different yarns knitted together where

one yarn appears on the knit side while the second yarn appears on the purl side of the knitting

SilverReed LK150 Instruction Manual p22

The yarns are usually different weights and fibers with one giving additional support to the construction of the fabric and/or adding special visuals like the swatch below.

(If you really want to dive into the technicalities, check out section 6.8.3 Plating in Knitting Technology by David J. Spencer. I thought it was a fascinating read!)


rainbow rayon thread plated on the knit side over a wool dress yarn purl side

Adding Structure – My AHA! Moment

The swatch above uses a very thin, thread weight rainbow rayon yarn over a wool dress yarn of about fingering weight to create a fabric that couldn’t exist without utilizing plating. But how did I get there?

When I was a machine knitting beginner, my friend gifted me THREE CONES of thread weight rainbow rayon yarn. It’s lovely. I adore the colors.

But…

The yarn is so thin that I found it difficult to work with on a standard 4.5mm gauge knitting machine. It’s just too small, and I had no clue what I could make with it. Perhaps a light shawl, but I didn’t think that would work.

Plus… rayon isn’t known as “the poor man’s silk” for nothing. It has a smooth texture and a lovely drape. But that drape comes with drop sometimes. Rayon knits can stretch in length under their own weight, and that can create some fit issues like armholes dropping or skirts falling to an undesired length.

So rayon isn’t always a good choice for some projects unless you combine it with another fiber and use it in a blended yarn, but I already had yarn that was 100% rayon with no clue what to do with it…

That’s when my teacher and mentor Pamela Carrico of CMO Designer Knits introduced me to plating. She gave me the wool dress yarn and suggested plating my rainbow rayon yarn on top of it.

It’s. Perfect.

The wool yarn grants elasticity and memory to the fabric and gives it structure due to the way wool fiber clings to itself at the microscopic level with tiny scales. That wool yarn basically negated rayon’s inherent issues.

The wool is about fingering weight and was much more manageable than thread for me as a beginner. The fabric it created was still nice and lightweight, so that meant it was still wearable while being wool, which matters in Oklahoma.

A “what the heck” yarn turned into “this works perfectly” in an instant.

Visual Appeal

The wool yarn has a blush pinkish grey appearance that doesn’t photograph well and didn’t stand out much on its own. As someone attracted to color, I would have passed it up if Pamela hadn’t suggested it.

She knew that rayon needed structure, and she knew my particular rayon didn’t need more color.

Adding the rayon to the wool took it from slightly boring to amazing. The wool didn’t really need anything, but the rainbow colors helped it make a complete fabric.


You won’t always have yarn features or issues to work around like I did, but you might find yourself wanting something more from your yarn, and plating offers that, too.

Lurex metallic yarns are easy to find on sites like Etsy, but sparkle isn’t all you can add to your work. Bouclé yarns add both visual interest and texture to your fabric. The possibilities are nearly endless.

So if you find yourself with a yarn that just doesn’t work on its own, try plating with it!


Plating Issues

Perfect plating places the yarn on the correct side every time, but for me on my standard gauge machine, that meant very careful carriage pushing and checking every row after it was knit. Even then, it didn’t always come out as planned.

rayon rainbow thread yarn on fingering wool dress yarn

If you look closely, you can see plenty of rows where the wool came through on the purl side and the rainbow rayon came through on the knit side. I wanted the rainbow on the purl side and the wool on the knit side for this swatch, but that just didn’t happen.


So where does the LK150 come in?

So far I’ve only discussed my experience with plating on a standard 4.5mm machine, but that’s not what the title said this post was about!

In my personal experience, I have not had the issues with yarns visiting the incorrect side of the fabric when I use the LK150 for plating. Instead of using an interchangeable part, the plating feature is built into the carriage, and I believe this is what makes it a more “stable” plating option.

For the smaller “top” yarn, I’ve used the thread rayon yarn, lace weight yarns, and even sock weight yarns on top of fingering and DK weight yarns. I even attempted plating two fingering weight yarns, which worked, but it wasn’t quite as nice of a fabric as the other combinations.

While preparing this post, I tried running the carriage across the needle bed very quickly, and I still did not experience yarns hitting the incorrect side of the work. This may not be universal and my machine’s younger age (about 3-4 years) might matter. I’m not complaining!

Plating takes yarns that might not be suitable on their own for your machine and makes working with them possible.


How to Plate on the LK150

Thread one yarn into slot 1, thread a second yarn into slot 2 and knit the night away!

That’s all it takes, but you should also make sure the yarns are not close to each other where they might twist or static cling to each other as they feed through the tension unit and carriage. Twisting two yarns together can make an interesting fabric, but that is not what we want in plating.

I can never remember which slot places yarn on the knit side and the purl side, so the first row of my swatches is often opposite of what I intended.

I’ve written it all out here so you won’t have the same problem! I’ll refer to the smaller yarn as the plating yarn.

slots 1 and 2 from the top
slots 1 and 2 from the front, angled upward

If you want your plating yarn to show on the purl side, thread it into slot 2 of the carriage.

If you want the plating yarn to show on the knit side, thread it into slot 1 of the carriage.


Once your carriage is set, swatch for tension and knit as usual!

I really do mean “knit as usual.” You can short row, cable, increase, decrease, and transfer stitches as you normally would while yarn plating.

You will want to be careful about where each yarn sits on the needle with any laddering and latching up to form purls for ribbing or texture stitches. The yarns need to stay on their respective sides of the knit fabric.

The same goes for stitch transferring and fixing dropped stitches. Make sure you catch both loops of yarn and re-hang them in the right orientation.

What do you think? Have you tried plating yarn before? Do you think you’ll try it now on the Silver Reed LK150? Let me know in the comments!

As always, thank you for reading and coming along on my machine knitting journey!

Seminar

Spring Seminar Coming Soon! April 1, 2023

That’s right! It’s nearly time for our next seminar!

Hand and machine knitters, you won’t want to miss this!

We’re learning how to design a custom fit knitted sweater!

Attendees will learn measurement tips and tricks to accommodate various body type needs and draw a body block schematic based off of their own measurements.

We’ll discuss ease—what it is, what it means for fit, and how you may not actually wear the “size” you think you do because of it.

That’s not all! We’ll talk about how material choice affects garment fit and design considerations you should consider when adding elements to your sweater.

Hope to see you there on April 1, 2023 from 10:00AM – 4:00PM at Get Stitchin’ in Tulsa, OK.

Visit Get Stitchin’s website to sign up today!

https://www.getstitchin.com/machine-knitting-seminar

Knitting Machines, resources

Resource Roundup- YouTube Edition

Do you have a favorite machine knitting YouTuber? You will after this post!

Each channel name links to the channel, so check them out!


Anna Haferman

Anna has a tutorial about using a KnitLeader with the LK 150! How awesome is that?

She also has project videos with really clever ways to work fair isle among other things. I’ve been watching her channel a lot lately, and she might be my favorite machine knitting YouTuber!


Diana Sullivan

Diana’s channel features beginner lessons along with cast-on, cast-off, and edging videos.

This pinwheel baby blanket was one of my very first machine knitting projects. (Her channel doesn’t allow embedding videos, so there won’t be a preview for this one.)


Creative Tien

Creative Tien features machine knitting, crochet, and sewing tutorials. I found the channel very recently but have really been enjoying it.

I really like the scalloped edges from this video:


Knitology 1×1

Channel owner Elena works in London as a knitted textiles designer and shares stitch and project tutorials.

The braided cable in this tutorial makes a lovely tank top strap that I can’t wait to try:


Claire Newberry

Although she only has a few videos, they’re worth the watch. Plus, she wears gorgeous sweaters as she films!

I particularly enjoyed her bead knitting video. The swatches she displays at the beginning are gorgeous!


Carole’s Country Knits at Rocking Horse Farm

I believe they might be more active on Instagram, but the Rocking Horse Farm channel is still worth a visit!

My brain isn’t quite happy with the 90 degree rotation from flatbed to circular sock machine, so this short rowing video has been helpful:


The Answer Lady

You may know the channel from the Ask Jack machine maintenance videos, but channel also includes pattern tutorials, tips, and tricks. I’ve seen Circular Sock Machine tutorials recently, too!


The Knitting School Online

TKSO offers more classes on their website than their channel, but you can get a good idea about their paid content through their YouTube content.

This double bed jacquard video made me excited to try out my color changer attachment.


Roberta Rose Meads (previously Roberta Rose Kelly)

Some videos may be “old” by YouTube standards, but the channel is a wealth of knowledge.

I’m obsessed with short rows, so learning you can do intarsia using short rows was amazing! Check it out:


Susan Guagliumi

In addition to her books, Susan Guagliumi has Craftsy videos! Not all of them are on uploaded to YouTube, but if you’re looking to see if her Craftsy content is worth it, and I’ve had many people tell me it definitely is, check out her channel!


Knit It NOW

Sue at Knit It NOW has a wonderful website with a yearly subscription that she introduces on her channel. You can have a free membership with access to some of her content on her website, but YouTube is still a good way to browse some of what you can find at her main site. (Her channel doesn’t allow embedding videos, so there won’t be a preview for this one.)


While in-person learning will always be my learning preference, I love finding new machine knitting video resources!

Who am I missing? I’d love to watch your favorite machine knitting YouTubers.

Thanks for tagging along with me on my machine knitting journey!

News

February Happenings

Wow! January flew by! I hope you all are staying warm and well.


Winter Knit-A-Long Continues

Don’t worry if you missed any meetings in January!

If you’d like to join us in knitting the Festival of Stitches by Lisa Hannes, please do! This is a very casual KAL focused on knitting fellowship as we all finally take time to make something for ourselves.

Every Wednesday from 12:00PM to 4:00PM we’ll be at Get Stitchin’ working on this beautiful wrap.

I’ve had a wonderful time making new friends and chatting with old friends. I hope you’ll join us if you’re in the Tulsa area!


Important Date Change–Machine Knitting Spring Seminar

Originally scheduled for April 8, 2023, our Spring Machine Knitting Seminar is now APRIL 1, 2023 from 10AM-4PM.

Someone, not naming names, (EMILY), used Orthodox Easter to schedule the week before Easter. (I learned something, though. That’s good, right?)

Joking aside, I apologize for any inconvenience this scheduling change might cause. I hope that we have changed things early enough for anyone who has already planned their trip to Tulsa to reschedule without issues.

Again, the Spring Machine Knitting Seminar is April 1 from 10:00AM to 4:00PM.

Visit the Event Page on Get Stitchin’s website to sign up.

Pamela Carrico of CMO Designer Knits returns to share over 40 years of machine knitting experience with us.

We will be learning to make a body block and designing a custom fit sweater from that body block!


Eureka! Fiber in the Ozarks

March 16-18, 2023
Eureka Springs Community Center

Find some ELY Knits handmade goodies among others from the Get Stitchin’ crew at the Eureka! Fiber in the Ozarks festival in Eureka Springs, Arkansas.

Visit the festival’s website to learn more.


Sock Club is coming in March!

There’s more fun coming to Get Stitchin’! Sock Club is starting up in March and will run all year through November. Every 2nd and 4th Saturday of the month from 10:30AM-12:00PM I’ll be going over the Sock of the Month.

If you prefer weekdays, Ms. Terry has a weekday meetup every 2nd and 4th Tuesday.

This is not a class, so you will need to have some experience already, but Ms. Terry and I will be around to help you troubleshoot. This will be a great opportunity for newer sock knitters and veterans alike as we explore heels, construction methods, and new sock yarns.


As always, you can check out my Google Calendar for standing classes, events, and shows.


Class booking and availability will be according to Get Stitchin’s website, so be sure to check their Classes page.


If you would like to book a lesson that is sold out or is not on the schedule, please contact me and we will find a date and time that work for you.


Patterns

The Doodle Beanie — Free Machine Knitting Pattern

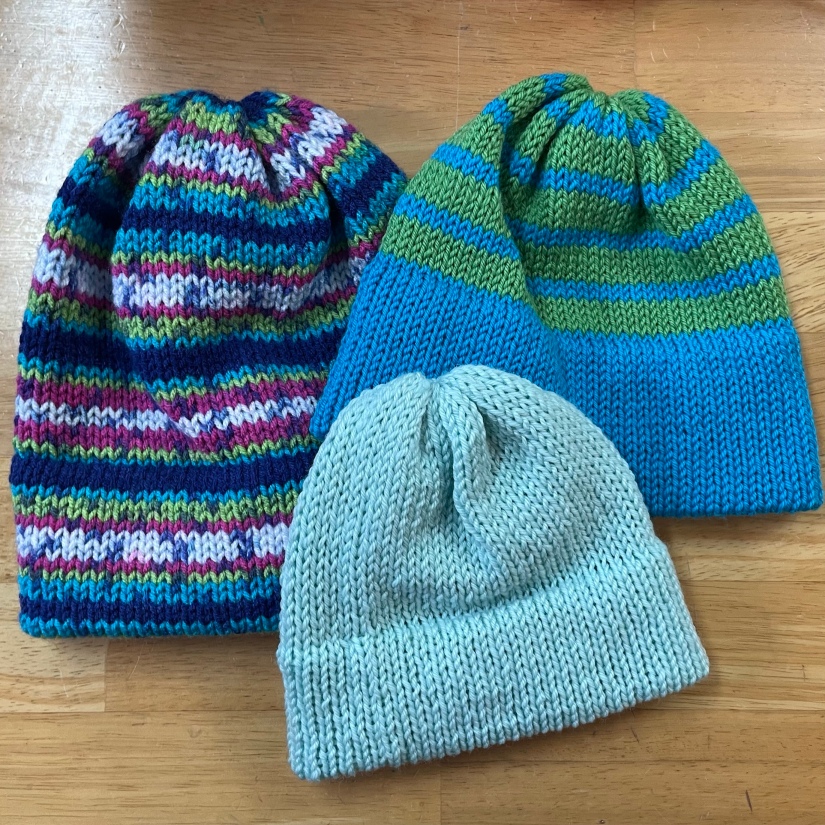
I was playing around on my Silver Reed LK150 a while back and came up with this simple beanie that begs to be customized. This hat has a folded brim and a cinched crown that would look great with an added pompom.

It’s just a rectangle, but it’s the perfect template to doodle around with and try out new things as you develop your machine knitting arsenal of techniques. I hope you enjoy it and put your own spin on it!


Materials

50-150g of Worsted Weight Yarn (Samples use Cascade 220 Superwash Wool at T7)
Silver Reed LK 150 6.5mm knitting machine

Sizing

Baby- 60 stitches, 30L-30R
Child/Teen- 80 stitches, 40L-40R
Adult- 90 stitches, 45L-45R
Adult L- 100 stitches, 50L-50R

Gauge

4 st per in at T7 in Cascade 220 Superwash


The Doodle Beanie concept will work with any machine gauge and suitable yarn. Knowing your stitches per inch from swatching yarn is immensely beneficial, so I encourage you to swatch beforehand if you have no clue what yarns knit best at what tensions on your machine. 


Pattern Instructions 

Set Tension to 7.
E-wrap CO 60 (80, 90, 100) stitches.

Brim:
Knit 20 (30, 40, 40) rows.
Hang hem by picking up the e-wrap and hanging it on the needle above it. 
Knit 1 row at T9. 

Revert back to T7.
Reset to RC000

Body:
This is the place to experiment with stitch patterns, stripes, etc
Knit 20 (30, 40, 40) rows.

Crown: 
Transfer stitches to EON.

Tension down to T6. Knit 1 row.
T5. Knit 1 row. 
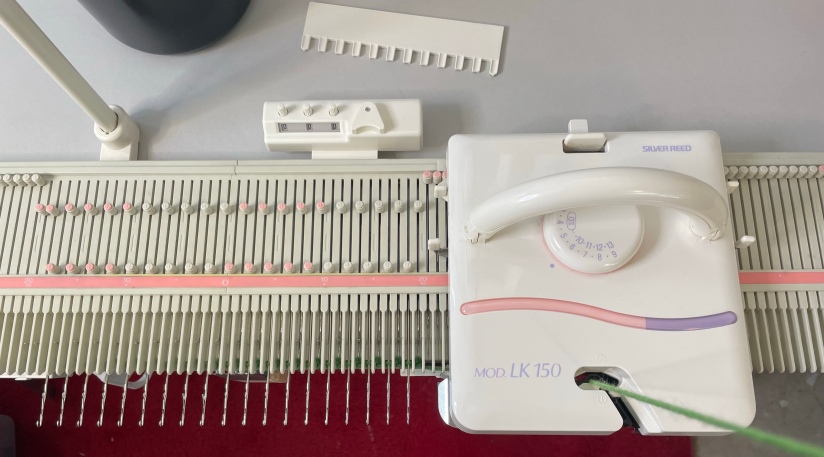
T4. Knit 1 row.
T3. Knit 1 row.


Finishing:
Do not remove stitches from needles. 
Leaving a tail long enough to seam the beanie, cut yarn. 
Thread needle and sew through the live stitches from the opposite side of the tail before removing the beanie from the machine. 
Cinch the top of the beanie together. 
Pull tightly but be careful not to break your yarn. 

Mattress stitch the sides of the beanie together. Weave in ends. Attach a pompom if you like. 


Modification Tips and Ideas

For a rolled brim, halve the number of rows in the brim step and do not hang the stitches.  

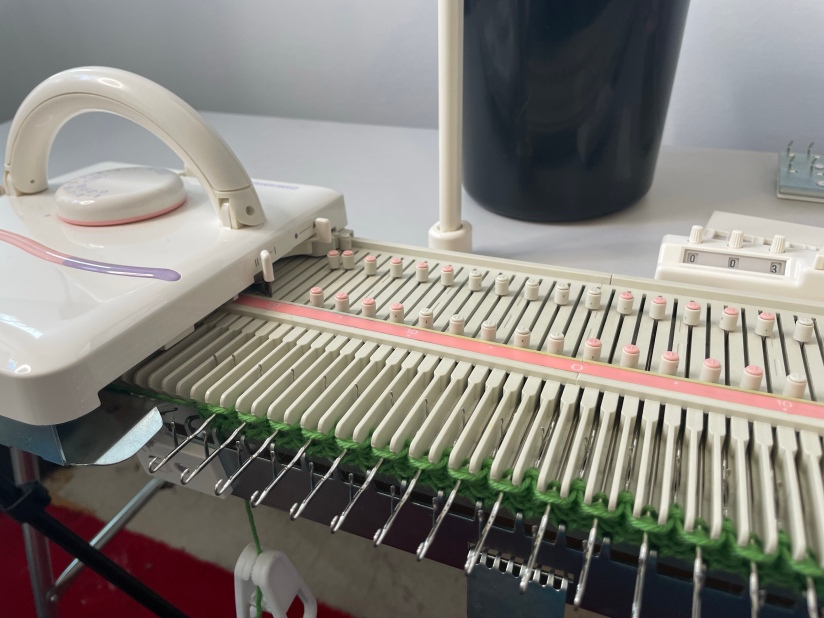
If you are not comfortable using your transfer tools or are in need of a very quick knit, tensioning down alone will work, but you will need to cinch the top together above the remaining live stitches like the pictures below to close the crown. The density of stitches at the crown is why we decrease to EON.


If you want a bit of a slouchy beanie, you can add 5 rows and skip tightening tension in the crown altogether. It will be easier to cinch the top if you decrease to EON.

Try knitting two strands of smaller yarns together or using variegated yarn to spice up the simplest version of this hat. 


Abbreviations

COCast On
BOBind Off
WPWorking Position
CORCarriage on Right
COLCarriage on Left
EONEvery Other Needle
RC ###Row Count ###, i.e. Row Count 023
T#Tension and size number (Tension 1, Tension 2…)

What will you doodle?


Did you knit a Doodle Hat? Please consider sharing your projects on ravelry so I can see what you made. I love seeing project pictures!

If you’d like to help support the site, please consider buying me a Ko-Fi.

As always, thank you for joining me on my machine knitting journey! Let me know what you think below in the comments. I’m also happy to hear from you via my contact form or on Instagram.

News

ELY Knits in Tulsa: January 2023 Announcements

Here’s to a new year and new knits!

This year I’m continuing my work with Get Stitchin’ in Tulsa, OK and offering in-person hand and machine knitting classes at their 61st and Memorial location.

As before, to sign up for a class, you’ll need to visit their Events and Classes page. If you’d like to take one of my classes but the date or time doesn’t fit into your schedule or it’s sold out, please contact me and we can figure out something that will work!


Take a look at my Google Calendar to find out where I’ll be regarding craft shows, classes, and other events. For classes, please refer to the Get Stitchin’ page for availability–classes on my Google Calendar don’t reflect the official sign-up page and the number of class slots available.


Winter Knit-A-Long

I’m hosting my first hand knitting knit-a-long at Get Stitchin’! Now that my hand and wrist have been snipped and snapped back into shape, I’m ready to go!

After a busy holiday knitting season, are you ready to make something for yourself?

Wednesdays this winter we’ll be knitting the Festival of Stitches KAL by Lisa Hannes.

IMG credit Lisa Hannes Festival of Stitches Pattern

From the Event Listing


“Festival of Stitches” is a fun & playful project that will keep you engaged from start to finish! Different sections make it addictive and knit up quickly. The finished item will add a wonderful highlight to your daily wardrobe with a shape that is versatile and easy to wear.
 
This pattern was designed by Lisa Hannes and has lots of fun colorwork. The colorwork design uses easy slipped stitches and color blocking, and we will be here to help you work through this shawl. There are also some cables, eyelets, and stripes, but no super complicated techniques are used in this pattern.

Get Stitchin’ suggests the new Berroco Vintage Sock yarn and will help you print the pattern in-store when you purchase it through them.

This event is FREE, but please sign up on the event page to let us know you’re joining!
(Well, you also have to purchase your materials.)

I have to confess, I already started! Head over to my Instagram to see my spoiler.


Spring 2023 Machine Knitting Seminar

It’s never too early to plan for our Spring Machine Knitting Seminar!
Our first one last October was wonderful, and we think this spring will be just as amazing or better!

Pamela Carrico of CMO Designer Knits is returning as our presenter on Saturday, April 8, 2023.

I’ve teased a bit of our topic in the past, so here’s more:

How can you use a body block to make custom knits?


See My Work in Person

You can find my work along with the handmade art of many other Eastern Oklahoma artists in-store at Get Stitchin’.

In addition to beautiful yarns, Get Stitchin’ stocks many handmade pieces by local artists from yarn bowls and drop spindles to project bags and hand-dyed fiber.

You can support local artists and small businesses all in one place.


That’s all for January

…but there’s much more in the works.

Keep an eye on the site and I’ll keep you in the loop! Be on the lookout for craft show announcements and new free patterns.

Here’s to 2023 being the best it can be!

Knitting Machines, Patterns

Free Step-by-Step Wristwarmer Pattern

Happy New Year, everyone!

You might recognize this stitch from my Using The Needle Beetle with Bonus Baby Blanket Recipe post.

I received a few requests for a step-by-step tutorial (a few of which were tied up in spam filters, so my apologies to those of you who haven’t received a reply yet) so here it is!

This is a nice introduction to tuck/textured stitches for beginners since needle selection and carriage changes are isolated to the first and fourth row of this four-row repeat.

Check the notes after the pattern if you’re interested in modifications! The abbreviation key also follows the pattern.

Solid vs Multicolor in this textured tuck stitch

Materials

Silver Reed LK 150 6.5mm Mid-Gauge Knitting Machine & Accessories
1 ball Cascade 220 Superwash (or any in the 220 family)
-or-
100g worsted weight yarn

Pattern Instructions

Set carriage to Tension 6 or number needed to achieve desired fabric

Initial Setup:
1) E-wrap CO 32 stitches from left to right (16L to 16R). COR
2) Knit 1 row. COL
3) Hang cast on comb and weights. COL
4) Knit 1 row. COR. Reset RC to 000.

Pattern Repeat:
Pattern row setup:
RC 000. COR.
Set Carriage to HOLD.
Place EON in hold beginning with the second needle (16R in WP, 15R in HOLD, etc). Last needle on the left (16L) should NOT be in HOLD. You should have two stitches in WP at the left edge.

Knit 3 rows.

RC 003. COL.

Set Carriage to KNIT.
Knit 1 row.

RC 004. COR

All needles are now in WP ready for selection for the next repeat.

Repeat from pattern row setup 18 times until RC 072.

Finishing:
Knit 1 row. RC 0073.

Perform the Backstitch Bind Off. This can be found in the LK 150 manual on page 38.

Choose whether you wish to use the purl side (the side that faces you during knitting and the side pictured at the top of the post) or the knit side (looks like a wonky stockinette stitch, pictured just above) as the public/outward facing side of your wristwarmers.

Wrap the rectangle around your hand to determine how much room to leave for your thumb and sew up with a tapestry needle using your stitch of choice.

Repeat for second wristwarmer.


Step-by-Step in Pictures

Setup:
RC 000. E-wrap CO from left to right.
Knit 1 row.
Hang cast on comb and weights, being careful not to catch working yarn in the cast on comb.

If you have trouble catching stitches, try pulling the e-wrap forward into the small dip in the needles. Do not pass the latches. (Click to enlarge pictures)


Reset to RC 000. Place EON in HOLD with Carriage set to HOLD before knitting. COR.
Knit across.

RC 001. One row knitted. COL
EON in HOLD should have a strand of yarn over it.

Knit across.

RC 002. Second row knitted. COR.

EON in HOLD now has two strands of yarn over it.

Knit across.

RC 003. Third row knitted. COL.

*RC 003. Set carriage to KNIT. COL.*

Knit across.

RC 004. Fourth row knitted. COR. Needles are in WP ready to be selected for pattern repeat.

Front view of setup rows plus one pattern repeat


Pattern Notes and Modification Tips

This pattern repeat will work with any machine and appropriately-sized yarn.

Stitch count must be a multiple of 2 + 2. The +2 stitches are seaming allowance.

If you change CO and BO types, make sure to use something stretchy. Tuck is a very horizontally stretchy stitch, and hands are active!

Remember to consider the finished project’s purpose when considering changes to a pattern!

Please consider making a tension swatch before you knit.
If you feel like walking on the wild side, note that tuck stitch patterns tend to be shorter and wider than stockinette, so plan on doubling your stockinette row count to reach your desired length.

Weights are very important when knitting tucked stitches. Weight helps the strands over needles in HOLD knit off properly. If you are having issues where stitches aren’t knitting off, try adding weight.


Abbreviations

COCast On
BOBind Off
WPWorking Position
CORCarriage on Right
COLCarriage on Left
EONEvery Other Needle
RC ###Row Count ###, i.e. Row Count 023

Did you make wristwarmers using this step-by-step pattern tutorial? Please consider sharing your projects on ravelry so I can see what you made! I love seeing project pictures!

If you’d like to help support the site, please consider buying me a Ko-Fi.

As always, thank you for joining me on my machine knitting journey! Let me know what you think in the comments! I’m also happy to hear from you via my contact form or on Instagram. I believe I’ve fixed the comment/contact spam filter issue, so please don’t let that stop you!