Blog

Knitting Machines

How to Store Your Knitting Machine

I don’t know many machine knitters who have just one knitting machine. After all, there are three common gauges (4.5mm standard, 6.5mm, mid-gauge, and 9mm bulky) that knit different yarn sizes. It’s wonderful if you’re fortunate enough to have the space to leave all three sizes of machines set up, but that’s not the reality for everyone.

So what’s the best way to store your knitting machine? Options vary, but there are some definite musts for storage.


Between Projects

If you plan to leave your machine set up while you aren’t using it, you should cover it with a sheet or table cloth to protect it from dust.


simple instructions from a knitting machine manual

Storage Musts

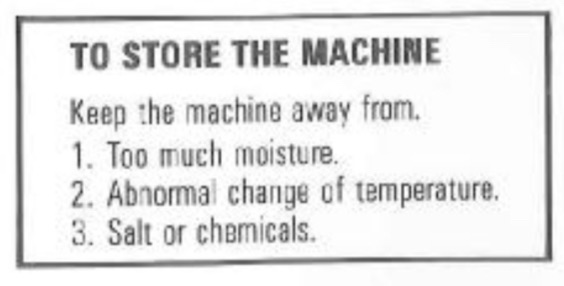
Climate Control is a must. Plastic beds and parts can become brittle if exposed to temperature extremes. Freeze/thaw and extreme heat can also damage the machine’s metal parts. Prevent warping by storing your machine in a climate controlled environment.

storage warning doodle from a manual-Keep away from moisture and heat!

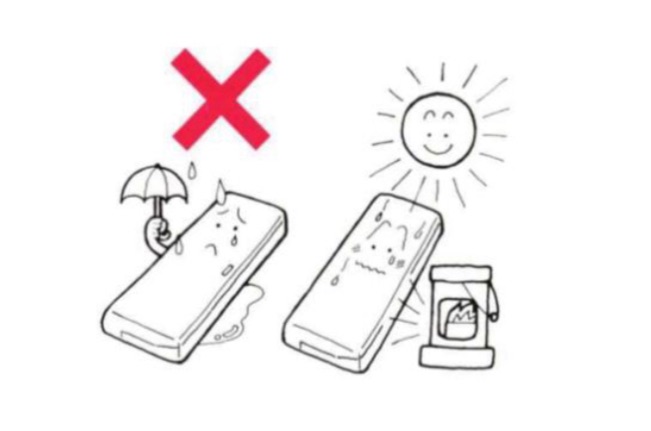
In addition to temperature, you should pay attention to humidity. Metal needles can rust open or shut. Sometimes extensive cleaning can save old needles with superficial rust, but uneven needle surfaces can snag yarn, and it’s generally not worth the time and trouble to try to save them.

Prevent rust and buildup by only storing a clean machine. Excess oils and lubricants can build up and eventually gunk up your machine’s moving parts. They also attract dust.


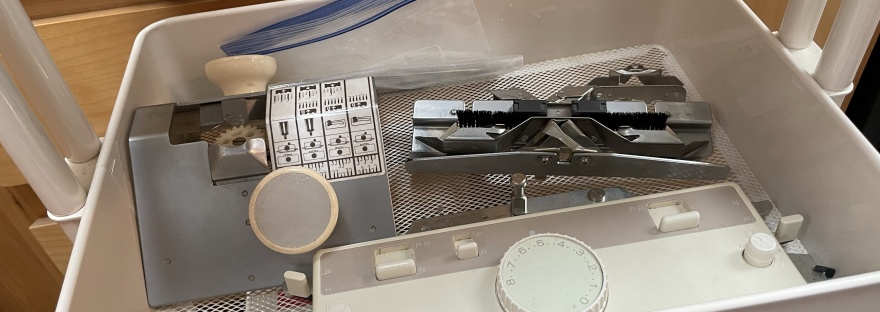
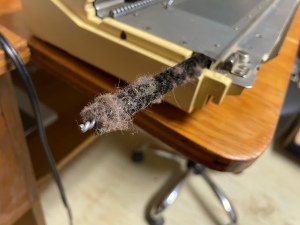
You should consider removing your sponge bar and running a long cat-tail cleaning brush through the channel to catch and remove fiber buildup from the machine. You should remove needles to make sure the brush doesn’t get stuck in the channel, so you might prefer to do this step for long term storage only. Removing the sponge bar also prevents any degraded sponge from falling apart in the machine, but hopefully you won’t be storing your machine quite that long!

fiber buildup in the sponge bar channel

Keep Your Boxes

If you have the box your machine arrived in, keep it! Even if your machine comes with a lid and is its own case, keeping the box can prevent dust buildup on the case.

I’ve had to scrub some interesting mystery substances off of the outside of knitting machine cases. A little extra protection can’t hurt.


Machines Without a Box

If your machine does not come with a built-in case lid and you do not have a box, you have a few options.

Rifle cases are often long enough to store a knitting machine bed or a ribber. If you choose to go this route, be sure to measure all dimensions of your machine-length, width, height, and depth, before purchasing a case.

If you lack a box and don’t like the idea of a gun case, you can always build your own box. Big box stores that carry large appliances, appliance specialty stores, and furniture shops often have excess boxes and are happy to give them to you at no charge if you call and politely request some. This option can use quite a bit of tape to secure the box’s shape, but your machine will be secure in its custom box.


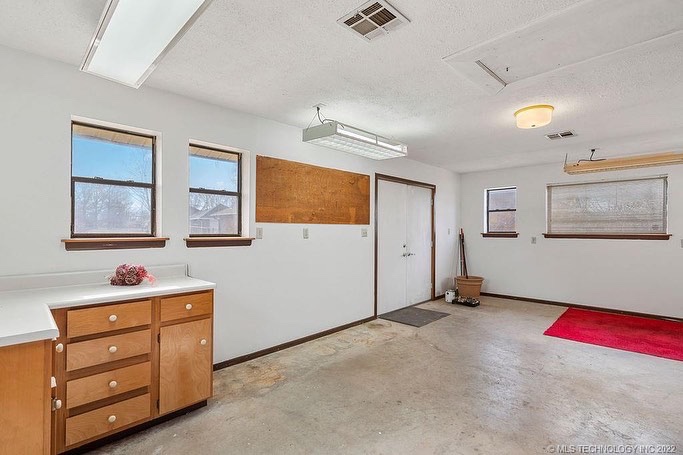
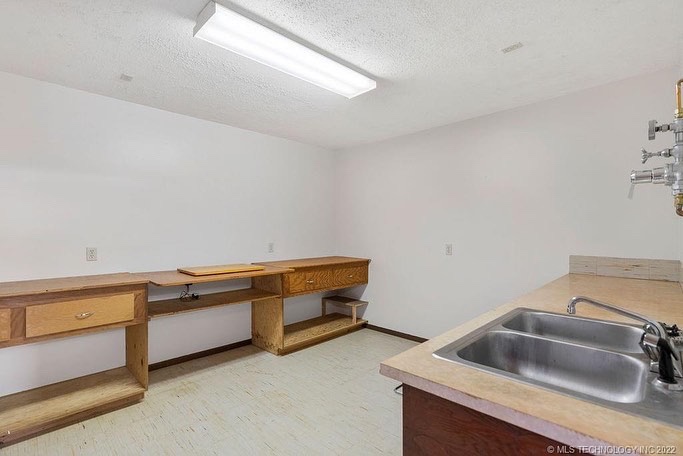
Where to Store Your Machine

Your machine is clean and safely tucked away in its box, but where do you put it? Many machine knitters store their machines under a bed or in the back of a closet. If you plan to lift and store your machine on a high shelf, be sure to ask for help. Metal bed machines weigh around 40lbs and can be unwieldy to lift because of their length.

If you prefer to build or buy a shelving unit, be sure to check that it can support the weight of your machines. I bought a heavy duty garage shelving unit with wood shelves for my studio that can support up to 400lbs per shelf. Some less expensive, wire rack storage units are the same size but support much less weight, so make sure to check the manufacturer’s specs before hefting your machine onto any old shelving unit.


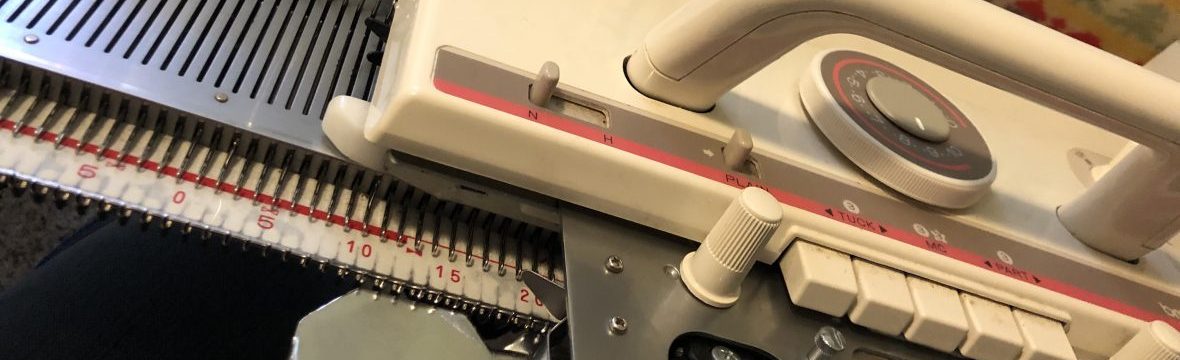
What’s Wrong With This Picture?

storage examples

My garage shelving unit can hold all of these machines, but there are still a few issues here. Make sure that your machines and accessories aren’t hanging off the shelves when you store them. (Don’t worry, things were safely stored right after this picture.)


Rumor or Warping Hazard?

The bottom shelves in the picture have machines stored with the case handle and latches pointed upward. I’ve read in multiple forums online and seen warnings in social media groups that storing machines latches up as opposed to latches stored facing horizontally can warp the knitting machine bed.

That’s scary! Can you work on a warped bed?

I read through the manuals of many different models from Brother, Toyota, and Silver Reed, but I didn’t see any notes about machine orientation in storage.

I contacted Knitcraft, the importer of Silver Reed knitting machines in the United States who I’m also a Silver Reed dealer through, and they had this to say:

We have not heard of any issues with warping. Maybe if you have a lot of heat with the LK[150] it could possibly bend standing straight up, but we have not had any of that happen here.

We would suggest lightly wiping [the machine] down with oil and keep the lid on the metal bed machines. Do not store in a spot that can get rusty or frozen or exposed to light. Best places to keep them are in a closet away from the elements. For the LK 150 it would be optimal to store it back in the original box it came in. If leaving up on a table, drape a tablecloth over the machine to keep dust off.

Knitcraft

Have you ever had a bed warp from storing it latch side up? Please let me know! I’ve read the warnings but not seen any actual accounts or pictures of warping from side storage.

If you are concerned about any potential warping, store your machine laying flat as if it were in use. I have traveled with my machines with the latch and handle facing up, but I place them flat for long-term storage. That rumor did make me worry even though those at Knitcraft have not heard of any warping actually happening.


What Improper Storage Can Do

I have a Brother KH 260 knitting machine with a warped bed. It was passed along to me in that condition since I’m teaching myself to fix machines, but that is one of many things I don’t yet know how to address in machine repair.

I don’t know what caused that machine to warp, but I do know it was stored in an attic for many years after its original owner passed away. You can see my attempt to clean it in this post from a couple years ago. I ended up deciding to keep the machine for parts instead of continuing with a restoration.

That machine could still knit stockinette stitch, but I do a lot more than that in my knitting. The punch card unit is cracked and doesn’t function, so I couldn’t test how it worked. Hand selected patterning kind of worked, but only after I removed a lot of oil residue from the carriage and reinstalled some missing springs.

So that’s it-a knitting machine might still function fine with a warped bed, but I never got past stockinette due to other damaged parts. It’s a shame to see a once-loved machine become scrap due to storage, especially a vintage machine that isn’t in production anymore. Some vintage machine brands have dupes so you can buy brand new parts that will work, but the parts aren’t necessarily the same quality as the originals. That lovely Brother KH260 is just back up scrap parts due to improper storage.


Protect your vintage knitting machines by storing them properly in a climate controlled place!

How do you store your knitting machine? Let me know in the comments, especially if you have any experience with a bed warping over time!

Thoughts and suggestions for what you’d like to see articles on can go down in the comments or through the contact form!

Thanks for coming on this machine knitting journey with me! If you like what you see and want to help me bring more machine knitting content, please consider supporting me on Ko-fi.

https://storage.ko-fi.com/cdn/widget/Widget_2.jskofiwidget2.init(‘Support Me on Ko-fi’, ‘#29abe0’, ‘J3J45DOLK’);kofiwidget2.draw();
Accessories, Knitting Machines

The EEW Cone Winder- Unboxing and Initial Thoughts

If you’re familiar with the Electric Eel Spinning Wheel, you might know that Maurice Ribble of Dreaming Robots, the mind behind the magic, recently released an electric cone winder

I backed the project on Kickstarter in 2022. I have only backed three or four Kickstarter projects, but I have to say, Dreaming Robots was great about keeping backers in the know about the state of the project and allowing input. I forgot to fill out the address form when it came out, so my winder arrived in December, but that’s all on me! (Facepalm) I paid the Kickstarter backer price of $189 plus shipping. The cone winder now retails at $259 and is in stock as of the time of writing.

each block is ~1 inch for size reference

The winder was packaged securely and nothing was damaged in shipping. I opted for 10 cones with my winder.

The manual is straightforward and comes with a template to show you how to lay out the tension unit and winder unit. I love that. I’m not great at eyeing measurements, and even though my blocking board lays things out by square inches, I can still measure things incorrectly. It’s a skill.

The cones are 27 grams according to my scale, and I like that they come in different colors. It’s fun. They look pretty cool on the inside once they hold yarn, too.

Assembly was straightforward and well laid out in the manual. There are excellent videos and written instructions on how to use the EEW Cone Winder on the Kickstarter page and FAQs on the product page. I avoided watching anything or reading anything but the initial Kickstarter campaign and the user manual before testing the winder for this post.


Initial Test-Winding Yarn from a Hank

I decided to cone up some of my friend Suzy’s yarn, Woolyboogers Felts. She works out of a studio next door to Get Stitchin’ and exclusively sells at craft shows and Get Stitchin’, so she’s just another great reason to stop by if you’re in the Tulsa area.
(You can sign up for one of my classes while you’re there! Standing classes the 2nd and 4th Wednesdays and Saturdays of the month!)

I used knitting machine clamps and the included tension unit clamp to hold the units in place on my counter, and I initially had my yarn swift (this thing) on the counter next to the winder. That meant the yarn was coming down from the swift to the counter level tension unit.

Using speeds 1 and 2 with the loosest, straight tension setting, I wound the 438 yards of sparkly goodness onto the cone. Well, the winder did all of the work. I supervised.

“professional” placement! haha

On the lowest settings and loosest tension, it took a few minutes to wind, but I wanted to be cautious learning the winder. I had a couple of issues with feeding into the tension unit from the swift when I had it sitting so much higher than the tension unit intake. It worked much better when I moved the swift to sit on a chair and the yarn intake was more level with the tension unit as it fed yarn in. The yarn winder had plenty of power to wind from the swift, but I found on the lowest tension it had to work a bit harder if the hank on the swift was held too tightly or the yarn was caught underneath itself.


After the slow speed test run with Woolyboogers, I decided to cone up four skeins of Berroco Modern Cotton DK. (I’ll be reviewing it soon, so be on the lookout for that post in the future!) 

warm light | cool light

I wound each skein at a higher speed than the last, with the final at speed setting #5. I was catching a breeze from the swift at that point! I used the higher tension winding setup as shown in the manual for this yarn. 

It looks great coned up! The cone has two small holes at the top for you to attach the yarn label and then store in the center of the cone.

I prefer a more tightly wound cone of yarn, especially for fibers like cotton. The looser tension setting is probably more ideal for delicate yarns. I didn’t experience any yarn breakage, and I did “jam” the winder a couple times. More on that in a bit.


Turn up your audio to hear what the EEW Cone Winder sounds like at speed #5 in my Instagram video below. My pictured setup isn’t ideal, but what I had worked just fine!

I wouldn’t say the cone winder is loud, but it definitely isn’t silent. You can hear it working rhythmically, but I didn’t find it unpleasant. 

If you’ve wound a lot of yarn into cakes before, you’ll appreciate the electric cone winder doing the hard work for you. Your arms can get tired after a thousand yards, but with the winder, you’re just turning a dial after a little yarn threading. Easy peasy!


Experimenting and User Error

Ah, the aforementioned jam.

The only issues I ran into using the electric cone winder stemmed from user error and experimentation with yarn swift placement for intake through the tension unit.

At one point, I was pulling additional yarn lengths from the swift because the winder seemed to struggle with pulling directly from the swift.

I shouldn’t have been pulling additional yarn out. The winder didn’t need my help. It operated fine, albeit slowly, when I stopped feeding it yarn myself at low settings as well as after I increased the speed dial setting.

While I was pulling that additional yarn from the swift, knots and loops developed in the yarn and happened to hook themselves around the metal guide spiral. The winder kept going for a tiny bit (of course, it is set to ON and rotating) BUT then it stopped.

When I read the FAQs on the product page, I found the motor stopping is by design, and I appreciate that it stopped and didn’t break my yarn!

This is by design. It is bad for the motor to continue trying to spin when it is not spinning. At low power this can happen when it’s trying to spin slowly but there isn’t enough motor to actually spin the drum. In this case the motor will turn itself off until it sees no attempts to spin for 3 seconds. To work around this turn the speed dial to off and then wait three seconds and it will resume normal operations.

from the FAQs at https://www.dreamingrobots.com/eew-cone-winder/

This is one of the reasons why you don’t set the winder and leave it. If something happens, that delay gives you time to fix things.

I’ll say it again: winder does have enough power to be able to pull yarn off of a swift through the tensioner unit, but at low speed settings with looser tension it seemed more likely to knot up or loop around the metal guide spirals on the tension unit, especially if the yarn wasn’t feeding in quite even with the tension unit (that pesky user messing with it…). It may seem counterintuitive, but I didn’t experience the same looping when I upped the tension and the winder speed (and left well enough alone). Pulling extra yarn from the swift to feed into the tension unit just gave the yarn opportunities to form knots and loops and catch on the tensioner.

Yarn placement is important, and getting it right makes your experience with the cone winder much smoother.


Why Buy a Cone Winder

As someone with hand and arm issues, I am so excited to have a way to wind that doesn’t depend on my arms functioning well that day. And, since cones are the most ideal yarn put-up for machine knitting, I can say goodbye to my awkward cake yarn winder. It served me well, but I’m happy to move on, and I won’t miss the occasional loops across the top and bottom that sent my yarn rolling.

At $259, the electric eel cone winder is not cheap. That’s a chunk of change for anyone, but if you want to use hand knitting yarns by machine and your ball winder isn’t cutting it, I think it’s worth the investment, especially if you have years of knitting in front of you, or if you are like me and have issues with your hands, wrists, and arms in general. Cutting out the winding motion lets me use my body’s limited energy to work on actual knitting.

All opinions are honest and my own. Purchases are made with my own money. Links may be affiliate links. If you choose to purchase something using my Amazon affiliate link, I may earn a small commission at no cost to you. If you don’t have somewhere local to purchase your machine knitting needs, please consider using my links to support the site! 

Thank you for joining me on my machine knitting journey! How do you prepare your yarn for machine knitting? Will you invest in a cone winder? Let me know in the comments! 

Book Review, Knitting Machines

Machine Knitting Techniques: Texture and 3D Effects

If you have a little bit of Christmas Cash and you feel like investing in yourself for the New Year, pick up the newly-released Texture and 3D Effects Machine Knitting Techniques book. Amber Hards teaches texture and playfulness in her essential addition to the series.

“[Hards] encourages you to explore and experiment with confidence to produce exciting, tactile knitwear.”

publisher’s blurb

Find it here on Amazon.


The Details

Published: January 1, 2024 (US/NA)Publisher: The Crowood Press
Format: PaperbackPages: 144
MSRP: $24.99Canada: $32.99

Chapters

Materials and StripesManual Tucks
PunchcardsWeaving
I-cords, Strips of Knit, & 3D EmbellishmentPartial Knit: Frills, Bobbles, Loops, 3D Scales
Lace Holes & LaddersPattern Collection

Overview

Amber Hards is a UK-based knitwear designer and maker who has been teaching machine knitting since 2016. Her website showcases years of her work, and I encourage you to give it a look. I especially recommend viewing her “Loving Love” show. You can see why those behind the Machine Knitting Techniques series enlisted her aid with tactile knitting!

The Crowood Press set a high standard for photographic instruction with their Machine Knitting Techniques series, and Hards meets that here. Instructions are clear with illustrative photos. Hards uses color contrast strategically to illustrate steps and movement of textures, but the generally monochromatic palette helps you visualize the textures of the stitches.

The “Pattern Collection” at the end of the book is a bit underwhelming with only two patterns, but remember that this is a technique book. The focus is, as it should be, on technique instruction.

Practicality

“When I show students more textured skills, they often express feeling overwhelmed by the process. As different techniques are often presented as all-over swatches where the stitch or technique is packed together throughout the swatch, many of these textured effects often feel too “runway” or high fashion for a beginner or casual machine knitter. “Where on earth would you actually wear that?” is a common question.

You don’t have to use these techniques all over! A large shawl completely done in one technique can be stunning, but remember that small, pinpointed uses of these details can add to an otherwise simple garment.


This partial knitting shawl I made in 2019 looks like a myriad of connected i-cords or winding snakes of stockinette stitch. It was created by moving groups of needles in and out of work.

Designer Linda Jensen uses the same technique for the bodice of this Ripple Top. Confining it to one part of a garment doesn’t diminish the visual interest this stitch generates. It just refines it.


Pintucks in the shoulder area add interest to an otherwise simple October Cardigan by Jesie Ostermiller. Using them over an entire cardigan could be interesting, but confining the texture to one area created a way to draw the eye upwards.


This October Cardigan was knitted on my Passap Bulky Eight and was one of the first machine knitted projects I created.

It’s not perfect, but I learned so much making it!

Why don’t you try choosing a technique from Texture and 3D Effects and place it in a similar location as the pintucks in this cardigan?


Buy or Bypass?

Of the Machine Knitting Technique books released so far, I suppose you could skip this one, but I think that would be a mistake. Developing skills like these can help you in your other works. Paying attention to how textured stitches are weighted while you knit them, for example, helps you become more aware of your work as it sits on the machine.

Texture and 3D Effects might feel like it is written more for the aspiring designer than your everyday machine knitter, but let’s face it- if you are a machine knitter, you need to learn to be comfortable being the designer yourself because of the lack of available patterns.

Hards encourages playfulness in machine knitting, and I applaud that.

Rating: 4.5 out of 5.

I hope you’ll explore your creativity on the knitting machine even more this year and realize that you might just already be a designer.

Happy 2024!

Thank you for joining me on this machine knitting journey! What texture technique from the book will you try first? Let me know in the comments!


Disclaimer: Links on this site may be Amazon Affiliate links. If you choose to purchase an item using my affiliate link, I may receive a small commission at no cost to you.

If you don’t have a local shop to support, please consider using my link and supporting the site!


I purchased this book with my own money. All opinions are honest and my own.

If you would like to submit a book, yarn, accessory, or other idea for review, please contact me through my contact form.


Like what you see and want to support the site?

https://storage.ko-fi.com/cdn/widget/Widget_2.jskofiwidget2.init(‘Support Me on Ko-fi’, ‘#29abe0’, ‘J3J45DOLK’);kofiwidget2.draw();
organization

The Craft Cart

It’s not technically a knitting machine accessory, but it sure does make life easier! If you don’t use one already, consider getting a craft cart to help organize your machine knitting tools and accessories.

I use a three tiered craft cart to keep my weights, carriages, and accessories organized and contained while I work.

I’m a bit scatterbrained on the best of days, so having a system where everything has its place really helps me stick to a task without distractions. I’m much less likely to lose things when I have a system.

This cart used to be organized with one tier for each gauge and a miscellaneous hand knitting tier when I started machine knitting with just a Brother KH890 and a Passap Bulky Eight, but my collections have a tendency to grow, so I plan on setting up one cart per machine gauge–standard, mid, and bulky.

I keep my most frequently used bits in the top drawer of the cart and use small makeup pouches or pencil cases to keep things like scrap yarn, ravel cord, and safety pin style stitch markers separate.

The middle tier holds plating and ribber accessories …

… and so does the bottom tier. If those ribber weights are on a tabletop somewhere, I can guarantee you they’ll find their way to landing on my foot, so those things get corralled!


My cart doesn’t always look this organized. Of course I cleaned it up for pictures! I often use clip boards or binders to keep my patterns and notes contained, so they float between tiers. Post-It notes with ideas and pattern modifications get scribbled and stuck to the nearest surface so I can continue working with fewer distractions.

I use a metal tilt stand for my standard gauge machine, and it has a shelf for the lid that I use to store the cast-on combs. My LK150 sits on a table or a counter, so I’m looking at a cart with a pegboard-style organization system that hangs down the side.

I’m currently using a lop-sided trash can that was slightly crushed in our move to keep my mid-gauge accessories in one place, so whatever system you decide to use, I’m definitely not going to be judging it.

It’s just important to have one!

How do you organize your knitting machine accessories? Do you have any suggestions for my system? Let me know in the comments below or contact me!

Thanks for reading and joining me on my machine knitting journey!


Book Review

Machine Knitting Techniques: Cables

The Crowood Press has released quite the handful of machine knitting books recently, and you won’t want to miss them. Bill King, someone you might recognize from his regular contributions to Machine Knitting Monthly, shares his wealth of knowledge in this Cables edition of Machine Knitting Techniques.

Once a few basic techniques have been mastered, the number of cable designs available is virtually endless.

The Crowood Press

The Details

Published: 2023Publisher: The Crowood Press
Format: PaperbackPages: 112
MSRP: $21.99Canada: $28.99

Chapters

The Basics of Cable Knitting on the MachinePress Off Relief
One Tool Cables on the Single BedSuper-sized Grafted Cables
Racked Cables on the RibberCables and Fisherman’s Rib
Deflected or Moved Ribs3×1 Mock Rib Cables
Partial Knit CablesCable Miscellany
Pattern Collection

Overview

Bill King is a freelance knitwear designer and technician who has worked extensively for the knitwear industry in the UK and overseas. His designs have sold to Calvin Klein, DKNY, Anthropology, amongst others. With 40 years of knitting experience, Bill holds regular knit workshops and seminars in the UK and has written the Masterclass feature in Machine Knitting Monthly for the past ten years.

Vogue Knitting Live

Machine Knitting Techniques: Cables is a skill book and focuses on instruction rather than patterns, though it does offer four patterns with instruction for three sizes each at the end of the book.

Examples are shown on a standard 4.5mm gauge machine, and most use a ribber bed, so you will need a ribber bed to get the most out of the book.

Instead of schematics, it has needle layout diagrams. If you are new to this type of diagram, it might take you a bit to get used it, but they are straightforward. Over a grid where each square represents one needle, a “|” symbol denotes a needle in work while an “o” denotes a needle out of work. You might sometimes encounter this type of diagram without the grid, as well.

Each new skill has an accompanying exercise with step-by-step instructions so you can practice. From intarsia to plating to tuck stitches, almost every type of cable combination you can think of is in this book.


Project Idea! Keep your exercise swatches and make a patchwork sweater!


Bill King Has Me Thinking More Like a Machine Knitter

The vast majority of my yarn friends are hand knitters or crocheters, and Ravelry is still my go-to for pattern browsing and inspiration. I’ve hand knitted so many cabled things and designed a few of my own, so I’d say I’m at least an intermediate cable knitter. Well, hand knitter.

I never thought about things like Press Off Relief or Mock Ribs. I didn’t need to think of things like that in hand knitting since I could simply knit a few stitches a little bit looser or perform a purl stitch to make a rib. The confines of my hand knitting didn’t need that sort of experimentation or modification. If I wanted to experiment with cables and crossing stitches, I just picked up my needles and started knitting.

Bill King doesn’t shy away from the limitations of the knitting machine. I feel like he leans into them. By making sure the reader understands what things that don’t work well, he reminds the knitter that there are possibilities in the workarounds. Because I spent a decade hand knitting before approaching machine knitting, I found myself thinking “that just doesn’t work well on the machine, so I’ll do it by hand.” King has not only proved that notion wrong, but has inspired me to experiment more with what is actually possible on the machine.

Rating: 5 out of 5.

I appreciate the years of industry knowledge King shares in the Cables technique book. If you’re looking for an extensive look into cabling on the knitting machine, you need to pick up a copy.


Where to Buy

If you don’t have a local shop to support, please consider using my amazon affiliate link to purchase your book. I may earn a small commission at no cost to you, and it helps support the site.

Thank you for joining me on my machine knitting journey! Do you have Machine Knitting Techniques: Cables by Bill King? What is your favorite new cable technique? Let me know in the comments!

yarn review

CONE Yarn Review: Brown Sheep Nature Spun Sport

It’s fall, y’all! …well, it is autumn according to the calendar.

Sweater weather hasn’t fully arrived yet in Northeast Oklahoma, but I am here for you with a seasonally appropriate review of Brown Sheep Nature Spun Sport 100% wool yarn ON CONES!

Before we get into my knitting experience, here are

The Details

Fiber Content100% Wool
Yardage/Meters1682 yards / 1598 m
Ounces/Grams16 oz / (1 lb) / 452 g
Yarn Weight/SizeCYC 2 / Sport
Made InMitchell, NE, USA
AvailabilityBrownSheep.com, Brick-and-Mortar Local Yarn Shops
Construction3 plies
Put UpCone
Hand WashYes
Machine WashNO
Flat DryYes
Machine DryNO
MSRP$55.80
Price Per Yard$0.03

Additional Info
•This yarn will felt if you do not follow proper care instructions.
•NatureSpun is treated with a moth proofing agent at the time of dyeing that makes the wool “unpalatable to the wool moth larvae.” (See their FAQ page for more details.)
•The main wool breeds used are Corriedale, Rambouillet, and Columbian.
•This construction is available in fingering, sport, worsted, and chunky yarn weights.
•Sport and Fingering are the only options that come in cones.


mid-work on a standard gauge knitting machine

Machine compatibility

4.5mm StandardYes
6.5mm Mid-GaugeYes
8mm / 9mm BulkyYes

Mid to high tensions felt best on a standard gauge machine. Low-mid tensions felt appropriate for the mid-gauge machine. Low tensions are appropriate on a bulky machine unless you plan on using specific techniques that require looser gauge.

(If you’re wondering, I knitted the pictured sweater at Tension 5/5 for the ribbing and Tension 10 for the colorwork.)


What I’m Looking For

I’ve laid out what I’m looking for in a book in recent reviews, but I haven’t really talked about what I want in a yarn. The completely unhelpful answer is “It depends.”

It’s about purpose.

Am I indulging myself in a luxurious, expensive specialty garment, or am I making a jacket I am going to wear every single day? Is the item for someone who will take the time to properly wash it, or is it for a busy new mom who barely has time to think, let alone check the care label on some knitting she got from Auntie Em?

I want to say I’m a bit of a yarn snob because the yarns I end up choosing for personal projects tend to be hand dyed from indie dyers that are specific wool breeds. I want that handmade, one-of-a-kind element to be there from start to finish.

But I can also appreciate acrylic and will argue that has its place in your stash alongside your finest, rarest fibers.

My considerations boil down to
•Will this work on my machine(s)?
•What is its purpose (everyday workhorse vs luxury) and does it meet it?
•How does it feel on my skin?
•Is it easy to care for as a gift?
•What are the color options?
•Is it sustainable/renewable? (This can be difficult to answer depending on the amount of information available)
•How does it block?
•Does it match the claims it makes? (i.e,. “just like silk!”)
•Is this going to be discontinued just because I like it?

I’m kind of kidding with that last one, but I’ll admit I’ve started to stay away from brands that are always introducing new yarns and then discontinuing them after a year. If it’s gone by the time I get to knit with it and I can’t find more, why bother even trying it? That’s a major yarn peeve!

Speaking of yarn peeves, you may not mind these things, but I sure do!

•Knots in low yardage skeins
•Knots in general
•Donut put-up
•Quickly discontinued
•Splitty construction
•Loose/easily lost labels (especially those wrapped but unsecured labels on those dang donuts)


sweater on a wildflower bed of saltmarsh asters

Knitting It Up

I bought this yarn to knit the Sweet and Simple Block Jumper by Kandy Diamond from her new book, Discovering Machine Knitting. (Check out my review here!)

Nature Spun has a great selection of colors. The two colors I used, Autumn Leaves, an olivey chartreuse, and Pomegranate, an autumn red, had very nice depth of color due to a tiny bit of added black. It really made the colors pop.

With more than eighty vibrant colors spun in four different weights, the possibilities are unlimited for creating something beautiful with Nature Spun.

BrownSheep.com

When I think of 100% wool yarns, I think “scratchy,” but that isn’t the case with Nature Spun. It is a bit more textured than a chemically treated superwash wool yarn version, but that is normal.

Nature Spun is pleasantly soft and squishy with a bit of a size bloom in the twist as it comes off of the cone. Brown Sheep Company classifies Nature Spun Sport as a CYC 2 yarn weight, but I wouldn’t call you wrong if you said it was a light DK or CYC 3 weight, as it is on the heavier end of “fingering” weight yarns.

This yarn flowed very nicely through my machines. I didn’t encounter any breakage or splitting, and when I needed to un-knit a few rows due to a punch card mispatterning, it didn’t cling to itself or create fiber halos around the strand of yarn as I unraveled it. It did shed a slight bit of fuzz as it went through the knit carriage, but others wools I have worked with shed the same amount.

having a soak


I lightly steam blocked the sweater pieces before putting the sweater together. After a bath in some Eucalan, I wet blocked the finished sweater.

The yarn bloomed a tiny bit more after a steam and a soak, but the stitch definition is still nice and clear.

This wool is WARM. Much too warm for Oklahoma in general, but I had to try it on even if it was 82F outside when I finished. If you’re at higher latitudes, this should keep you very warm in the winter.

If you’re picky about your yarn’s sourcing, Brown Sheep Company says it sources its wool from local growers, and the entire process save wool scouring, carding, and combing is done at their Nebraska location. Plus, they are family owned.


Final Thoughts

This yarn is much nicer than I expected it to be, especially as a nonspecific wool blend at $0.03 per yard. Brown Sheep Company’s product listing claims “breathability, resilience, vibrancy, and warmth,” and I haven’t experienced anything to contradict that.

I joked with my husband that we needed to buy a building downtown and open up a yarn shop just so I can get a wholesale account with Brown Sheep Company. I really enjoyed working with this yarn, and I plan to purchase more of it. I personally don’t mind its care requirements, but if you plan to gift an item made from this, make sure your recipient knows how to wash it. It’s basically a one-season/winter only garment yarn in Oklahoma, but I think it’s worth it. I give it a solid

Rating: 4.5 out of 5.

Brown Sheep Nature Spun Sport on Cones is a workhorse yarn you’ll want to add to your stash.

Thanks for joining me on my machine knitting journey! I hope you’ve enjoyed my review. What factors do you consider when judging yarns? What do you want to see next on the blog? Let me know in the comments or contact me through my site form.


Disclaimer
I purchased this yarn myself. All opinions are honest and my own.
Amazon product links may be affiliate links. As an affiliate, I may earn a small commission at no cost to you if you choose to use my link. If you don’t have a local place to support, please consider supporting the site and using my link.


Book Review, Knitting Machines

Discovering Machine Knitting by Kandy Diamond

I love my vintage machine knitting book collection, but new machine knitting books just make my day. They’re proof that machine knitting isn’t dying — it’s still evolving, and dare I say, growing.

Discovering Machine Knitting by Kandy Diamond releases in North America on October 10, 2023.

It’s more than just an eye-catching cover. Here are my thoughts:


Perfect for beginners, it starts with how the machine works and how stitches are formed, all the way through to shaping garment panels to your desired size and fit. Each chapter focuses on different skills that build throughout the book, with lots of projects so you can put the skills into practice and make some knits for yourself.

If you work through the step-by-step instructions and projects in this book, by the end of it you will be designing and knitting your own garments!

Excerpts from the publisher’s blurb

The Details

Published: 2023Publisher: The Crowood Press
Format: PaperbackPages: 160
MSRP: $24.00Canada: $32.99

Chapters

Chapter 1: Before You StartChapter 2: Getting Started
Chapter 3: Pattern and Garment ConstructionChapter 4: Simple Shaping
Chapter 5: Colour and DesignChapter 6: Level Up – Ribber
Chapter 7: Design Your Own

What I’m Looking For

If you missed my last book review on Alison Dupernex’s Creative Machine Knitting, here’s the rundown on what I look for in a machine knitting book.

Schematics are the first thing I look for in a knitting book of any kind. Schematics make it possible to change yarns and still have a correctly sized finished garment. For plus-size knitters like myself, they make it much easier to adjust sizing. It’s non-negotiable for me– a “good” book requires schematics.

I want to see what makes up the designer’s perspective. What makes them unique? How do they work with the classics? What do they bring to the crafting community, and what do they think of that community?

If a book touts itself as a skill book, I want to see pictures and detailed how-to’s throughout. Machine knitting can become intuitive, but setup often includes multiple steps that are easy to miss if someone becomes overwhelmed during the learning process.


Overview

Discovering Machine Knitting by Kandy Diamond is a start from scratch course based on using a standard gauge (4.5mm) domestic knitting machine, but that doesn’t mean users with other gauge machines won’t find it useful. Basic skills translate between machines, and while mid-gauge users (6.5-7mm) will need to learn to hand select needles for colorwork, the skill-building projects are still worthwhile.

Diamond begins the book teaching readers about the knitting machine itself–parts and accessories; stitch formation; fiber considerations; basic cleaning, maintenance, and troubleshooting.

Chapters each teach a different set of skills and are further divided into sections with detailed written instructions accompanied by step-by-step photos and colorful diagrams. Example pictures use bright and easy to see colors with contrasting colors illustrating notable instances in the knitting process.

Designer profiles throughout the book introduce readers to artists across the industry, offering more perspectives to beginners along with showing the possibilities of what they, too, can do after they have completed the book’s course.


Thoughts

I greatly appreciate those with decades long machine knitting careers who have shared their work with us, but I often feel a generational disconnect because, well, we are from different generations, and sometimes machine knitting patterns and the craft itself just feel… old. I want my peers to look at my work and not think I’m just doing granny things.

Discovering Machine Knitting makes machine knitting look approachable, fun, and current. The book echoes the bright and fun vibe that Kandy Diamond curates on her Instagram account through her brand Knit and Destroy, and the beginner-appropriate projects feel updated and wearable.

The book is instructional without feeling sterile. The designer profiles and Diamond’s own designs offer inspiration and remind the reader that this is only the beginning. This combined with the well thought out photos and use of color to illustrate separation in steps keeps the book engaging and the messaging clear. There is so much attention to detail in this book, and I feel Diamond’s enthusiasm through the pages

Diamond walks you through the knitting design process from yarn selection and swatch to finishing and makes the math involved feel like just another step in the knitting process as opposed to the “intimidating barrier” many students I’ve encountered consider it. The book is worth a buy for the design math alone.

There aren’t a ton of projects in this book, but each is customizable, skill-building, and wearable, so I think you’ll find yourself making them more than once.


I made an autumn-themed version of Diamond’s Sweet and Simple Block Jumper using Brown Sheep Company’s NatureSpun Sport 100% wool.

This is a great project that will help beginners get a good feel for the machine and gain confidence in their design abilities. More on this yarn and project in a future post.


Schematics? Where appropriate
Perspective? Explorative and focused on contemporary design
How To’s? Detailed and well thought out


This book makes me excited. After reading my copy from Blackwell’s UK, I asked the shop owner where I teach to order a few copies for the North American release so I could recommend it to my students. One of my students even mentioned its upcoming release to me at a lesson to make sure I knew of it!

If you’re a beginner or someone who needs a skill refresh after years away, this book is for you. If you’re not a beginner but you want to learn more about machine knitting designers of today and support their work, this book is for you. If you’re just looking for project inspiration, this book is for you.

Rating: 5 out of 5.

Where to Buy

If you don’t have a local yarn shop or bookstore who can order this for you, please consider using my Amazon affiliate link when you purchase your copy of Kandy Diamond’s Discovering Machine Knitting. I may earn a small commission at no cost to you that helps me continue providing free content.

Discovering Machine Knitting releases in the United States on October 10, 2023.

Thanks for joining me on my machine knitting journey! If you have an idea for a yarn, book, or product for me to review, please let me know through my contact page.

Did I miss something? Disagree? Let me know in the comments!

Tips and Tricks

Choosing Colors

In my last post I showcased a project where I used NINE colors to push my creative boundaries. I ended that post feeling more confident, but when I went to choose colors for my next colorwork project, I found myself even more color-shy than before!

Since I’m still not convinced I know enough about colors to be allowed to choose combinations on my own, I thought I’d share different ways to choose a color palette that will help you build and discover your own color stories.


Use a Color Wheel

To me, using a color wheel feels like the “pro” way to choose colors. It’s the way “real” artists do it, or so my head says.

(I’ve considered myself a “real” artist for a while now, and I only just bought a color wheel, so let’s all remember to ignore those negative “not a ‘real’ artist” thoughts if they pop up, okay?)

If you don’t have a color wheel and/or a local place to buy one, please consider using my Amazon Affiliate link to support my site! I may receive a small commission at no cost to you, and it helps me keep my content free.

This post from Felt Magnet explains how to use color wheel and defines the associated terms. There are lots of other great posts on Color Theory and color wheels out there, so search up a few and give them a read if this one wasn’t enough for you.

I bought my color wheel from the Across Generations natural dye booth at the Fiber Christmas in July fiber festival. She doesn’t seem to have any in her Etsy shop, but her colors are so amazing and inspiring that I wanted to make sure I linked her because you can …


Use Your Favorite Artist’s Colors

You like them for a reason, right? If you aren’t confident enough to trust your gut, trust someone else’s!

Since most artists now have websites and/or social media, you can keep up with their work without going to galleries.

Find a piece that speaks to you and identify your favorite colors from that piece.

From my slightly overwhelming experience with nine colors, I suggest you start with just two or three.

Kacy Latham is my favorite artist, hands down. I love the way she plays with bright colors and texture as well as the way her shapes flow. We actually grew up in the same town, and while I don’t know her well because she’s a bit older than me, I’ve followed her art journey for years now. She is constantly pushing herself to create and share her work, even painting numerous public art pieces for the residents of that tiny town in Texas to enjoy.

What colors would you choose from this piece from Kacy’s Instagram?

I chose the darkest navy blue from the top right and the rosy, bronze-y brown just left of middle.


Follow Indie Dyer Collections

Don’t forget your favorite fiber artists!

If you keep up with your favorite dyers on social media, look through their feed or ask them how they choose their colors when you visit their booths at fiber festivals. Jenny at 316 Dye Studio recently released an entire collection inspired by Bob Ross paintings!

Sometimes indie dyers will even feature curated palettes of their yarns, so it’s worth it to go see what they’re up to when you’re looking for color inspiration.


Go Through Your Finished Objects

Even if you’ve knitted it up already, take a look at your favorite yarns and completed projects and try pulling your color palette from them, especially if you used a kit or a yarn with an existing color palette.

I don’t even know where this scarf is right now…

I hand knitted this Gallatin Scarf back in 2016. I hated the yarn but loved the colors. The self-striping element made knitting through the pattern interesting, and I can see this palette being perfect for a floral colorwork sweater.


Use an App

As mentioned in my Confronting Color post, you can browse a color palette app like Coolers.co for inspiration. You can also create your own palettes with up to five colors without a Pro subscription.

My favorite feature might be pulling a five color palette from an existing image.

You simply drag the white circle selector to different colors to change what it generates in your palette.

Canva.com also has a similar image palette generator. I’ve only used the free versions, but both Coolers and Canva have additional features in their subscription only tiers.


Browse Pinterest

It’s one of my favorite time wasters that I can justify as not actually being a time waster because I find can find punchcard patterns and more on it

As ad-filled and misdirected as its links can be, Pinterest is still perfect for making mood and inspiration boards.


Ask Around

In addition to having fiber suggestions, your local yarn shop is a great place to ask about color combinations. Since the owners have likely already ordered for the coming season, they might be able to point you in the direction of future color trends.

Your LYS’s staff probably aren’t the only helpful people around in your fiber community. In my experience, there’s always at least one regular who everyone counts on for their color choosing capabilities.

Get Stitchin’, where I teach lessons, in Tulsa, OK almost always has a trunk show rotating through the shop. She also carries yarns and fiber from local specialists, so if you don’t have a favorite indie dyer or fiber farm, you will soon!

You probably have a local shop closer to you than you think. Ravelry has a Local Yarn Shop Directory, and most yarn brands have a stockist locator on their website. If you don’t have a local shop to frequent, I hope you find one soon!

How do you choose colors for your projects? What other ways should I try to find color inspiration? Let me know in the comments!

Thank you for joining me on this colorful leg of my machine knitting journey!

Book Review, colorwork

Confronting Color

In case you missed it, I recently reviewed Alison Dupernex’s Creative Machine Knitting.

And boy can I say I was excited but also nervous when I noticed she replied to my Instagram post about the review.


…I threw all my designs in and my ‘colour madness’ to encourage and inspire knitters to go and make for themselves.

Alison Dupernex

Click on the post to view the entire comment.


Her color stories are sometimes very “out there” to me, as in “there’s no way I’d personally choose that,” but her comment on my review got me thinking. 

I decided to pick up Designing with Colour, another book Dupernex wrote in 2020. (I’ll fully review that one soon, but it’s another nice one).

Somehow her color choices didn’t feel as wild to me as they did in Creative Machine Knitting, the most recently published one, but Dupernex’s design theory and point of view remain consistent.

I’ve changed. 

I started to ruminate on how I use color in my own work. 


My default want is to add texture. And there’s nothing wrong with that. Texture is lovely. But I ran into the thought

… am I afraid of color work? 

I adore hand dyed yarns from indie dyers. I love to let the yarn do the work for me color-wise. I like to see how the colors pool, stripe, or blend together. I know what I’m working with, but I don’t know exactly how the garment will turn out, and each skein is unique. 

Does letting the yarn do the work for me make me a lazy knitter? I don’t think so. 

Does that make me a lazy designer? Not necessarily…

But I think it does make me a bit complacent.

It’s easy to rely on beautiful hand dyes to catch eyes and bring people to your work. 

It’s not at all a bad thing to use the gorgeous colors others have curated in your work. 

But I’m not really growing or building skills as a knitter or designer that way. 


Starting Out Small

I initially felt drawn to Dupernex’s color blocked designs the most. I decided to start with her Blocked Sweater from Creative Machine Knitting that featured textured striping on the sleeves and borders of the garment since texture is my favorite thing in knitting.


The design features nine colors. 

Until recently, I didn’t even own nine colors in the same yarn. I think six is my maximum, and that’s if you count Silk City Fibers Cotton Bamboo and Lion Brand CoBoo as the same yarn in different put-ups. 

I found some new old stock vintage Millor Trenzado Industrial cone yarn through a Facebook post (read some tips on finding cone yarn in this post), so I finally have enough colors in the same weight of yarn to experiment.

Sorting through this was overwhelming

After looking through the cones, I had no clue where to start choosing colors. I googled “color palettes” and ended up at Coolers.co narrowing down their existing color palettes to those with nine colors. From there, I tried to see which ones 1) I liked and 2) actually existed in my new cone stash. 

I landed me with this one. I took a screenshot, but I’ve been unable to locate it again. I’ll update with a direct link if I find it.

This palette gives me a southwestern US vibe, and I like that. Holding vacation thoughts in my head, I matched the colors as best as I could from the existing pile and buckled down to knit. 

This photo is rather heavily filtered to make the yarn as close to in-person color as possible.

Actually Knitting

Trenzado Industrial is probably a little bit large for this project, but I decided to continue with the fabric at the pattern’s prescribed tension because it knit well on my Brother KH890 and blocked out nicely. 

After knitting the back right, I quickly realized I needed to dig out a color changer so I could avoid having to get up every few rows to change colors. Just a note: If you decide to get a color changer, there is a difference in models for Brother machines at least, and some will not work with the ribber bed attached while others will. 


The garment itself wasn’t difficult to knit, but I made it a bit harder on myself by reversing the shaping on one front while I was listening to a podcast. 

I didn’t realize until I went to pin the piece onto my dress form, so I had to rehang the stitches and unravel a few inches so I could fix the neck and shoulders. It wasn’t a big deal, but I felt a bit silly. 


I’ve always admitted to being a lazy knitter, so I didn’t enjoy knitting the sleeves. Changing yarns so often was annoying, and I didn’t feel like I could get in the groove with so many quick sections and color changes alongside the decreases. That’s on me, but it is harder to knit something when you don’t enjoy the process.

I do like the overall color palette that the coolers app presented, but in addition to being a lazy knitter by nature, I think I must be a second-guesser, especially since I opted for some tans instead of oranges due to supply. 

I questioned my color choices the entire time I was knitting. Is this orange too bright for the southwest feel? Why did I think this needed a green? That’s too minty, why did I think it was a light sage? 

I had to keep telling myself to trust the process. 

Trust the process. Trust the process…

What do you think? 

It looks pretty okay, right? I’ve been telling myself, “Look here, overthinking second-guesser. It turned out great and now you have a color palette ready for the next one!”

But let me overthink some more…

Since I already liked color blocked items, just doing one with striped sleeves and calling it a day doesn’t really mean I’ve done much “Confronting Color,” now, does it?

Here’s to the next one with less anxiety over the color palette and even more use of color!


This page may contain affiliate links. If you choose to buy something using my link, I may earn a small commission at no cost to you. If you don’t have a local place to support, please consider using my affiliate link as it helps me continue to provide you with free content.


Tips and Tricks

Organizing My Studio: The Main Room


This post contains affiliate links. If you purchase something using one of my links, I may receive a small commission at no cost to you. If you don’t have a local place to support, please consider using my link as it helps me continue to provide you with quality free content.


We moved to our new place last year, and I have a studio! Yay! It’s a small building around 400 square feet just steps from our garage.

It’s been a dream come true having a large, dedicated machine knitting space and not just a small craft room, but it’s a lot more chaotic than I hoped. 

I rushed to move my things in and managed to paint the paneled outer workroom wall before I had a couple surgeries. I’m not fully unpacked yet.


Wall Storage

I painted the paneled outer workroom wall and covered it with 2×4′ pegboard panels.

All of my cone yarn was finally on the wall… until I found some new old stock yarn and brought in nearly a hundred more cones. (Find some tips on how to find cone yarn in this post.) I had to move my hanks to make room for the extra cones, so I needed more pegboard and more hooks.

I ended up using 16×16″ metal pegboard squares for the rest of the pegboard wall so I could work around my thermostat.

working around the thermostat

If I had to go back, I think I’d opt for using the 16×16″ size for the whole pegboard wall since I had to wait until my husband had time to help me with the large pegboard and I could install the smaller squares myself.


Here’s what I used:

Triton 2 x 4′ Pegboard 4 Count6″ Pegboard Hooks (better for cones)
Metal 16×16″ Heavy Duty Pegboard – 4 Pack
8″ Pegboard Hooks (better for hanks)

Cube Storage

wooden cube storage in my old setup-so cute but so cramped!

My wooden cube storage is full of my knitting books, my vintage magazine collection, and my personal yarn, so, you guessed it, I needed some more storage after finding more vintage patterns.

I opted for a wire mesh cube set that I could reconfigure as needed since I have been rearranging machines and yarn every few months to test layouts. It currently sits under a window, so it was nice to be able to work around the frame.

hanks waiting on me to order more pegs…

I had to quickly drag the wire cube stack out of the way after an HVAC condensation issue, and surprisingly it stayed together! I didn’t expect that. I wouldn’t suggest moving it like that under normal circumstances, but I wanted to make sure nothing dripped on my yarn.

I think I bought my oldest wooden cube storage unit at Target, but they only come in the 6 cube option there. This one has options from 3-12 cubes, even though I chose to stick with 6 cube units. I have four of them lining a wall now.


What I used

Wood Cube StorageWire Cube Storage

More Work to Do

The studio building was built in the late 1970s or early 1980s, but it is very well insulated. The HVAC has a couple of issues that we discovered after a severe storm-related, days long power outage, some windows need replaced, and some of the lighting fixtures have gone out with no replacement bulbs to be found. I’m using my seed-starting lights as a temporary fix so I can see to knit.

The floor is bare concrete in the main room for one glued down piece of red carpet, and the workroom is tile on top of concrete. I’d like to put in padded flooring eventually.

Oh, and I still have to finish unpacking and organizing my books….


I don’t feel great about how things look in my studio right now, and I really miss my small craft room at our old house sometimes. It had such a cute aesthetic and I really felt creative in that space.

I have to remind myself that I curated the old craft room over the course of the years we spent in that house.

One year I did the walls. Another year I added more storage. The pegboard closet wall came close to the end.

I did all of the organizing in this post gradually over the year or so we’ve been in this house. That’s not bad progress for a busy year at all!

I’ll continue tweaking and optimizing as my budget and time allow. Slow progress is better than no progress!

I hope sharing the slow progress on my studio gave you some inspiration or encouraged you in your own organization progress. If you choose to try out some of the products that I linked, thank you, and please let me known what you think!

I’d love to see pictures of how you utilize your space.

Thanks for reading and joining me on my machine knitting journey!