This post includes my own experiences with pain and hand and machine knitting and should not be considered medical advice. If you have a concern about knitting-related pain, you should seek help from a medical professional.
More Common Than You Think
Over the years I spent working in a yarn shop, I heard a lot of things about customers knitting less or even stopping their hand-based yarn hobbies altogether because of hand pain.
Quite a few of our shop patrons experienced occasional or chronic hand pain, and their responses to it varied as much as their yarn projects.
Some customers swore off small yarns and began knitting with bulky yarns on large needles. Others blamed the bulk of large projects and decided to only work on small, lightweight pieces.
Some knitters swore by compression gloves to remedy their pain. Others relied on copper bracelets and rings to help with blood flow to their fingers. Some made lotions and balms with different oils to soothe and relax tired hands. One customer even suggested certain yoga poses to help release arm and hand tension.
Whether it’s arthritis, carpal tunnel, or tendinitis, knitting is a repetitive motion, so it does carry a bit of a risk of injury or aggravation with too much of it.
But what do you do when the pain gets to be too much and you can’t knit more than a row or two without stopping to rest or reaching for some medical pain relief?
If you’ve ever seen a knitting machine, you may think it could be the answer to keep you knitting.
Pushing a carriage across a needle bed to make a blanket or turning a crank to make a sock seems like such a simple motion compared to the steps you complete to make a stitch in hand knitting.
Knitting that quickly and simply must be super easy, right?
Life with Hand Pain
I’ve had issues with the joints in my hands and arms since I was a child. They gave me trouble with things from learning piano to writing class notes.
I learned to hand knit in college, but I didn’t ever knit long enough in one sitting to notice anything past the usual pain, swelling, and weakness flaring up, and it did that anyway with normal daily activity.
A doctor first noticed a bit of minor arthritis in one finger in my mid-20s, but she wasn’t able to pin down a reason for the rest of the weakness, inflammation, or swelling of my hands and arms.
She told me I should just stop knitting.
That advice came right as I was launching an Etsy shop and beginning to attend craft shows. It was a day ruiner, that’s for sure.
I loved knitting, and I wasn’t about to give it up, so I decided to follow the advice of my fellow knitters and tried stretches and compression gloves along with frequent breaks to alleviate my hand pain. If my hands were swollen and weak that day, I wore my braces and read knitting magazines or browsed ravelry instead.
I tried taking over the counter medicines and went back to the doctor again, but she still said there wasn’t anything wrong with me other than that small spot of arthritis. At this point, I was barely able to hold a pen or a fork, let alone knit.
I randomly saw a machine knitting video on Youtube. I don’t think I knew knitting machines existed before 2017, to be honest, but I finally started considering one a solution that could keep me knitting.
Hand Involvement in Machine Knitting
If you think machine knitting is only pushing a carriage across a needle bed, you’d be incorrect.
True, that is the most basic action in machine knitting, but you use your hands a lot.
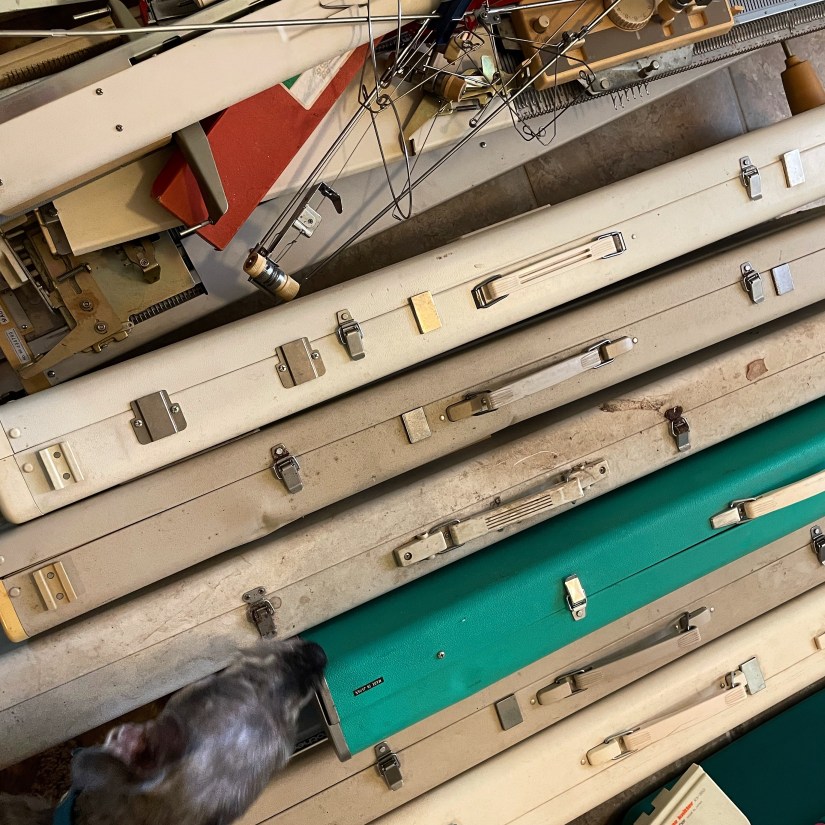
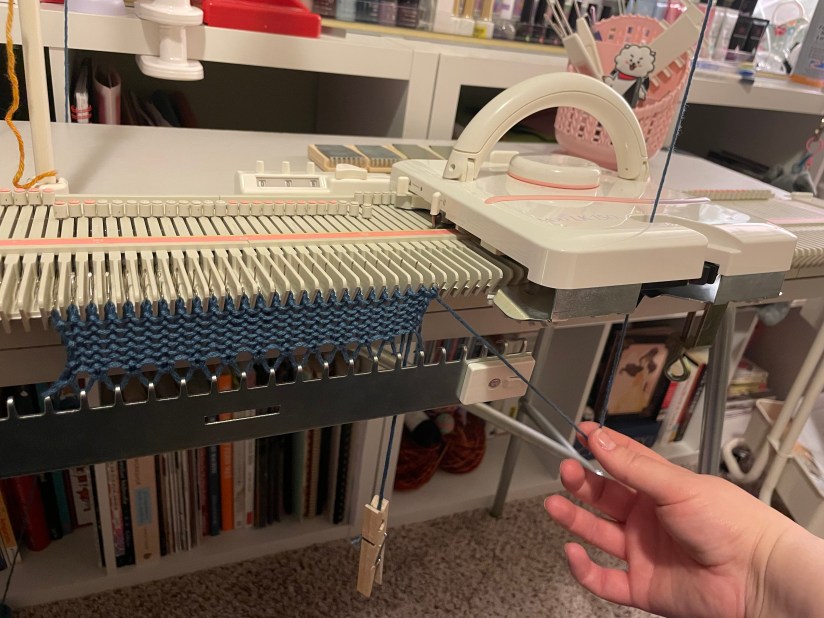
If you have a manual machine like the SilverReed LK-150 or Brother KX 350 (click here to read a post about cleaning and testing this machine), you do everything besides knitting the stitches themselves by hand.
Needle selection is by hand. Transferring stitches for increases, decreases, lace, or cables is done by hand with specialized tools. Any decent cast on with a finished edge is done by hand wrapping or using the latch tool. Bind offs? By hand. Seaming? Unless you buy a linking machine, you’re doing it by hand.
And that’s the thing. It is quite easy to remove the majority of the hand manipulated element of machine knitting, but it isn’t cheap. You have to buy specific machines or accessories to lessen your manual involvement.
You can hand select and do things manually on all machines, but punchcard and electronic machines have settings that enable a lot less handwork. Those extra functions come with extra cost. They are more expensive, sometimes double the cost of the manual machines mentioned above, and some require buying even more accessories to accomplish what would otherwise be manual tasks.
Lace and intarsia specialty carriages can be over $100 each. Buying a second bed to knit ribbing can run about $500. Whether you buy used or new, you’re still looking at a range from a few hundred dollars to a couple thousand invested in removing the manual element from your knitting.
Adapting to Painful Hand Knitting with Machine Knitting
I still hand knit. It is what started me down the fiber road, after all. But I cannot knit as much as I used to. I’m down to about a tenth of what I once could do. Moving my hands in certain ways seems to flare things up more than others, so I’ve written off entire stitch patterns if they hurt.
It definitely feels awkward as an instructor to say I physically can’t do that knitting stitch other than showing how it’s done once or twice, but awkward is a better feeling than pain. I tell my students as long as they’re forming the stitches correctly, there’s not really a “wrong” way to knit. But if it hurts, that’s knitting the wrong way.
Some days I wake up and my hands feel fine. Others I can barely hold the spoon to eat my morning oatmeal. Checking how my hands are functioning is a part of my morning routine now.
I modified how I hand knit so that most of the motion comes from my better hand, my left. My right hand is basically a needle stabilizer. I can knit this way with braces on my hands, so I still get a little bit of hand knitting accomplished on painful days.
Moreso than trying to knit wearing my braces, I look for ways to blend hand my hand and machine knitting together. I figure out what parts I can hang on a machine so I can save my hands. Does the pattern call for 12″ of stockinette stitch? That’s going on the machine. Is there a complicated lace repeat on a hem? I’ll do that by hand with plenty of breaks on a good day or I’ll try to find a similar punchcard lace pattern on the machine.
I can operate almost every function of a punchcard machine on all but the worst pain days. I can push a machine carriage and change lever- and button-based settings; I can use transfer tools, the latch tool, and thread the machine’s tension unit. I’m not going to choose something with a lot of hand manipulation like cables or hand transferred lace on a bad pain day, but that’s easy enough to stay away from.
Return to Teaching
I had to pause teaching classes and working at the yarn shop when the pandemic started, and after the shop closed earlier this year, I was unsure if I’d teach hand knitting again.
I’m currently working with Get Stitchin’ in Tulsa, OK to offer classes and SilverReed machine sales through the shop. It’s a dream come true for me to be teaching again and connecting with the fiber community once more, but working around my hands sometimes feels iffy.
When you check the Classes page on Get Stitchin’s site, you’ll see hand knitting classes. With me. I’m not stopping, but I am adjusting.
I have to give myself much more time to compete a project. What would previously have taken me less than a month might now take three. Trying to have a sample done in time for in-store class advertising has been a little rough on my hands. Instead of the larger projects I once wanted to do with multiple-part classes, I’ve chosen smaller things that teach and reinforce skills and concepts but do it in a more compact project.
Worth It
Investing my time and money into knitting machines has enabled me to continue on my fiber journey. I didn’t have to give up my creative passion, and that alone makes machine knitting priceless to me. In addition, I’ve been able to speed up my design process because knitting a piece on the machine takes so much less time than doing it by hand. Making mistakes and ripping them out is not necessarily an uncommon occurrence for me when I’m working on the machine, but making those mistakes has given me more confidence in my ability to create and fix designs.
Knitting machines can’t always produce the exact same fabrics that hand knitting can, but there are analogs and even more stitch options to produce all kinds of wonderful fabrics that would be nearly impossible, or at the very least extremely impractical, to do with hand knitting.
I did manage to get some answers regarding my hands this year with a new doctor, but other than steroid shots, there’s not much that has been able to help. There are a couple surgical options in my future, but one always has to weigh risks and benefits with them. How long will I have to stop knitting to recover, and is it a permanent solution? I’m cautiously optimistic that I may finally be able to eat, write, and hand knit pain free someday.
Have you experienced yarncraft-related hand pain? What did you do to combat it? Did you turn to machine knitting to stay creative? Are you considering a knitting machine to give you more flexibility in your knitting? Let me know in the comments below, and, as always,
Thank you for coming on this knitting journey with me.