Accessories, Knitting Machines

The EEW Cone Winder- Unboxing and Initial Thoughts

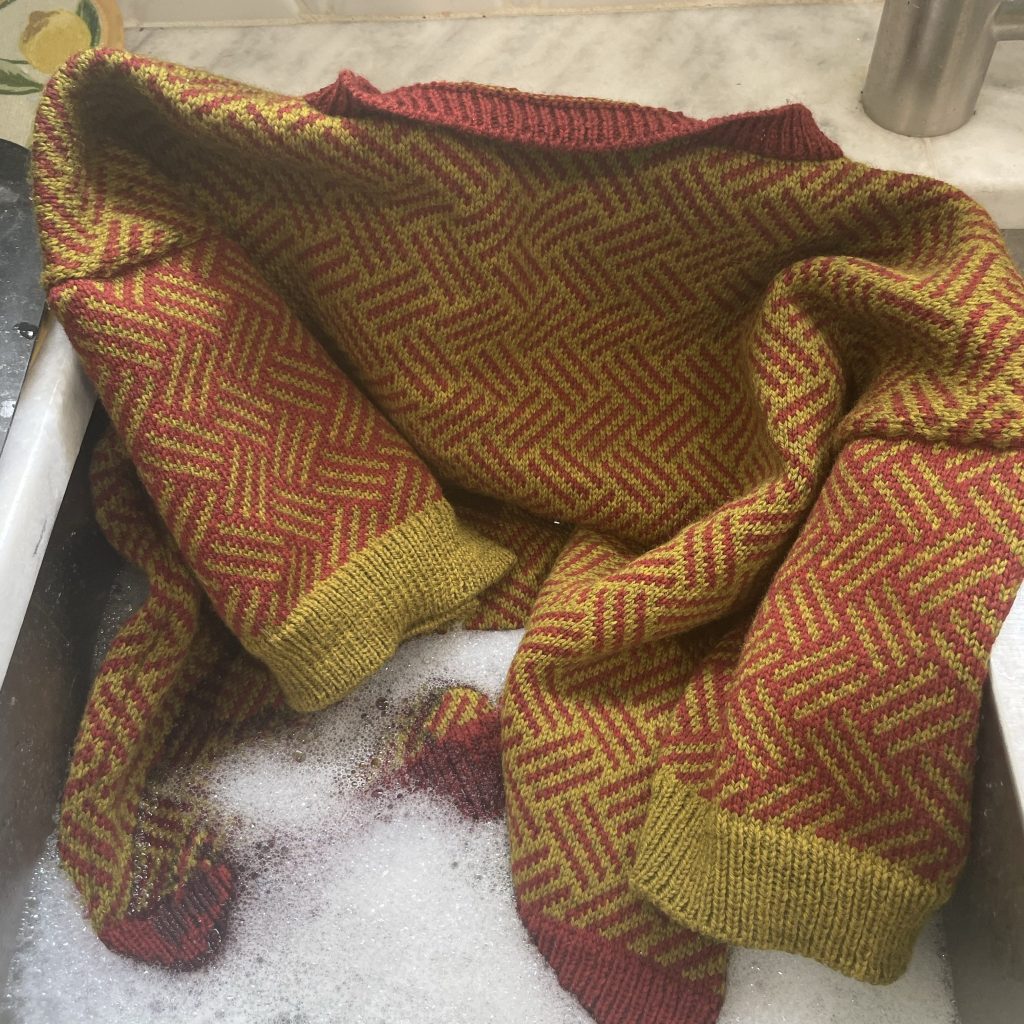
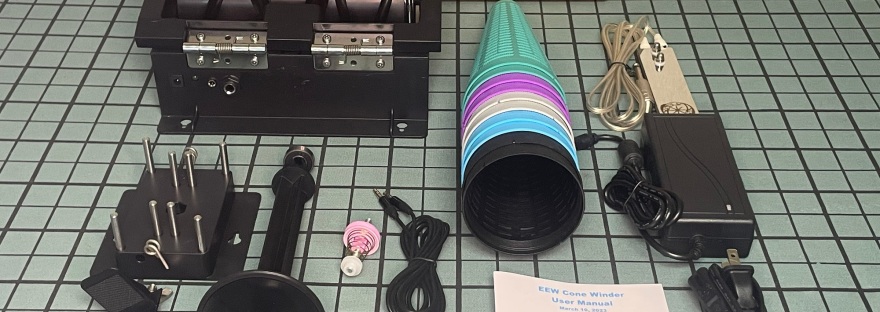
If you’re familiar with the Electric Eel Spinning Wheel, you might know that Maurice Ribble of Dreaming Robots, the mind behind the magic, recently released an electric cone winder

I backed the project on Kickstarter in 2022. I have only backed three or four Kickstarter projects, but I have to say, Dreaming Robots was great about keeping backers in the know about the state of the project and allowing input. I forgot to fill out the address form when it came out, so my winder arrived in December, but that’s all on me! (Facepalm) I paid the Kickstarter backer price of $189 plus shipping. The cone winder now retails at $259 and is in stock as of the time of writing.

each block is ~1 inch for size reference

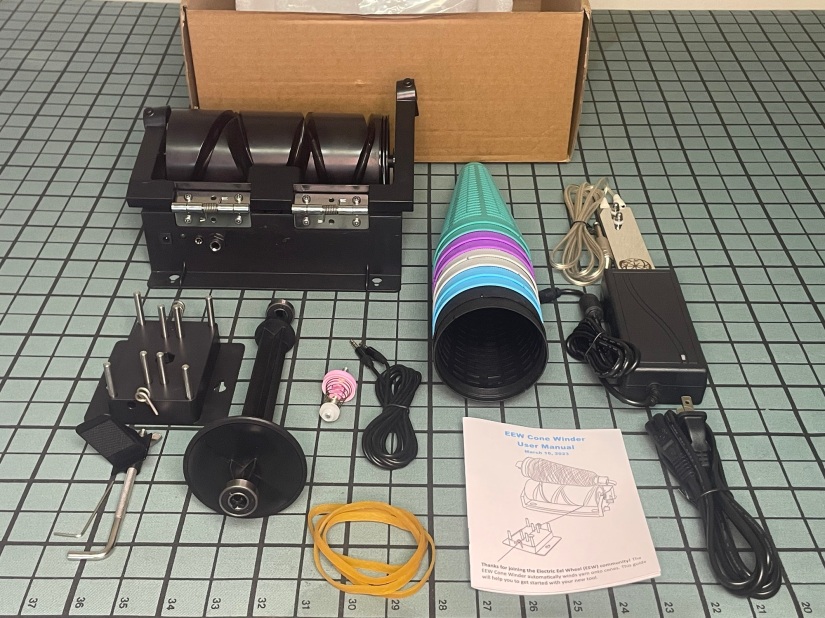
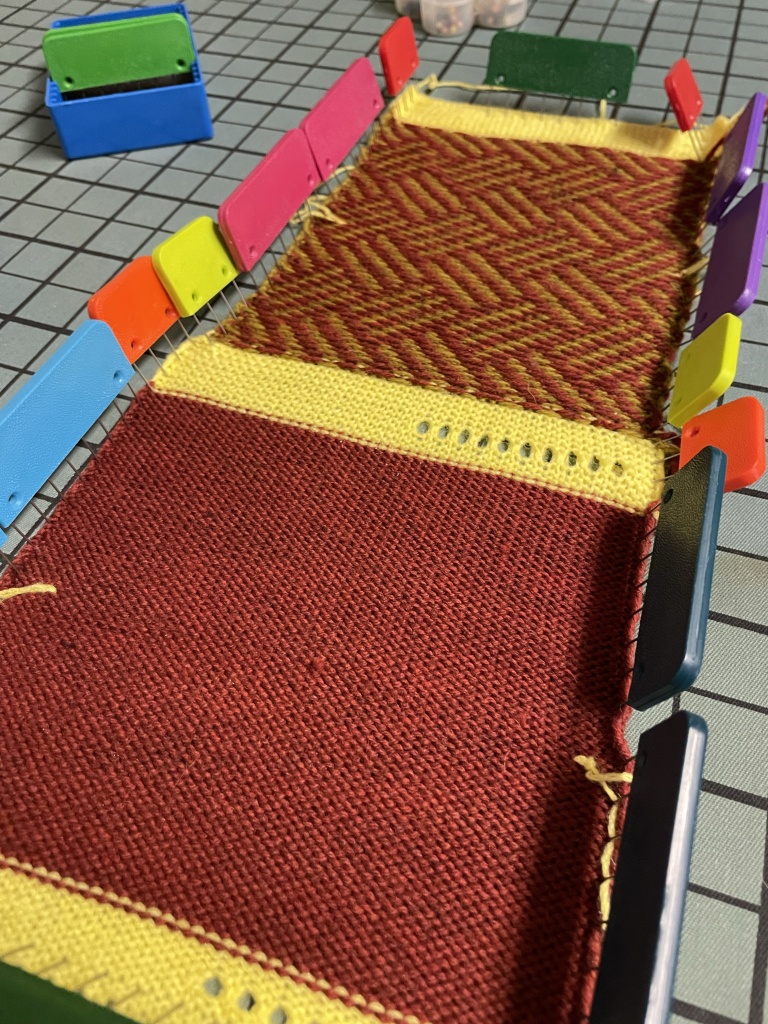
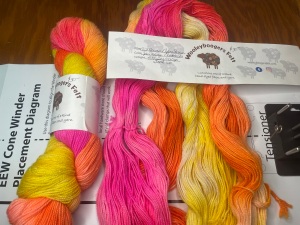
The winder was packaged securely and nothing was damaged in shipping. I opted for 10 cones with my winder.

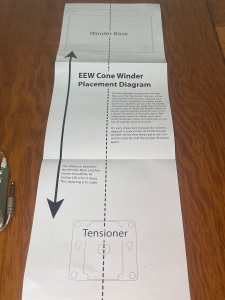
The manual is straightforward and comes with a template to show you how to lay out the tension unit and winder unit. I love that. I’m not great at eyeing measurements, and even though my blocking board lays things out by square inches, I can still measure things incorrectly. It’s a skill.

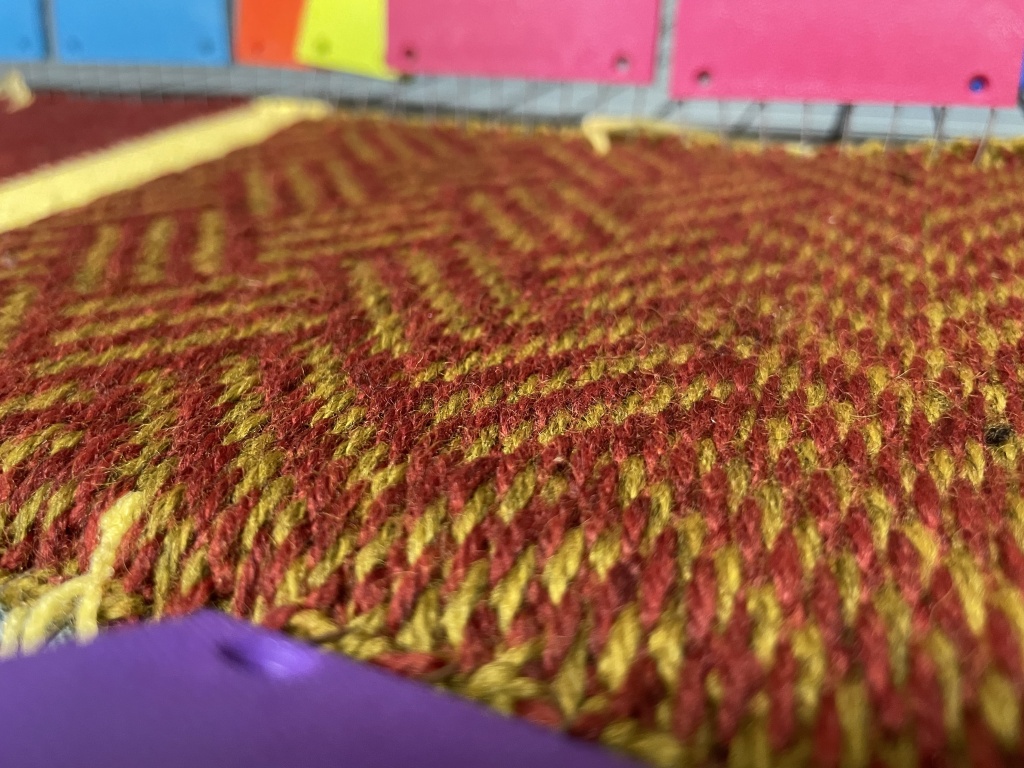
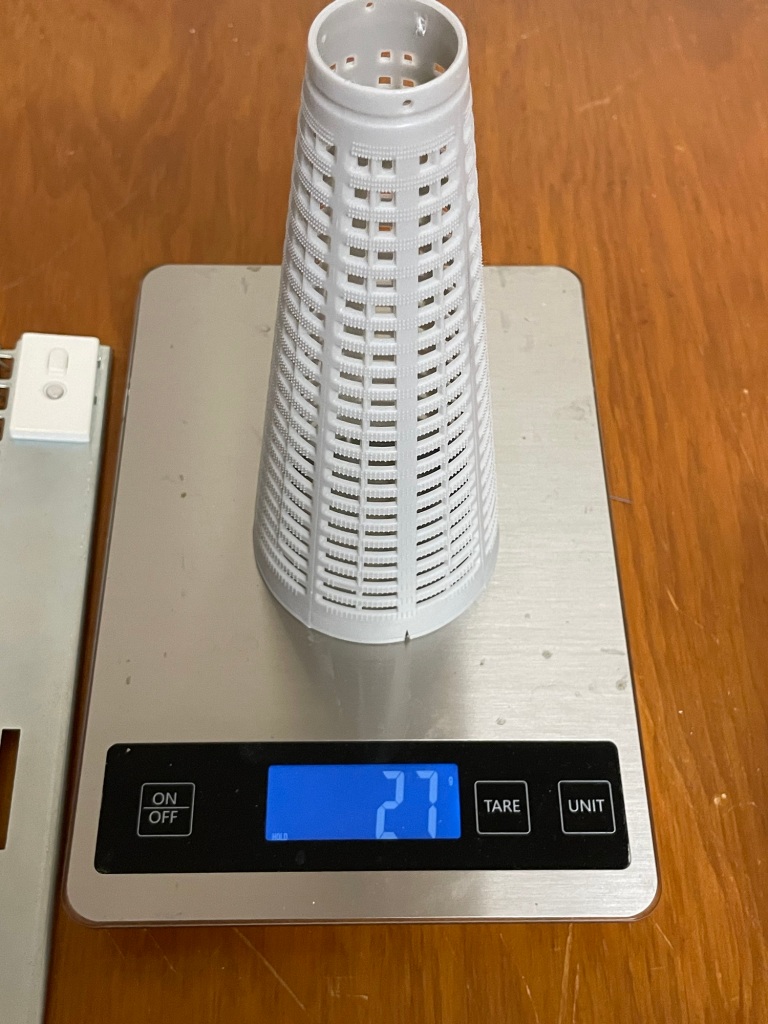
The cones are 27 grams according to my scale, and I like that they come in different colors. It’s fun. They look pretty cool on the inside once they hold yarn, too.

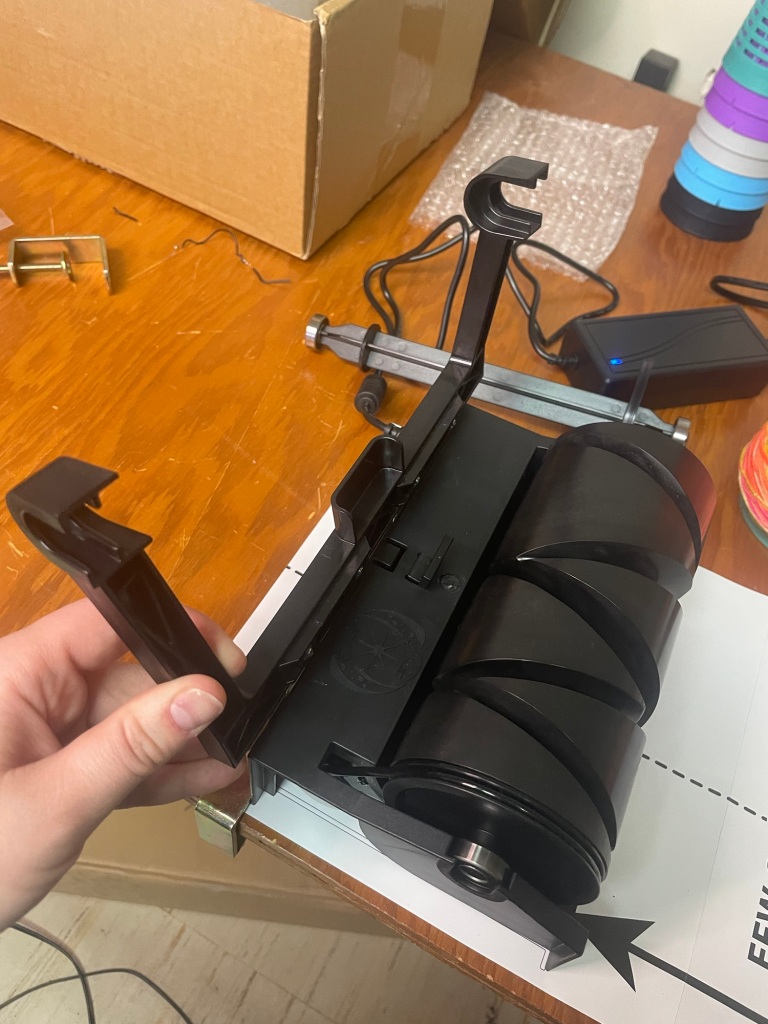
Assembly was straightforward and well laid out in the manual. There are excellent videos and written instructions on how to use the EEW Cone Winder on the Kickstarter page and FAQs on the product page. I avoided watching anything or reading anything but the initial Kickstarter campaign and the user manual before testing the winder for this post.


Initial Test-Winding Yarn from a Hank

I decided to cone up some of my friend Suzy’s yarn, Woolyboogers Felts. She works out of a studio next door to Get Stitchin’ and exclusively sells at craft shows and Get Stitchin’, so she’s just another great reason to stop by if you’re in the Tulsa area.
(You can sign up for one of my classes while you’re there! Standing classes the 2nd and 4th Wednesdays and Saturdays of the month!)

I used knitting machine clamps and the included tension unit clamp to hold the units in place on my counter, and I initially had my yarn swift (this thing) on the counter next to the winder. That meant the yarn was coming down from the swift to the counter level tension unit.

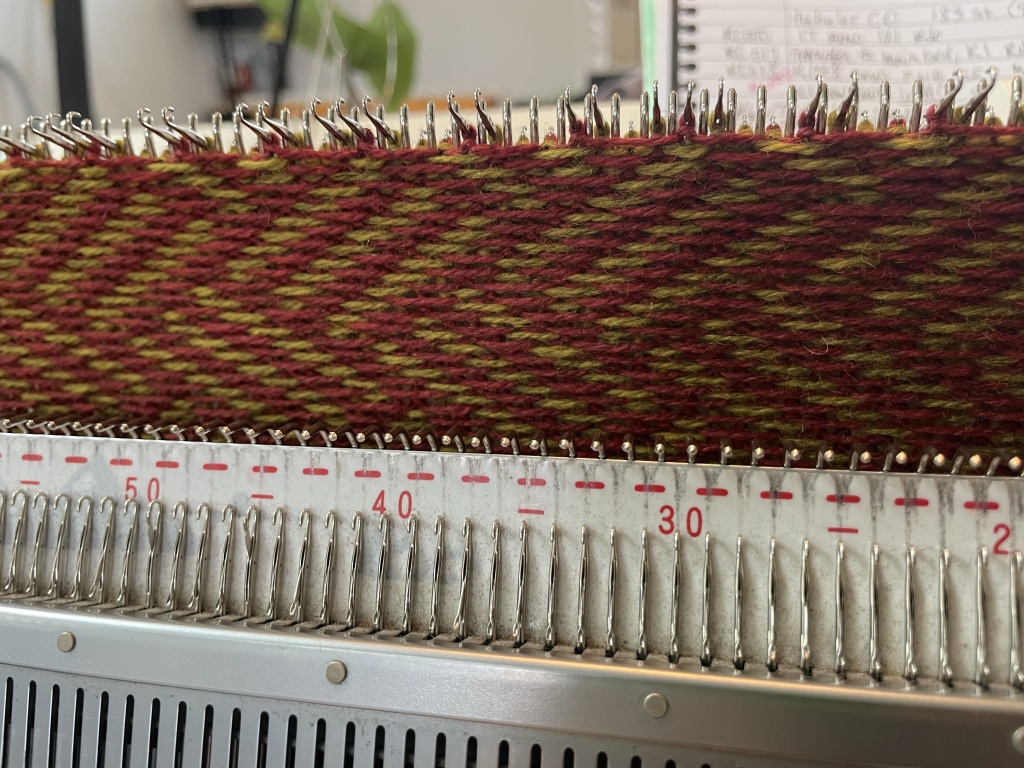
Using speeds 1 and 2 with the loosest, straight tension setting, I wound the 438 yards of sparkly goodness onto the cone. Well, the winder did all of the work. I supervised.

“professional” placement! haha

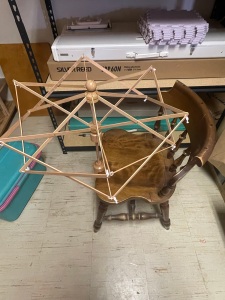
On the lowest settings and loosest tension, it took a few minutes to wind, but I wanted to be cautious learning the winder. I had a couple of issues with feeding into the tension unit from the swift when I had it sitting so much higher than the tension unit intake. It worked much better when I moved the swift to sit on a chair and the yarn intake was more level with the tension unit as it fed yarn in. The yarn winder had plenty of power to wind from the swift, but I found on the lowest tension it had to work a bit harder if the hank on the swift was held too tightly or the yarn was caught underneath itself.


After the slow speed test run with Woolyboogers, I decided to cone up four skeins of Berroco Modern Cotton DK. (I’ll be reviewing it soon, so be on the lookout for that post in the future!) 

warm light | cool light

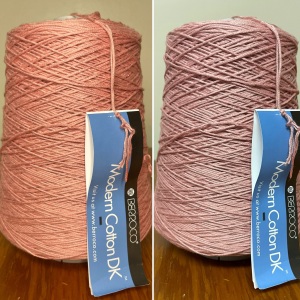
I wound each skein at a higher speed than the last, with the final at speed setting #5. I was catching a breeze from the swift at that point! I used the higher tension winding setup as shown in the manual for this yarn. 

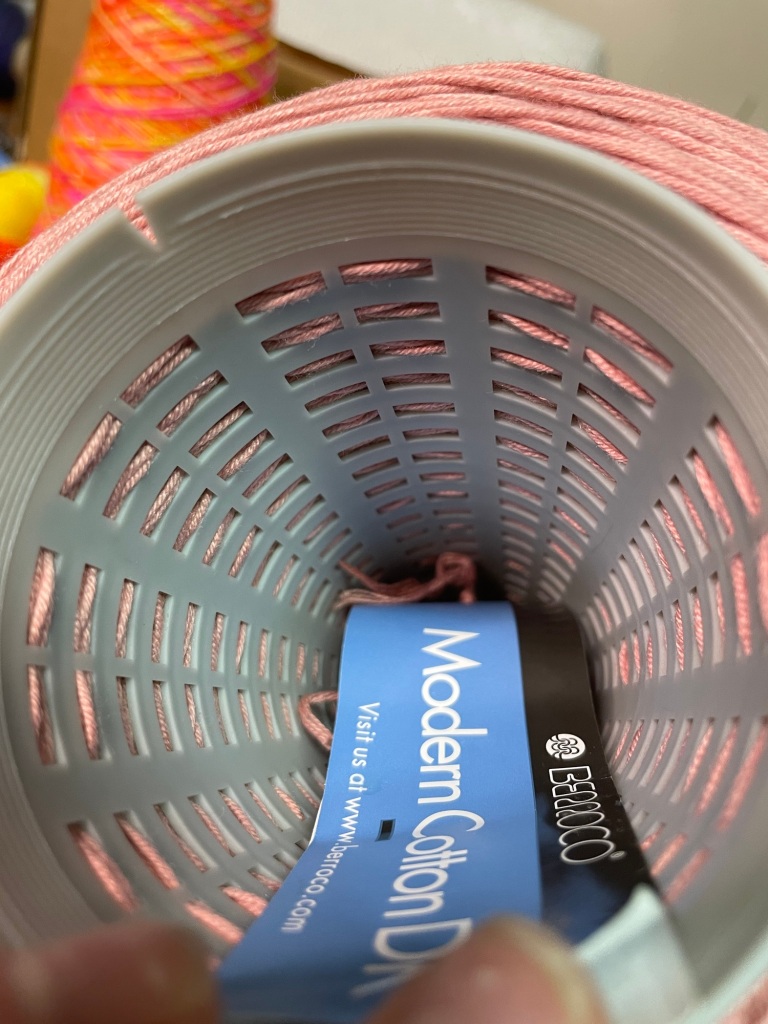
It looks great coned up! The cone has two small holes at the top for you to attach the yarn label and then store in the center of the cone.

I prefer a more tightly wound cone of yarn, especially for fibers like cotton. The looser tension setting is probably more ideal for delicate yarns. I didn’t experience any yarn breakage, and I did “jam” the winder a couple times. More on that in a bit.


Turn up your audio to hear what the EEW Cone Winder sounds like at speed #5 in my Instagram video below. My pictured setup isn’t ideal, but what I had worked just fine!

I wouldn’t say the cone winder is loud, but it definitely isn’t silent. You can hear it working rhythmically, but I didn’t find it unpleasant. 

If you’ve wound a lot of yarn into cakes before, you’ll appreciate the electric cone winder doing the hard work for you. Your arms can get tired after a thousand yards, but with the winder, you’re just turning a dial after a little yarn threading. Easy peasy!


Experimenting and User Error

Ah, the aforementioned jam.

The only issues I ran into using the electric cone winder stemmed from user error and experimentation with yarn swift placement for intake through the tension unit.

At one point, I was pulling additional yarn lengths from the swift because the winder seemed to struggle with pulling directly from the swift.

I shouldn’t have been pulling additional yarn out. The winder didn’t need my help. It operated fine, albeit slowly, when I stopped feeding it yarn myself at low settings as well as after I increased the speed dial setting.

While I was pulling that additional yarn from the swift, knots and loops developed in the yarn and happened to hook themselves around the metal guide spiral. The winder kept going for a tiny bit (of course, it is set to ON and rotating) BUT then it stopped.

When I read the FAQs on the product page, I found the motor stopping is by design, and I appreciate that it stopped and didn’t break my yarn!

This is by design. It is bad for the motor to continue trying to spin when it is not spinning. At low power this can happen when it’s trying to spin slowly but there isn’t enough motor to actually spin the drum. In this case the motor will turn itself off until it sees no attempts to spin for 3 seconds. To work around this turn the speed dial to off and then wait three seconds and it will resume normal operations.

from the FAQs at https://www.dreamingrobots.com/eew-cone-winder/

This is one of the reasons why you don’t set the winder and leave it. If something happens, that delay gives you time to fix things.

I’ll say it again: winder does have enough power to be able to pull yarn off of a swift through the tensioner unit, but at low speed settings with looser tension it seemed more likely to knot up or loop around the metal guide spirals on the tension unit, especially if the yarn wasn’t feeding in quite even with the tension unit (that pesky user messing with it…). It may seem counterintuitive, but I didn’t experience the same looping when I upped the tension and the winder speed (and left well enough alone). Pulling extra yarn from the swift to feed into the tension unit just gave the yarn opportunities to form knots and loops and catch on the tensioner.

Yarn placement is important, and getting it right makes your experience with the cone winder much smoother.


Why Buy a Cone Winder

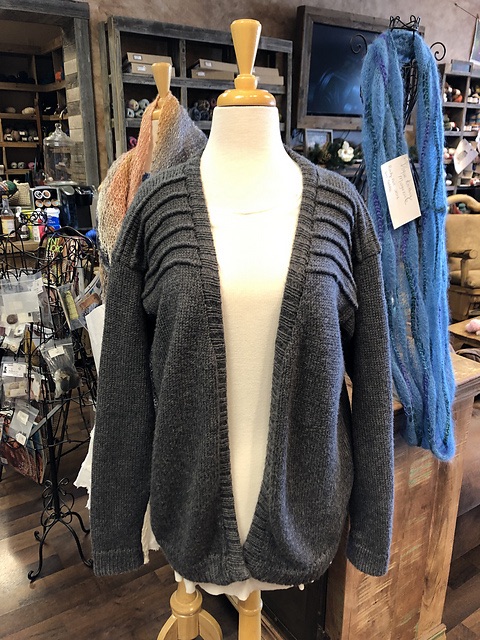
As someone with hand and arm issues, I am so excited to have a way to wind that doesn’t depend on my arms functioning well that day. And, since cones are the most ideal yarn put-up for machine knitting, I can say goodbye to my awkward cake yarn winder. It served me well, but I’m happy to move on, and I won’t miss the occasional loops across the top and bottom that sent my yarn rolling.

At $259, the electric eel cone winder is not cheap. That’s a chunk of change for anyone, but if you want to use hand knitting yarns by machine and your ball winder isn’t cutting it, I think it’s worth the investment, especially if you have years of knitting in front of you, or if you are like me and have issues with your hands, wrists, and arms in general. Cutting out the winding motion lets me use my body’s limited energy to work on actual knitting.

All opinions are honest and my own. Purchases are made with my own money. Links may be affiliate links. If you choose to purchase something using my Amazon affiliate link, I may earn a small commission at no cost to you. If you don’t have somewhere local to purchase your machine knitting needs, please consider using my links to support the site! 

Thank you for joining me on my machine knitting journey! How do you prepare your yarn for machine knitting? Will you invest in a cone winder? Let me know in the comments! 

Book Review, Knitting Machines

Machine Knitting Techniques: Texture and 3D Effects

If you have a little bit of Christmas Cash and you feel like investing in yourself for the New Year, pick up the newly-released Texture and 3D Effects Machine Knitting Techniques book. Amber Hards teaches texture and playfulness in her essential addition to the series.

“[Hards] encourages you to explore and experiment with confidence to produce exciting, tactile knitwear.”

publisher’s blurb

Find it here on Amazon.


The Details

Published: January 1, 2024 (US/NA)Publisher: The Crowood Press
Format: PaperbackPages: 144
MSRP: $24.99Canada: $32.99

Chapters

Materials and StripesManual Tucks
PunchcardsWeaving
I-cords, Strips of Knit, & 3D EmbellishmentPartial Knit: Frills, Bobbles, Loops, 3D Scales
Lace Holes & LaddersPattern Collection

Overview

Amber Hards is a UK-based knitwear designer and maker who has been teaching machine knitting since 2016. Her website showcases years of her work, and I encourage you to give it a look. I especially recommend viewing her “Loving Love” show. You can see why those behind the Machine Knitting Techniques series enlisted her aid with tactile knitting!

The Crowood Press set a high standard for photographic instruction with their Machine Knitting Techniques series, and Hards meets that here. Instructions are clear with illustrative photos. Hards uses color contrast strategically to illustrate steps and movement of textures, but the generally monochromatic palette helps you visualize the textures of the stitches.

The “Pattern Collection” at the end of the book is a bit underwhelming with only two patterns, but remember that this is a technique book. The focus is, as it should be, on technique instruction.

Practicality

“When I show students more textured skills, they often express feeling overwhelmed by the process. As different techniques are often presented as all-over swatches where the stitch or technique is packed together throughout the swatch, many of these textured effects often feel too “runway” or high fashion for a beginner or casual machine knitter. “Where on earth would you actually wear that?” is a common question.

You don’t have to use these techniques all over! A large shawl completely done in one technique can be stunning, but remember that small, pinpointed uses of these details can add to an otherwise simple garment.


This partial knitting shawl I made in 2019 looks like a myriad of connected i-cords or winding snakes of stockinette stitch. It was created by moving groups of needles in and out of work.

Designer Linda Jensen uses the same technique for the bodice of this Ripple Top. Confining it to one part of a garment doesn’t diminish the visual interest this stitch generates. It just refines it.


Pintucks in the shoulder area add interest to an otherwise simple October Cardigan by Jesie Ostermiller. Using them over an entire cardigan could be interesting, but confining the texture to one area created a way to draw the eye upwards.


This October Cardigan was knitted on my Passap Bulky Eight and was one of the first machine knitted projects I created.

It’s not perfect, but I learned so much making it!

Why don’t you try choosing a technique from Texture and 3D Effects and place it in a similar location as the pintucks in this cardigan?


Buy or Bypass?

Of the Machine Knitting Technique books released so far, I suppose you could skip this one, but I think that would be a mistake. Developing skills like these can help you in your other works. Paying attention to how textured stitches are weighted while you knit them, for example, helps you become more aware of your work as it sits on the machine.

Texture and 3D Effects might feel like it is written more for the aspiring designer than your everyday machine knitter, but let’s face it- if you are a machine knitter, you need to learn to be comfortable being the designer yourself because of the lack of available patterns.

Hards encourages playfulness in machine knitting, and I applaud that.

Rating: 4.5 out of 5.

I hope you’ll explore your creativity on the knitting machine even more this year and realize that you might just already be a designer.

Happy 2024!

Thank you for joining me on this machine knitting journey! What texture technique from the book will you try first? Let me know in the comments!


Disclaimer: Links on this site may be Amazon Affiliate links. If you choose to purchase an item using my affiliate link, I may receive a small commission at no cost to you.

If you don’t have a local shop to support, please consider using my link and supporting the site!


I purchased this book with my own money. All opinions are honest and my own.

If you would like to submit a book, yarn, accessory, or other idea for review, please contact me through my contact form.


Like what you see and want to support the site?

https://storage.ko-fi.com/cdn/widget/Widget_2.jskofiwidget2.init(‘Support Me on Ko-fi’, ‘#29abe0’, ‘J3J45DOLK’);kofiwidget2.draw();
Book Review

Machine Knitting Techniques: Cables

The Crowood Press has released quite the handful of machine knitting books recently, and you won’t want to miss them. Bill King, someone you might recognize from his regular contributions to Machine Knitting Monthly, shares his wealth of knowledge in this Cables edition of Machine Knitting Techniques.

Once a few basic techniques have been mastered, the number of cable designs available is virtually endless.

The Crowood Press

The Details

Published: 2023Publisher: The Crowood Press
Format: PaperbackPages: 112
MSRP: $21.99Canada: $28.99

Chapters

The Basics of Cable Knitting on the MachinePress Off Relief
One Tool Cables on the Single BedSuper-sized Grafted Cables
Racked Cables on the RibberCables and Fisherman’s Rib
Deflected or Moved Ribs3×1 Mock Rib Cables
Partial Knit CablesCable Miscellany
Pattern Collection

Overview

Bill King is a freelance knitwear designer and technician who has worked extensively for the knitwear industry in the UK and overseas. His designs have sold to Calvin Klein, DKNY, Anthropology, amongst others. With 40 years of knitting experience, Bill holds regular knit workshops and seminars in the UK and has written the Masterclass feature in Machine Knitting Monthly for the past ten years.

Vogue Knitting Live

Machine Knitting Techniques: Cables is a skill book and focuses on instruction rather than patterns, though it does offer four patterns with instruction for three sizes each at the end of the book.

Examples are shown on a standard 4.5mm gauge machine, and most use a ribber bed, so you will need a ribber bed to get the most out of the book.

Instead of schematics, it has needle layout diagrams. If you are new to this type of diagram, it might take you a bit to get used it, but they are straightforward. Over a grid where each square represents one needle, a “|” symbol denotes a needle in work while an “o” denotes a needle out of work. You might sometimes encounter this type of diagram without the grid, as well.

Each new skill has an accompanying exercise with step-by-step instructions so you can practice. From intarsia to plating to tuck stitches, almost every type of cable combination you can think of is in this book.


Project Idea! Keep your exercise swatches and make a patchwork sweater!


Bill King Has Me Thinking More Like a Machine Knitter

The vast majority of my yarn friends are hand knitters or crocheters, and Ravelry is still my go-to for pattern browsing and inspiration. I’ve hand knitted so many cabled things and designed a few of my own, so I’d say I’m at least an intermediate cable knitter. Well, hand knitter.

I never thought about things like Press Off Relief or Mock Ribs. I didn’t need to think of things like that in hand knitting since I could simply knit a few stitches a little bit looser or perform a purl stitch to make a rib. The confines of my hand knitting didn’t need that sort of experimentation or modification. If I wanted to experiment with cables and crossing stitches, I just picked up my needles and started knitting.

Bill King doesn’t shy away from the limitations of the knitting machine. I feel like he leans into them. By making sure the reader understands what things that don’t work well, he reminds the knitter that there are possibilities in the workarounds. Because I spent a decade hand knitting before approaching machine knitting, I found myself thinking “that just doesn’t work well on the machine, so I’ll do it by hand.” King has not only proved that notion wrong, but has inspired me to experiment more with what is actually possible on the machine.

Rating: 5 out of 5.

I appreciate the years of industry knowledge King shares in the Cables technique book. If you’re looking for an extensive look into cabling on the knitting machine, you need to pick up a copy.


Where to Buy

If you don’t have a local shop to support, please consider using my amazon affiliate link to purchase your book. I may earn a small commission at no cost to you, and it helps support the site.

Thank you for joining me on my machine knitting journey! Do you have Machine Knitting Techniques: Cables by Bill King? What is your favorite new cable technique? Let me know in the comments!

Book Review, Knitting Machines

Discovering Machine Knitting by Kandy Diamond

I love my vintage machine knitting book collection, but new machine knitting books just make my day. They’re proof that machine knitting isn’t dying — it’s still evolving, and dare I say, growing.

Discovering Machine Knitting by Kandy Diamond releases in North America on October 10, 2023.

It’s more than just an eye-catching cover. Here are my thoughts:


Perfect for beginners, it starts with how the machine works and how stitches are formed, all the way through to shaping garment panels to your desired size and fit. Each chapter focuses on different skills that build throughout the book, with lots of projects so you can put the skills into practice and make some knits for yourself.

If you work through the step-by-step instructions and projects in this book, by the end of it you will be designing and knitting your own garments!

Excerpts from the publisher’s blurb

The Details

Published: 2023Publisher: The Crowood Press
Format: PaperbackPages: 160
MSRP: $24.00Canada: $32.99

Chapters

Chapter 1: Before You StartChapter 2: Getting Started
Chapter 3: Pattern and Garment ConstructionChapter 4: Simple Shaping
Chapter 5: Colour and DesignChapter 6: Level Up – Ribber
Chapter 7: Design Your Own

What I’m Looking For

If you missed my last book review on Alison Dupernex’s Creative Machine Knitting, here’s the rundown on what I look for in a machine knitting book.

Schematics are the first thing I look for in a knitting book of any kind. Schematics make it possible to change yarns and still have a correctly sized finished garment. For plus-size knitters like myself, they make it much easier to adjust sizing. It’s non-negotiable for me– a “good” book requires schematics.

I want to see what makes up the designer’s perspective. What makes them unique? How do they work with the classics? What do they bring to the crafting community, and what do they think of that community?

If a book touts itself as a skill book, I want to see pictures and detailed how-to’s throughout. Machine knitting can become intuitive, but setup often includes multiple steps that are easy to miss if someone becomes overwhelmed during the learning process.


Overview

Discovering Machine Knitting by Kandy Diamond is a start from scratch course based on using a standard gauge (4.5mm) domestic knitting machine, but that doesn’t mean users with other gauge machines won’t find it useful. Basic skills translate between machines, and while mid-gauge users (6.5-7mm) will need to learn to hand select needles for colorwork, the skill-building projects are still worthwhile.

Diamond begins the book teaching readers about the knitting machine itself–parts and accessories; stitch formation; fiber considerations; basic cleaning, maintenance, and troubleshooting.

Chapters each teach a different set of skills and are further divided into sections with detailed written instructions accompanied by step-by-step photos and colorful diagrams. Example pictures use bright and easy to see colors with contrasting colors illustrating notable instances in the knitting process.

Designer profiles throughout the book introduce readers to artists across the industry, offering more perspectives to beginners along with showing the possibilities of what they, too, can do after they have completed the book’s course.


Thoughts

I greatly appreciate those with decades long machine knitting careers who have shared their work with us, but I often feel a generational disconnect because, well, we are from different generations, and sometimes machine knitting patterns and the craft itself just feel… old. I want my peers to look at my work and not think I’m just doing granny things.

Discovering Machine Knitting makes machine knitting look approachable, fun, and current. The book echoes the bright and fun vibe that Kandy Diamond curates on her Instagram account through her brand Knit and Destroy, and the beginner-appropriate projects feel updated and wearable.

The book is instructional without feeling sterile. The designer profiles and Diamond’s own designs offer inspiration and remind the reader that this is only the beginning. This combined with the well thought out photos and use of color to illustrate separation in steps keeps the book engaging and the messaging clear. There is so much attention to detail in this book, and I feel Diamond’s enthusiasm through the pages

Diamond walks you through the knitting design process from yarn selection and swatch to finishing and makes the math involved feel like just another step in the knitting process as opposed to the “intimidating barrier” many students I’ve encountered consider it. The book is worth a buy for the design math alone.

There aren’t a ton of projects in this book, but each is customizable, skill-building, and wearable, so I think you’ll find yourself making them more than once.


I made an autumn-themed version of Diamond’s Sweet and Simple Block Jumper using Brown Sheep Company’s NatureSpun Sport 100% wool.

This is a great project that will help beginners get a good feel for the machine and gain confidence in their design abilities. More on this yarn and project in a future post.


Schematics? Where appropriate
Perspective? Explorative and focused on contemporary design
How To’s? Detailed and well thought out


This book makes me excited. After reading my copy from Blackwell’s UK, I asked the shop owner where I teach to order a few copies for the North American release so I could recommend it to my students. One of my students even mentioned its upcoming release to me at a lesson to make sure I knew of it!

If you’re a beginner or someone who needs a skill refresh after years away, this book is for you. If you’re not a beginner but you want to learn more about machine knitting designers of today and support their work, this book is for you. If you’re just looking for project inspiration, this book is for you.

Rating: 5 out of 5.

Where to Buy

If you don’t have a local yarn shop or bookstore who can order this for you, please consider using my Amazon affiliate link when you purchase your copy of Kandy Diamond’s Discovering Machine Knitting. I may earn a small commission at no cost to you that helps me continue providing free content.

Discovering Machine Knitting releases in the United States on October 10, 2023.

Thanks for joining me on my machine knitting journey! If you have an idea for a yarn, book, or product for me to review, please let me know through my contact page.

Did I miss something? Disagree? Let me know in the comments!

yarn review

Yarn Review: Lion Brand Touch of Yak

I bought this yarn in 2020 to review, and, well, 2020 (and now most of 2021) happened. Now it’s on clearance, but if this yarn seems like it’s for you, you might find a good deal on

Lion Brand Touch of Yak

Touch of Yak in Water Lily

All opinions are honest and my own. I am not affiliated with any company or individual mentioned or linked unless otherwise noted. I purchased this yarn myself and did not receive compensation for this review.


About

Fiber Content90-% Acrylic / 10 % Yak
Yardage/Meterage219 / 200
Ounces / Grams3.5 / 100
Yarn Weight4 / Medium / Worsted
Made inChina
AvailabilityLocal Yarn Store, Online
Put upSkein

This yarn is on clearance for $6.99 at the time of this post, so if it’s something you’re interested in, grab it while you can. The clearance price brings the price per yard down from $0.06 per yard to $0.03 per yard.

Originally retailing for 13.99, Touch of Yak is part of Lion Brand’s “Touch of Luxe” collection. The listing mentions “Yak fiber is as soft and warm as cashmere, with wonderful drape,” but with 90% of this yarn being acrylic, any drape you achieve will be from steam blocking or “killing” the acrylic.

Colors are soft, muted, and generally neutral. Now that it’s on clearance, three colorways remain.


Care Guide

Hand WashYes
Machine WashYes
Flat DryYes
Machine DryNo

I machine washed and dried this yarn with no problems. To be honest, I couldn’t tell any difference made by the minimal presence of yak fibers compared to any other decent machine washable and dry-able acrylic.


Knitting Machine Compatibility

4.5mm Standard GaugeNo
6.5mm Mid-GaugeYes
8mm / 9mm Bulky GaugeYes

This is a worsted weight yarn. I wouldn’t put it through any standard gauge machine, but it worked fine on other gauges.


Touch of Yak in Waterlily in a warm light
Pattern: Mirror Cable Mitts on ravelry

Performance

This yarn knitted up fine. It wasn’t anything special, but it wasn’t terrible to work with. When I transferred stitches to form cables, the yarn was annoyingly splitty, but plain knitting was fine. The stitch definition was fine for cables and the finished project looked nice.

There’s really nothing to point out if you treat this like any decent acrylic. The yak is nowhere to be found, especially if you’ve worked with 100% yak fiber before. If you haven’t, you might be able to convince yourself this yarn is softer than another mid-range acrylic, but really, it’s not anything special. There is a slight halo of potential yak fiber if you squint. Maybe?


Blocking

This yarn is 90% acrylic, so block it as such. Too much heat will “kill” the acrylic and freeze it in place. “Killing” acrylic is literally melting the plastic it is made of. You’ll achieve a great drape with this but lose any other properties acrylic might offer.

Careful steam blocking is my blocking method of choice for all yarns, even acrylics, but you should make sure you do not leave your steamer in one location for too long.


Touch of Yak in Water Lily wound into a cake

Final Thoughts

This yarn is fine. That’s it. It’s fine. The “touch” of yak is barely noticeable. It feels like almost any other mid-range acrylic. It’s soft, it works, it’s machine washable, and even though it says not to, it really is machine dry-able. The color range is limited, and the yarn is now on clearance. If you like a slightly softer than normal acrylic and you snatch it up, this could be a good yarn for you provided you aren’t picky about colors. Just don’t expect anything that actually touched a yak when you purchase this.

I give Lion Brand LB Collection Touch of Yak a 2 out of 5 score.


Have you used Lion Brand Touch of Yak before in your machine knitting? What about in your hand knitting? What kind of projects did you use it for, and what did you think of its performance?

Are there other properties you think I should include in my yarn reviews? What yarn should I review next? Let me know in the comments!


Accessories, Patterns

Using The Needle Beetle with Bonus Baby Blanket Recipe

If you have a 6.5mm mid-gauge SilverReed LK-150 knitting machine, this accessory is a must-have!

The Needle Beetle Needle Selector by KrisKrafter makes knitting patterned stitches a breeze. Instead of selecting the whole bed of needles by hand or using a needle pusher,

You hand select the first 8 needles into the arrangement you want, then push the Needle Beetle across the needle bed and it will select the rest of the needles lickety split!

KrisKrafter Needle Beetle

I wanted to knit a full bed tuck stitch baby blanket on my SilverReed LK-150 to go along with my Lion Brand Ice Cream yarn review, but I didn’t want to select every other stitch for two out of three rows using only my needle pusher or my hands.

I can be a patient knitter if I try hard enough, but selecting stitches like that is not my idea of a good time.

Needle Beetle to the rescue!

After finding where I had safely stored it after purchasing it in January (I really need to stop rearranging my craft room), I took it for a test knit.

I love tuck stitch patterns, so the majority of my Needle Beetle usage so far has been tuck stitch work.

front and back of a Nancy Marchant tuck stitch done on the LK-150 using the Needle Beetle in mystery yarn

Since I have a standard gauge punch card knitting machine, I don’t normally do much patterning on my LK-150. I’ll do a bit of cabling or hand-selected lace, but tuck or fair isle? Nah. Why do that on the Lk-150 when I can have my standard machine do it for me?

But talk about fun! I really was missing out on the things the LK-150 can do by ignoring patterned stitches just because I’d have to select by hand or needle pusher.

For the time it saves and the versatility it reminds you the LK-150 already has built in, the Needle Beetle is an amazing and worthwhile addition to your accessory collection.

And for those for those stubborn (ok, I’ll admit it, for me the word is lazy) knitters, you can’t go wrong with the time it will save you for only $89.00.


Troubleshooting User Errors

The Needle Beetle comes with very clear instructions, so I feel like the issues I had with it were entirely my fault.

1. Loose Screw

The Needle Beetle isn’t just for the LK-150 machine. It also works on the LK-140, the GK-370, and the 9mm LK-100/Zippy 90 models. For the KX-350/355/360 machines, KrisKrafter offers the Needle Beetle II, which performs the same as the Needle Beetle but fits those machines.

Since it fits both 6.5mm machine and 9mm machines, the cam inside the Needle Beetle is reversible. You simply flip it over and screw it back in. Since I like seeing how things work, I took mine apart to look at all of the pieces and see how they fit together.

The instructions warn of over-tightening the screw on the cam, but I think I took the warning a little too seriously. At the end of selecting a row of needles, when I picked up the Needle Beetle, the cam, flipper, and other parts kept going!

I ended up having to search my craft room floor for the screw, washer, and cam. And of course my mischievous cat was batting one of the pieces around. (I promise I love her, but she’s about to be barred from the craft room for eternity.)

So do tighten the screw. Don’t over-tighten it. But don’t under-tighten it, either. If it isn’t secure, the motion of the cam selecting the needles will vibrate the screw out of its hole and send you on a quest to find the pieces of this magical accessory.

2. Wrong Track

If you aren’t paying attention and you align your Needle Beetle along the carriage track rather than the track containing the needles, instead of selecting needles from upper working position, it will take out of work needles and push them into work.

Whoopsies!

3. Position Label Sticker

If your LK-150 still has the sticker labeling working positions A, B, C, and D on the right side of the needle bed, you might want to be careful with how you push the Needle Beetle across your machine.

I wasn’t careful, and the Needle Beetle picked up part of the edges of my sticker and eventually took the sticker with it. I don’t need the sticker, so it isn’t a big deal, but if you’d like both ends of your machine bed to look the same, be careful with how you put pressure on the Needle Beetle if you’re using it for full bed patterning and it might come into contact with your position label sticker.


Bonus: Tuck Stitch Baby Blanket Recipe

This tuck stitch baby blanket is a great way to put your Needle Beetle to work!

For this blanket, cast on an odd number of stitches using scrap yarn and ravel cord.

I used 149, nearly the whole bed.

I knitted one row plain and then began my tuck stitch pattern.

This pattern is based off a variation of one of Nancy Marchant’s hand knitting two-color tuck stitches, which I find a bit funny since Marchant herself has mentioned that she once used tuck stitches in machine knitting and developed many of her hand-knitted tuck patterns inspired by machine knitted tuck. We’ve come full circle!

Instead of switching out yarns, I decided to use the multicolor Lion Brand Ice Cream Big Scoop from my earlier yarn review. The yarn is a decent acrylic with fun colors that are perfect for a baby blanket.

Select every second needle of the first eight stitches. Slide the Needle Beetle across the bed to continue the pattern. Every other stitch should be all the way towards you in HOLD position.

** The first and last stitches should not be in hold. They should remain in working position so they are not tucked.

Set Carriage to HOLD.

Knit three rows.

Set Carriage to NORMAL.

Knit one row.

Repeat these four rows until your blanket is your desired size, ending with a plain knit row.

Scrap off or place all needles in HOLD to add edging to live stitches.

I used the “worm” (also called pie crust) edging with six rows knitted on three live stitches before moving to the next three stitches. I skipped rows in between “worms” on the sides of the blanket to mimic the look of the worm edging on live stitches.

Diana Sullivan on YouTube has great edging ideas, so you should definitely go check her out for great how-to videos for edgings.


All opinions are honest and my own. I am not affiliated with any company or individual mentioned or linked unless otherwise noted. I purchased this accessory myself and did not receive compensation for this review.


Do you have a Needle Beetle Needle Selector? What projects have you knitted with it? How do you like it!

Let me know in the comments below!

As always, thank you for coming on this machine knitting journey with me.

Uncategorized, yarn review

Complete Yarn Review: Jody Long Coastline

It’s time for another yarn review! I’ve been sitting on this one a while and really testing how it washes and wears, so I hope you enjoy all of the yarn data I’ve collected for you.

Like past yarn reviews, I’m covering fiber content, color options, ease of care, knitting machine compatibility, wear, and much more. If there’s a category you don’t see covered, let me know! I’ll add it to my list.

If you’re interested in learning more about the UK-based designer Jody Long, his designs, and the other yarn in his line, check out his website.

Today, we’re focusing on his fun fiber blend of

Jody Long Coastline


All opinions are honest and my own. I am not affiliated with any company or individual mentioned or linked unless otherwise noted. I purchased this yarn myself and did not receive compensation for this review.


About

Fiber Content33% Cotton / 28% Viscose / 27% Nylon Polyamide / 12% Linen
Yardage/Meterage218 yd / 200
Ounces / Grams3.5 / 100 g
Yarn Weight4 / Medium / Worsted
Made inItaly
AvailabilityLocal Yarn Store, Online
Put upDonut

Although retail listings might state Jody Long Coastline is a worsted weight yarn, its ravelry page and recommended needle/hook size place it closer to a heavy worsted or Aran weight yarn.

Coastline is distributed by Knitting Fever and has 18 colorways. The core of the yarn is made of natural fibers while the other fibers, which contain the dye, create a spiral chain around it.

The chain surrounding the core of the yarn occasionally allows the natural-colored core to show through, giving the yarn a heathered or marled look.

I untwisted the yarn in the image below to give you a better look at the chain and core construction.

Because Coastline is a heavy worsted/Aran weight, its low yardage count isn’t too much of a surprise. Coastline checks in at around $0.08 a yard.

Coastline retails for about $16.49 a ball at your Local Yarn Store but can be found at slightly lower prices online at WEBS yarn store.

I will always recommend shopping at your LYS since you won’t have to pay shipping and you’ll benefit from their years of experience at the shop. Feeling the yarn and seeing the colors in person is well worth it considering you’d only save a couple bucks by buying online.

As for how this yarn is presented, the donut put up is my least favorite way to obtain yarn. Yes, they look tiny and tidy on the shelves at the LYS, but once you use 50-60% of the ball, the donut starts to fall apart and tangle. It is one of the worst ways to present yarn in my opinion. It’s just asking for added headache, especially in slippery plant fiber yarns.


Care Guide

Hand WashYes
Machine WashYes, Warm
Flat DryYes
Machine DryOfficially: No. Unofficially: Maybe

Coastline handles a washing machine cycle with ease. If you’d like to be extra cautious, wash your project in a mesh bag or in a cycle of only knits to avoid snagging.

Don’t plan on washing your Coastline project one day and wearing it the next, though. Coastline takes a long time to dry.

The front of my Coastline tank top can be nearly dry while the back underneath it is still very damp. I recommend flipping any project after a few hours to assist in the drying process.

I believe this is due to the natural fibers at the core of Coastline. The cotton really soaks up moisture and doesn’t seem to want to let go of it easily.

While it isn’t recommended by the care label, I did send one of my swatches through a machine drying cycle. It was still damp after one cycle on low. The low heat of the dryer did not seem to affect any of the synthetic fibers, as the swatch held its shape but was not permanently melted into that shape.

That said, machine dry at your own risk.


Knitting Machine Compatibility

4.5mm Standard GaugeNo
6.5mm Mid-GaugeYes
8mm / 9mm Bulky GaugeYes

Coastline is too large to try on a standard gauge machine, even if you were to attempt using every other needle. The small chained threads around the core would catch on the small needles of the standard gauge machine. I do not recommend this yarn for a 4.5mm machine.

Mid-gauge machines can handle this yarn at medium and upper tension numbers with ease. You might run into some difficulty if you attempted to use this yarn at a lower tension, though, as it is on the stiffer side as far as yarns go.

Bulky machines should handle Coastline well.


Swatches and Performance

If you’re interested in how I swatch yarn, please check out this post.

This yarn knits into a lovely but slightly heavy-feeling fabric at medium to high tensions on the SilverReed LK 150 mid gauge machine. Lower tensions produce a stiff, dense fabric that might work for a bag or utility project but would be uncomfortable in a garment.

Jody Long Coastline in Deep Ocean

This swatch was washed on warm, dried flat, and gently steam blocked. I did not stretch it or force it, merely smoothed it out flat.

There wasn’t any discernible shrinking in the swatch since it was dried flat. To add to that, the Desert Queen tank top that I knitted with Coastline still measures true to gauge after over a year of wear and washes.

SilverReed LK-150 Tension 7

BeforeAfter
20 stitches4.25″4.25″
30 rows4.25″4.25″

When I machine dried a swatch, however, I did notice some shrinkage.

SilverReed LK-150 Tension 5

BeforeAfter
20 stitches4″3.875″
30 rows4.125″3.5″

Stitch gauge shrank about 3% and row gauge shrank about 15%.

*The row gauge shrink could be due to the number of weights on my swatch as I knitted them. I formerly used two claw small weights on my cast-on comb, but now I use one.


Blocking

Since just over half of Coastline’s fiber content is synthetic, be careful when steam blocking this yarn. That being said, the natural core structure will hold the yarn’s shape well, so gentle steam blocking is not out of the question with this yarn. In fact, that’s my go-to blocking method, and I used it with this yarn just like I do with other yarns. I was just a little more cautious about than I normally would be until I learned how it blocked with steam.

That’s another reason it’s important to swatch! Practice your blocking method on your swatch and you won’t be surprised when you’re blocking your finished project.

If you are unfamiliar with steam blocking, wet blocking any project is still a great choice for this yarn, but be aware of lengthy drying times.


Projects

Back in February and March of 2020, I used Jody Long Coastline to make the Desert Queen tank top by Meghan Kelly.

I had to adjust the DK weight pattern to fit the larger Aran weight Coastline yarn, but it knit up beautifully.

I wear my Desert Queen tank top about two times a month, so at this point the garment has been through around 30 wash cycles.

close-up of the Desert Queen top neckline after 30+ washes

And it still looks wonderful!

The stitch definition is still as strong as it can be with the heathered effect, and harder use areas like the underarm are strong with no signs of pilling whatsoever. The denim-like look of the fabric has not faded, and the eyelet elements at the neckline and bust of the top are still well-defined.


I’ll admit, I initially HATED working with this yarn. Amid all the stress of March 2020, this yarn presented my ULTIMATE yarn pet peeve: knots in low-yardage skeins. And I purchased six skeins to treat myself to this top that I had fallen in love with.

Here are my initial thoughts from my ravelry project page

I’m NOT happy with this yarn. It looks good, but EVERY SKEIN had MULTIPLE knots in it. For a low-yardage, cotton/linen NYLON/VISCOSE blend, that is unacceptable. This yarn retails for $16.99 a skein. Yes, it’s machine washable and looks very nice once knitted up, but you can find similar blends at Hobby Lobby or Michael’s for under $5.00 that perform just as well or better.

I even wrote comments in my swatch binder about the knots. “Hated” was underlined twice.

Hmm.

Desert Queen by Meghan Kelly in Jody Long Coastline Deep Ocean

Final Thoughts

I’m still a bit torn when I remember the knots. Each skein had a knot joining the last 50 yards to the rest of the ball. Some skeins had knots every 50-75 yards.

I had six skeins of this yarn.

Considering the cost-per-ball and only 218 yards in a knot-filled ball, I felt really ripped off, especially as this was supposed to be me treating myself to a fancy yarn. Jody Long is a prolific designer, and it felt a bit like I was paying a premium for his name while getting an entirely mediocre product.

But after living with this gorgeous tank top that has held up beautifully through one of the most stressful times any of us may live through, I have to think my initial reaction could have been a little harsh. After all, a knot just means another end to weave in, and that’s not as bad as I make it out to be, even if I hate doing it.

I don’t know if I just got a bad batch or if the knot issue is persistent throughout all Coastline colors. I’ll admit, it has made me reluctant to try another yarn from Jody Long’s yarn lines, and I’ve seen some lovely cottons that really tempt me.

The durability after over a year and a half of wearing and washing is nothing short of impressive, and without the knot issue, I’d give Jody Long Coastline a 4.5 out of 5, but because of it, I’m only giving it a 3 of 5.

It’s a good yarn, but buyers shouldn’t have to fight knots when the skeins are so small.


Have you used Jody Long Coastline before in your machine knitting? What about in your hand knitting? What kind of projects did you use it for, and what did you think of its performance?

What’s your yarny pet peeve?

Are there other properties you think I should include in my yarn reviews? What yarn should I review next? Let me know in the comments!


Thanks for coming along with me in my knitting machine journey! See you next time!


Uncategorized

Yarn Review: Berroco Comfort

Welcome to the first of many yarn reviews! In this series, I’m going to analyze each yarn for its compatibility with knitting machines, ease of use, ease of care, affordability, and much more. I’ll include pictures of my swatches along with notes on how the yarn performed, thoughts about available color choices, and updates on long-term wear.

Let’s get started!


All opinions are honest and my own. I am not affiliated with any company or individual mentioned or linked unless otherwise noted. I purchased this yarn myself and did not receive compensation for this review.


Berroco Comfort in Color 9747 Cadet

About Berroco Comfort

Fiber Content50% Nylon 50% Acrylic
Yardage/Meterage210 yds / 193 m
Ounces / Grams3.5 oz / 100 g
Yarn Weight4 / Medium / Worsted
Made inTurkey
AvailabilityLocal Yarn Store, Online
Put upSkein

Care Guide

Hand WashYes
Machine WashYes
Flat DryYes
Machine DryYes

Berroco Comfort is a hardworking acrylic blend worsted weight yarn that comes in over 60 colors. Available at your Local Yarn Store (LYS), it usually retails for around $6.50 a skein. This acrylic is NOT your grandma’s scratchy acrylic yarn. Soft and with a very slight metallic sheen, it can be easily blocked with steam to produce a fantastic drape in a fabric. It comes put up in a center pull skein, but if you’re planning to use it with your machine, I advise winding it into a cake to avoid yarn tangles.

Comfort also comes in Sock, DK and Chunky weights with slightly less color availability in the larger sizes and mostly variegated options available in sock weight. With the exception of the Comfort Sock, the Comfort line of yarn sticks to solid colors the majority of the time.

The wide variety of colors makes this yarn a good choice for colorwork. Comfort has a pleasing stitch definition and does not tend to lose itself as it wears in my experience.

Since it is machine washable and dryable, a gifted item with this is “safe” for any recipient as far as care instructions go. If you’re worried about your garment, you can still hand wash it and lay it flat to dry, but know that it will be just fine in your laundry machines.

In addition, those with wool allergies will enjoy this yarn, as will those who live in areas with warmer climates or milder winters.


Knitting Machine Compatibility

4.5mm Standard GaugeYes, But*
6.5mm Mid-GaugeYes
8mm / 9mm Bulky GaugeYes

*This yarn will knit at upper tensions on the Brother KH-890, but it produces a stiffer fabric that is not as pleasant as one it will make on a mid-gauge or bulky machine. Color, as in dye lot and the chemicals used to achieve different colors, can affect how yarns perform. Always swatch your yarn before starting a project!


Swatches and Performance

If you’re interested in learning about how I swatch yarn, please check out this post.

This yarn knits like a dream on the mid-gauge and bulky machines. The yarn glides smoothly through the tension mast and carriage once the skeins have been rewound into yarn cakes and does not catch on itself. I’ve used over 10 skeins of Berroco Comfort over the years in both hand knitting and machine knitting, and I have never experienced a knot in any of them.

I found Tension 3 on the SilverReed LK-150 was a bit too tight of a fabric for my liking, but I enjoyed T4 and T5 and found that their fabrics offered a nice mix of drape and coverage/lack of excessive light showing through between the stitches when held up.

The same ideal knitting experience can’t be said for Comfort on the standard gauge. My machine did not struggle, but it wasn’t happy with me for using this yarn on it. The fabric produced was stiff and more appropriate for a purse or bag than any wearable garment. If you’d like to try out this yarn on your standard gauge machine, I recommend trying Comfort DK or Comfort Sock instead.

Berroco Comfort Color 9747 “Cadet” knitted at Tension 5 on the SilverReed LK-150 mid-gauge machine

The above swatch was washed on warm, dried on low, and gently steam blocked, not killed, so that there is still some elasticity left in the fabric. Some stitches did catch and pull a bit on other items in my washer, so you should be sure to wash your knits in their own load or in a mesh bag or pillowcase for protection.

Though it is not visible in the picture, some very minor halo or fluffing of the yarn occurred. It has not changed the stitch definition, only added to the softness of the yarn. Garments in this yarn could possibly halo or fuzz more over time, but I have not noticed this in my experience. I have not noticed any pilling whatsoever in my swatches or garments, and my mother tells me she has not had issues with a gifted tank top made from this yarn that she has worn and machine washed for over two years, and she has experienced no fuzzing, pilling, or garment stretching. It should be noted that she does dry the top flat.

Berroco Comfort Color 9747 “Cadet” knitted at Tension 5 on the Brother KH-890 standard gauge machine

This swatch was also washed on warm, dried on low, and gently steam blocked. I did not stretch it or force it, merely smooth it out from the shape it dried in in my dryer.
Note: Because the LK-150 swatch is an older one from before my current swatch records system, I do not have its before wash measurements to calculate any shrinkage.

Here are the before and after measurements for the standard gauge swatch:

Before After
40 stitches5.875″6″
60 rows6.1875″6″

With only 3% row gauge shrinkage and an actual increase in stitch gauge of around 2%, this yarn does not change much in the wash, but you should always work from your finished swatch measurements in any case.


Blocking

Comfort blocks well with a steam block. I do not “kill” the acrylic with the steam heat, only lightly run the steamer head over the fabric as I move it to the desired dimensions. I do not think this yarn needs to be “killed” to achieve drape or a desirable fabric, especially as the “kill” process slightly melts the yarn, and, I believe, can affect the integrity of the garment. If you do desire or need a more aggressive blocking experience than what I prefer, Comfort can and will meet your blocking desires for the most part without killing the yarn.


Final Thoughts

Comfort performs well no matter what yarn weight you choose. At around $0.03 a yard for worsted weight, you’re looking at a nice, quality acrylic for a good price. A sweater quantity (1000-2000 yards) of this yarn retails for around $35.00 to $75.00, and some shops will give you a bulk buy discount. It’s not exactly a “budget” yarn when you compare it to what you can find at big box stores, but it is definitely worth the price when you consider the quality of what you’ll be running through your machine or your hands and then wearing next to your skin. Plus, when you buy from your local yarn shop, you’re supporting smaller, local businesses, and I don’t think you can go wrong there!

As a sucker for hand-dyed yarns in all kinds of gradients, I usually find myself wishing for rainbow magic colorways in whatever yarn I’m using at the moment, but that isn’t necessary here, and that isn’t what Comfort is trying to do. If you’re looking for a go-to acrylic yarn, Comfort is a great choice.

I’ve used Comfort in tunics, dog sweaters, and scarves, and I’ve seen customers and students use it in baby items, hats, and blankets. If you have a project, you can usually find a Berroco Comfort line yarn that will fit.

I give Berroco Comfort Worsted a solid 4.5 out of 5 score.


Have you used Berroco Comfort before in your machine knitting? What about in your hand knitting? What kind of projects did you use it for, and what did you think of its performance?

Are there other properties you think I should include in my yarn reviews? What yarn should I review next? Let me know in the comments!